Repair information 4-319
5058-030
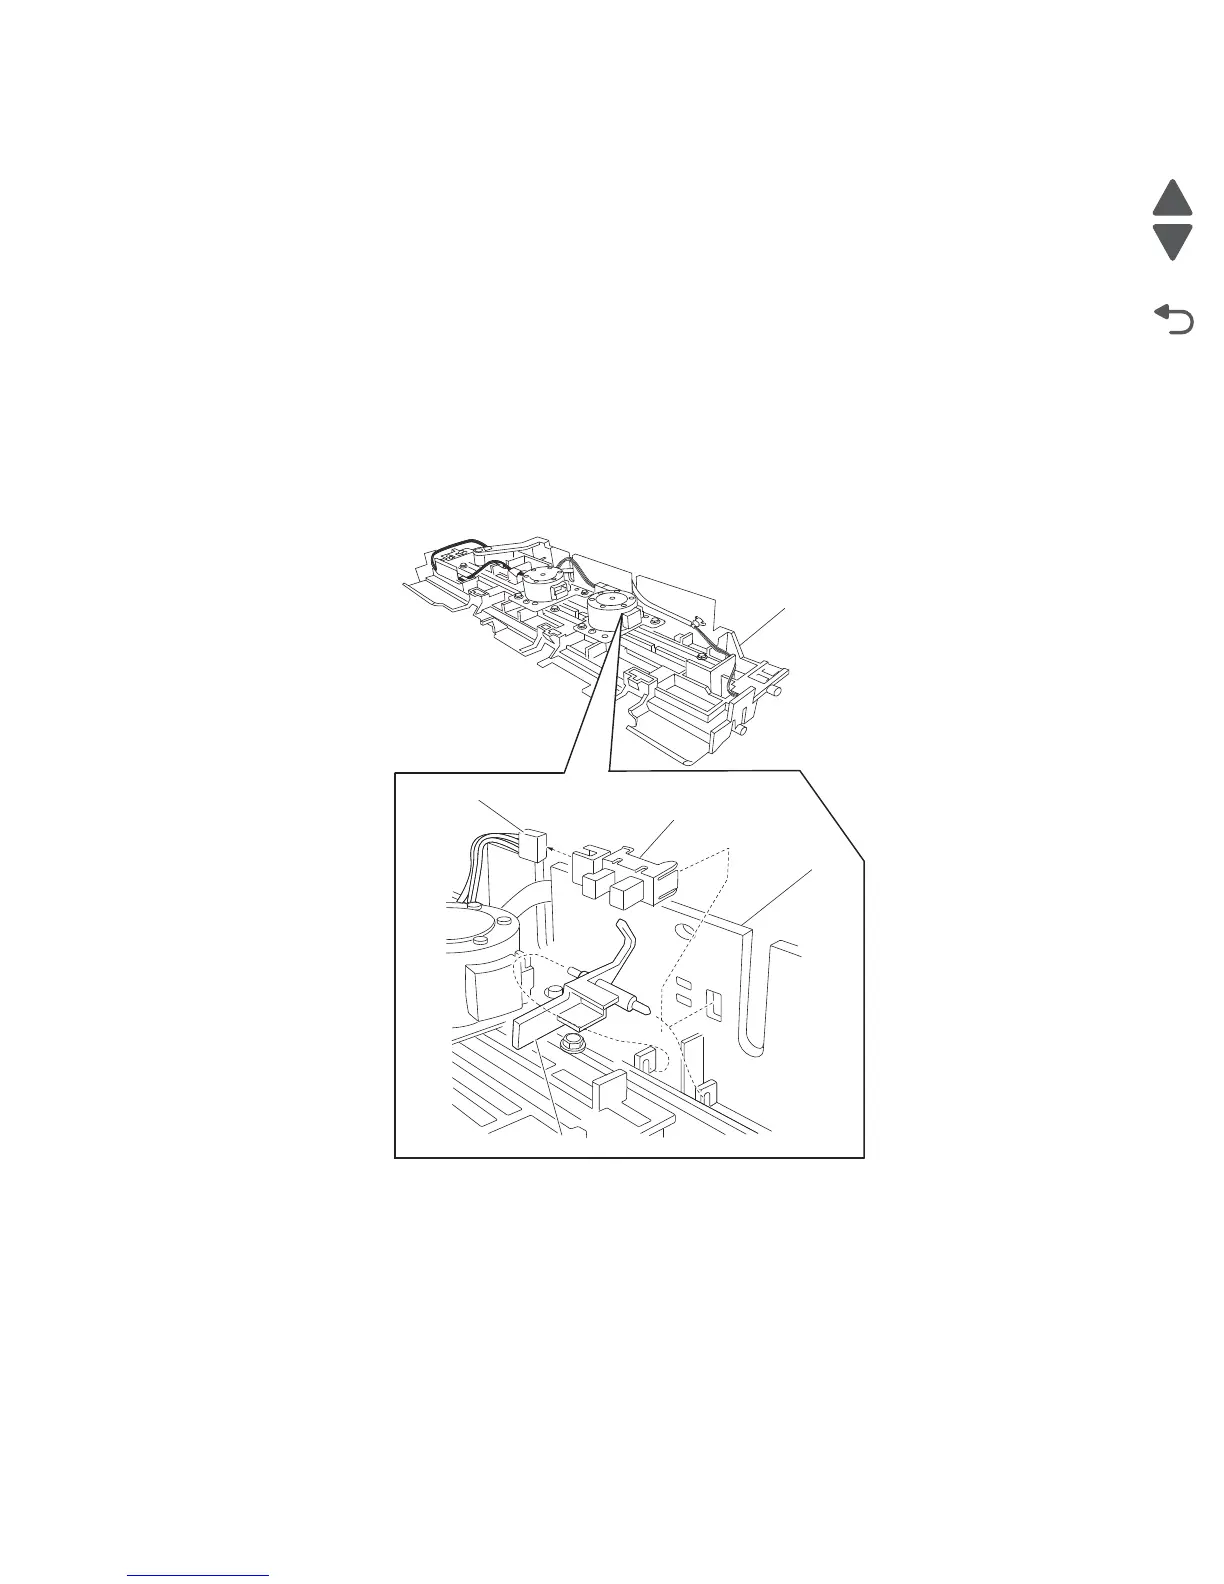
Sensor (compiler media present) removal
1. Remove the finisher front door assembly. See “Finisher front door assembly removal” on page 4-276.
2. Remove the rear upper cover. See “Rear upper cover removal” on page 4-309.
3. Remove the rear lower cover. See “Upper media bin front cover removal” on page 4-353.
4. Remove the upper media bin assembly. See “Upper media bin assembly removal” on page 4-352.
5. Remove the upper media bin vertical cover. See “Right eject cover removal” on page 4-310.
6. Remove the stapler unit frame. See “Stapler unit frame removal” on page 4-342.
7. Remove the clamp drive motor. See“Clamp drive motor removal” on page 4-268.
8. Remove the media eject unit assembly. See “Media eject unit assembly removal” on page 4-299.
9. Remove the media eject motor assembly. See “Media eject motor assembly removal” on page 4-298.
10. Remove the media compiler unit assembly. See “Media compiler unit assembly removal” on
page 4-294.
11. Disconnect the connector from the sensor (compiler media present) (A).
12. Release the hooks securing the sensor (compiler media present) (A) to the compiler unit assembly (B).
13. Move the compiler media present actuator (C) downward as shown.
14. Remove the sensor (compiler media present) (A).
Sensor (diverter gate) removal
1. Open the finisher front door assembly.
2. Remove the rear upper cover. See “Rear upper cover removal” on page 4-309.
3. Remove the upper media bin assembly. See “Upper media bin assembly removal” on page 4-352.
4. Remove the top cover. See “Top cover removal” on page 4-351.
5. Remove the left lower cover. See “Left lower cover removal” on page 4-288.
6. Remove the left upper cover. See “Left upper cover removal” on page 4-289.
7. Remove the punch carriage assembly. See “Punch carriage assembly removal” on page 4-304.

 Loading...


