EasyManuals Logo

Lexmark C950 Service Manual

Lexmark C950
1014 pages
To Next Page IconTo Next Page
To Previous Page IconTo Previous Page
Page #757 background imageLoading...
Page #757 background image
Repair information 4-329
5058-030
Go Back
Previous
Next
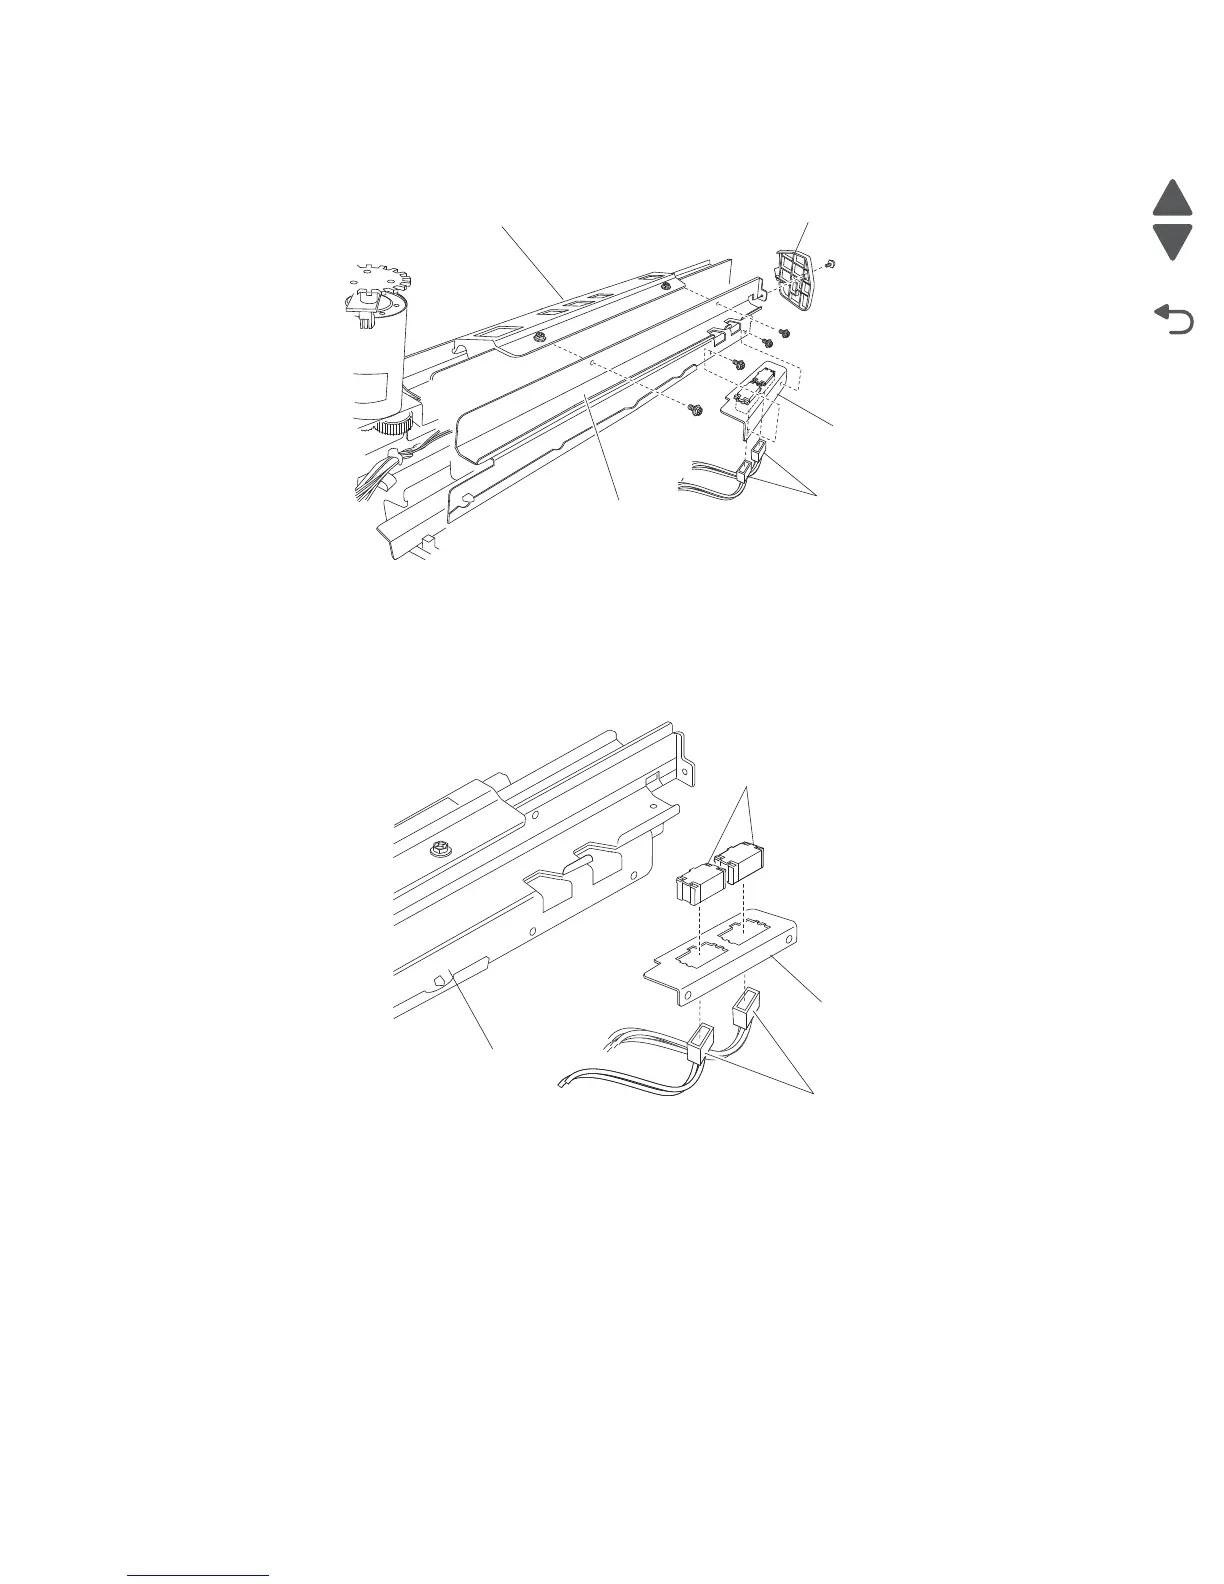
8. Remove the two screws securing the paper guide (C) to the punch unit assembly (B).
Note: Do not remove the harness attached to the paper guide (C).
9. Turn the paper guide (C) upside down.
10. Remove the two screws securing the bracket (D) to the paper guide (C).
11. Remove the bracket (D).
12. Remove the two connectors from the sensor (punch unit side registration pair) (E).
13. Release the hooks securing the sensors (punch unit side registration pair) (E) to the bracket (D).
14. Remove the sensor (punch unit side registration pair) (E).
Note: The two sensors are identical.
Sensor (punch waste box set) removal
1. Open the finisher front door assembly.
2. Pull the punch waste box.
3. Disconnect the connector from the sensor (punch waste box set) (A).
)
B
A
D
C
Connectors
C
D
E
Connectors

Table of Contents

Other manuals for Lexmark C950

Questions and Answers:

Question and Answer IconNeed help?

Do you have a question about the Lexmark C950 and is the answer not in the manual?

Lexmark C950 Specifications

General IconGeneral
Print Resolution1200 x 1200 dpi
Duplex PrintingYes
Processor Speed1.2 GHz
ConnectivityEthernet, USB
Print TechnologyLaser
Print Speed50 ppm
Monthly Duty Cycle300000 pages
Recommended Monthly Page Volume5, 000 - 33, 000 pages
Memory1024 MB
Hard DriveOptional
Output Capacity500 sheets
InterfaceUSB 2.0
Media TypePlain paper, Card stock, Labels, Envelopes, Transparencies
Total Media Capacity5140 sheets
Media SizesLetter, Legal, A4, A5, Executive, Folio, Statement
Operating Systems SupportedWindows, Mac, Linux

Related product manuals