EasyManuals Logo

Lexmark C950 Service Manual

Lexmark C950
1014 pages
To Next Page IconTo Next Page
To Previous Page IconTo Previous Page
Page #770 background imageLoading...
Page #770 background image
4-342 Service Manual
5058-030
Go Back
Previous
Next
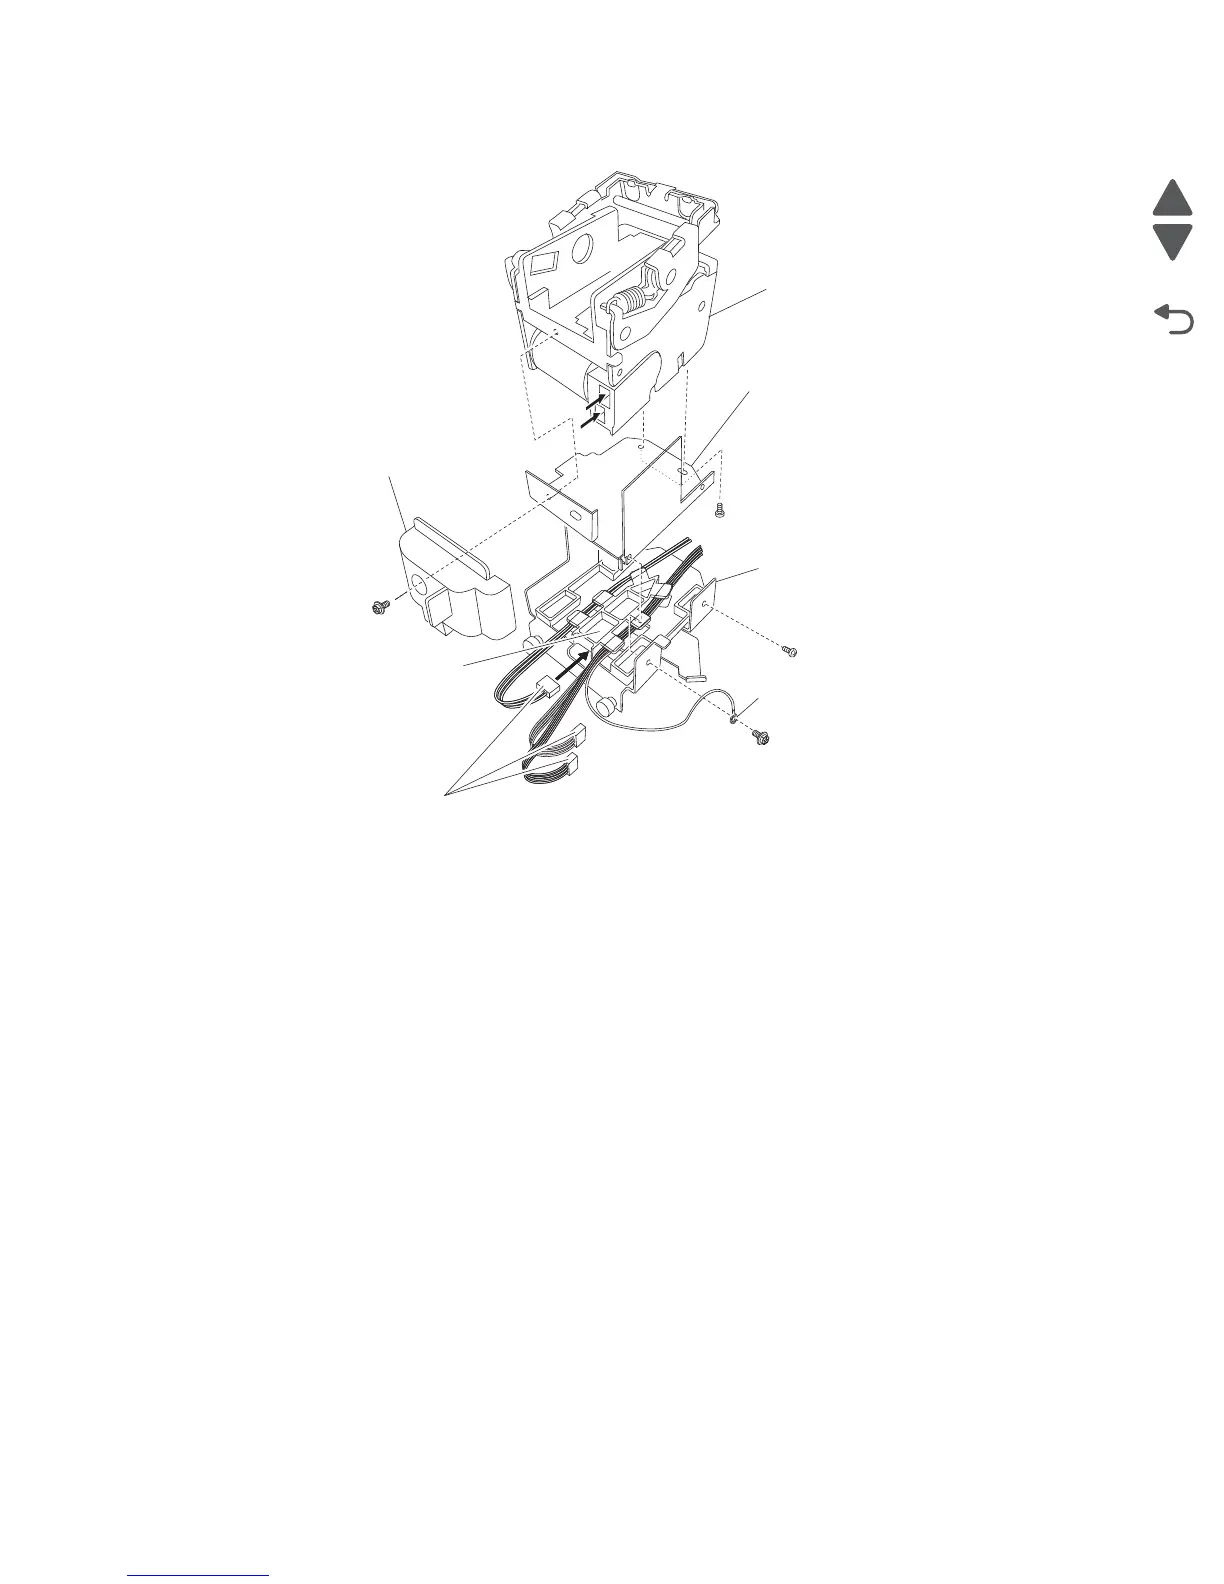
17. Remove the two screws securing the bracket (H) to the stapler unit assembly (F).
18. Remove the stapler unit assembly (F).
Reinstallation notes:
When replacing the stapler unit assembly (F), make sure the ground wire is reconnected.
Make sure the stapler carriage assembly (D) and the stapler carriage motor assembly (C) move freely
without binding.
Stapler unit frame removal
1. Remove the finisher front door assembly. See “Finisher front door assembly removal” on page 4-276.
2. Remove the staple cartridge.
3. Remove the rear upper cover. See “Rear upper cover removal” on page 4-309.
4. Remove the rear lower cover. See “Upper media bin front cover removal” on page 4-353.
5. Loosen the four screws securing the plate (A) to the finisher.
F
H
D
Ground wire
G
E
*1
*2
*1
*2
Connectors

Table of Contents

Other manuals for Lexmark C950

Questions and Answers:

Question and Answer IconNeed help?

Do you have a question about the Lexmark C950 and is the answer not in the manual?

Lexmark C950 Specifications

General IconGeneral
Print Resolution1200 x 1200 dpi
Duplex PrintingYes
Processor Speed1.2 GHz
ConnectivityEthernet, USB
Print TechnologyLaser
Print Speed50 ppm
Monthly Duty Cycle300000 pages
Recommended Monthly Page Volume5, 000 - 33, 000 pages
Memory1024 MB
Hard DriveOptional
Output Capacity500 sheets
InterfaceUSB 2.0
Media TypePlain paper, Card stock, Labels, Envelopes, Transparencies
Total Media Capacity5140 sheets
Media SizesLetter, Legal, A4, A5, Executive, Folio, Statement
Operating Systems SupportedWindows, Mac, Linux

Related product manuals