EasyManuals Logo

Lexmark C950 Service Manual

Lexmark C950
1014 pages
To Next Page IconTo Next Page
To Previous Page IconTo Previous Page
Page #527 background imageLoading...
Page #527 background image
Repair information 4-99
5058-030
Go Back
Previous
Next
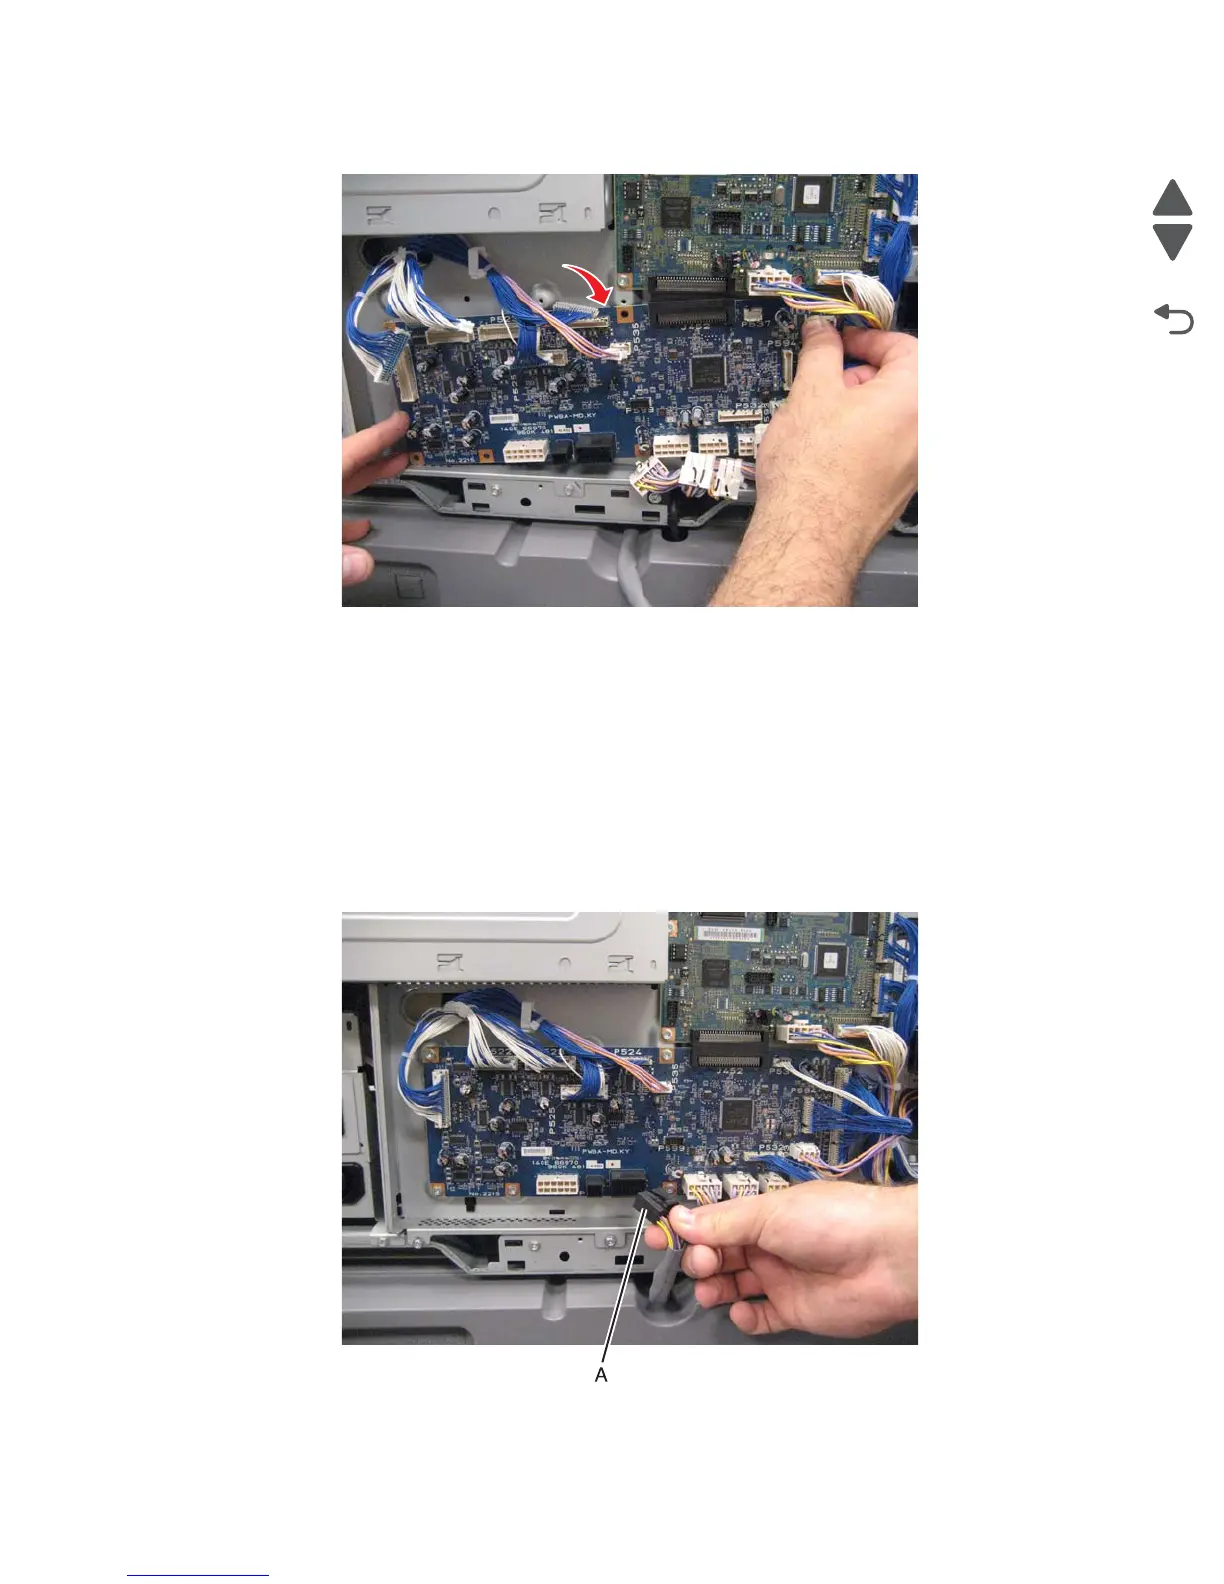
5. Detach the lower engine PCBA from the upper engine PCBA by moving it downward.
6. Remove the lower engine PCBA.
Replacement warning: When replacing the lower engine PCBA, ensure that all of the cables are properly
reconnected.
Lower redrive shift motor assembly removal
1. Remove the left upper cover. See “Left upper cover removal” on page 4-6.
2. Remove the upper redrive assembly. See “Upper redrive assembly removal” on page 4-183.
3. Remove the fuser. See “Fuser assembly removal” on page 4-78.
4. Remove the rear upper cover. See “Rear upper cover removal” on page 4-16.
5. Disconnect the input option cable (A).

Table of Contents

Other manuals for Lexmark C950

Questions and Answers:

Question and Answer IconNeed help?

Do you have a question about the Lexmark C950 and is the answer not in the manual?

Lexmark C950 Specifications

General IconGeneral
Print Resolution1200 x 1200 dpi
Duplex PrintingYes
Processor Speed1.2 GHz
ConnectivityEthernet, USB
Print TechnologyLaser
Print Speed50 ppm
Monthly Duty Cycle300000 pages
Recommended Monthly Page Volume5, 000 - 33, 000 pages
Memory1024 MB
Hard DriveOptional
Output Capacity500 sheets
InterfaceUSB 2.0
Media TypePlain paper, Card stock, Labels, Envelopes, Transparencies
Total Media Capacity5140 sheets
Media SizesLetter, Legal, A4, A5, Executive, Folio, Statement
Operating Systems SupportedWindows, Mac, Linux

Related product manuals