4-94 Service Manual
5058-030
K toner auger removal
1. Remove the printer front door. See “Printer front door removal” on page 4-10.
2. Remove the transfer belt cleaner. See “Transfer belt cleaner removal” on page 4-172.
3. Remove the waste toner box.
4. Remove the four photoconductor units.
5. Remove the four toner supplies.
6. Remove the operator panel front cover.
7. Remove the printhead retract door. See “Printhead retract door removal” on page 4-139.
8. Remove the inner cover. See “Inner cover removal” on page 4-3.
9. Remove the inner plate. See “Inner plate removal” on page 4-92.
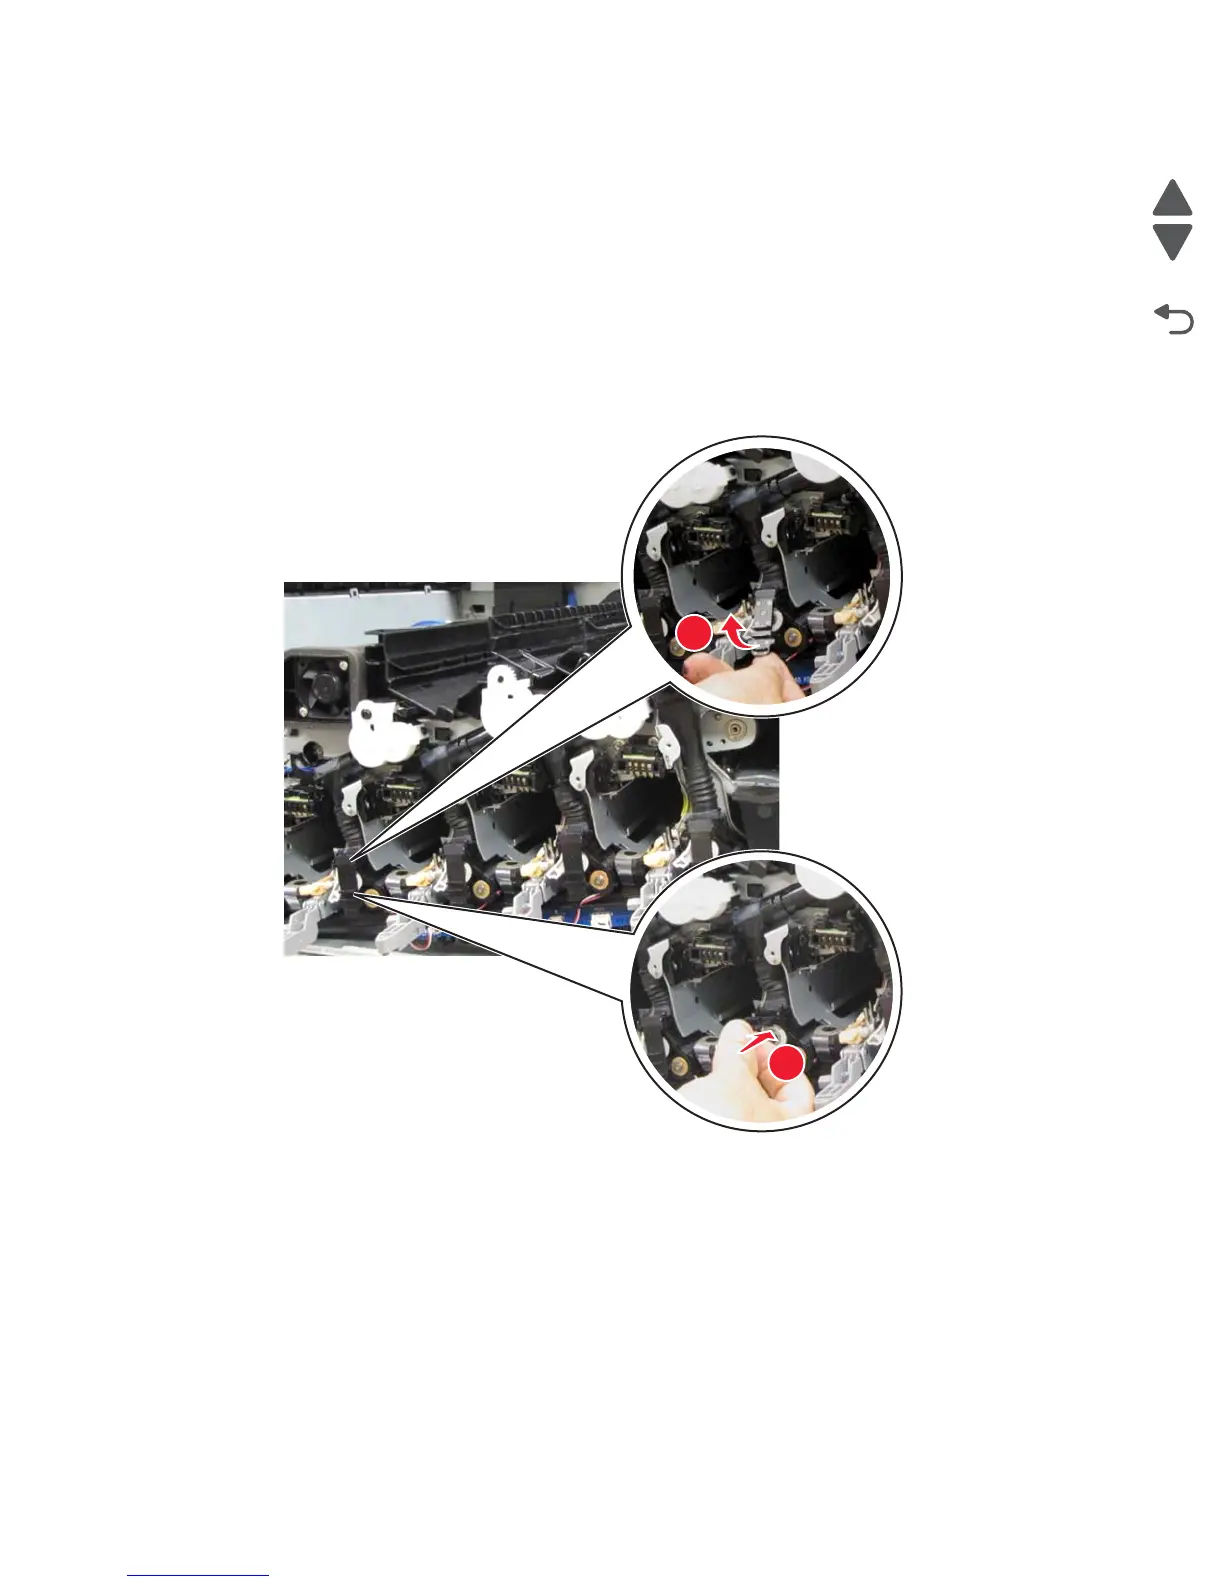
10. Lift the plastic gate, and push it in to prevent the toner from spilling.
11. Squeeze the two latches (A) to release the upper part of the auger.
12. Detach the lower portion (B) of the auger from the developer unit.