Repair information 4-275
5058-030
Finisher diverter gate removal
1. Open the finisher front door assembly.
2. Remove the rear upper cover. See “Rear upper cover removal” on page 4-309.
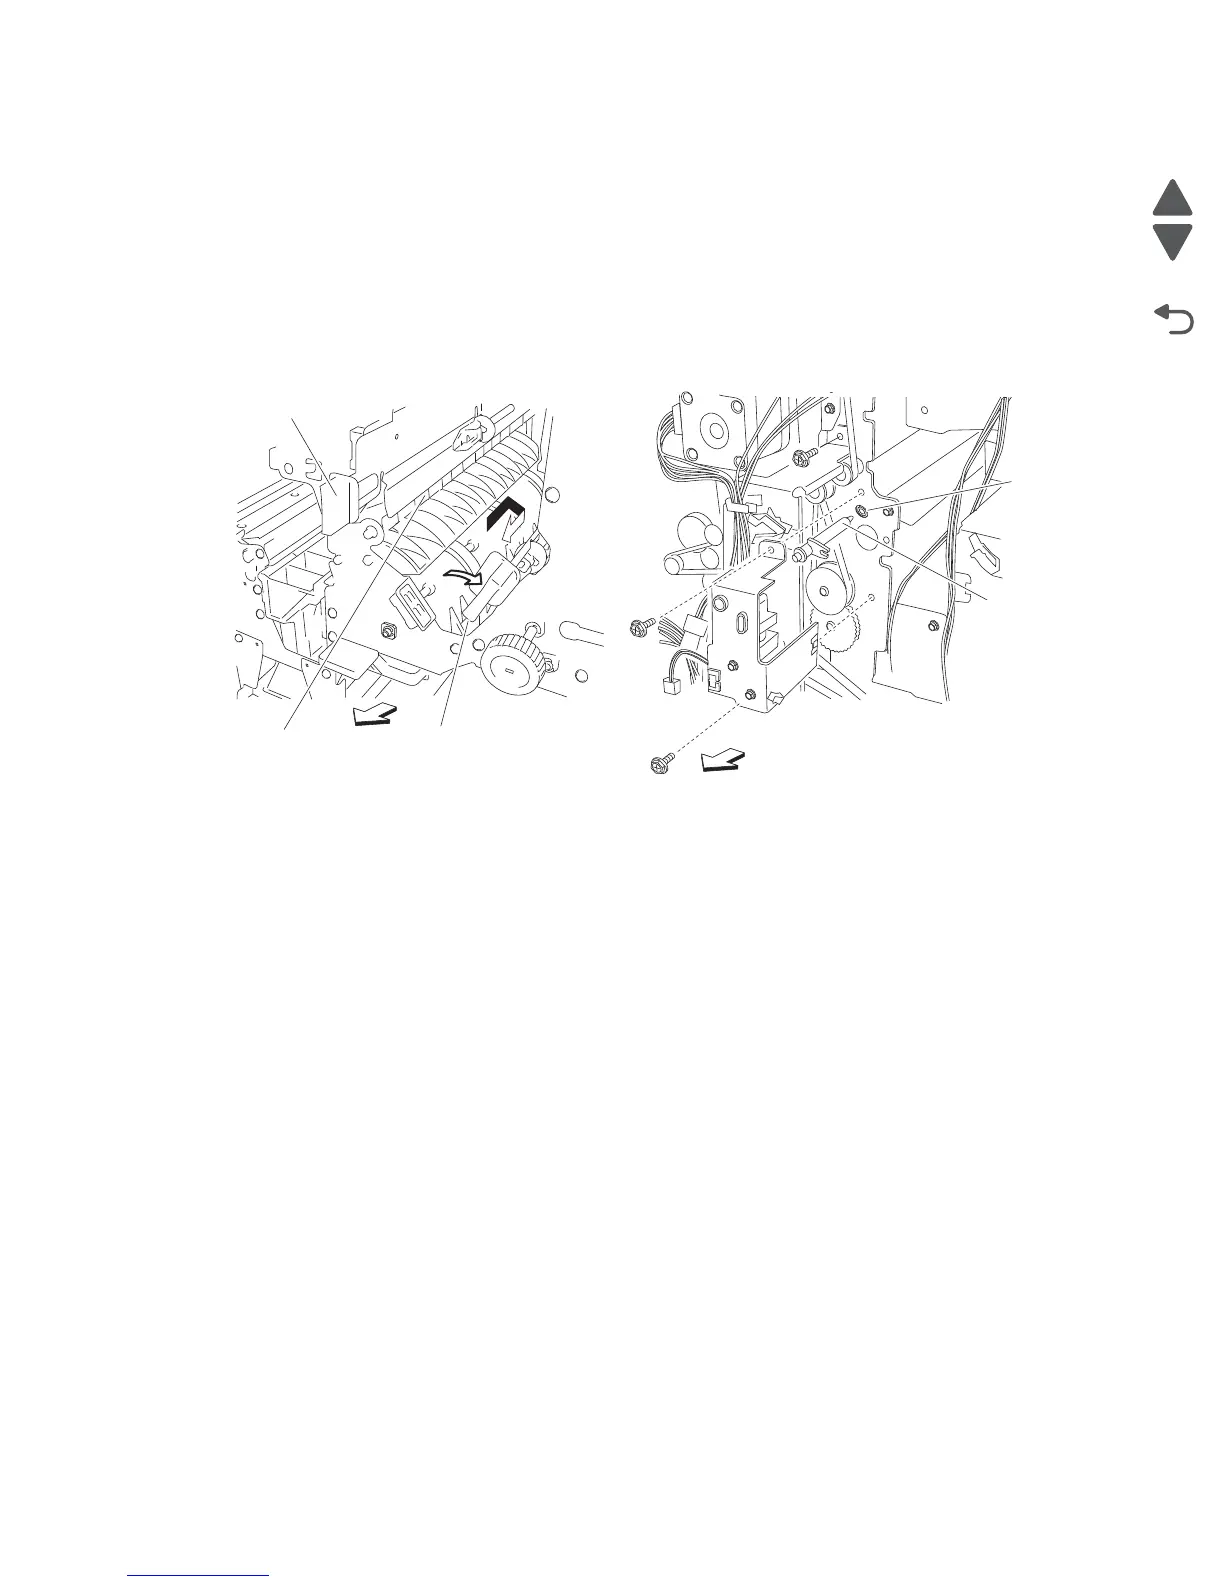
3. Open the lower pinch guide assembly (A) to the right.
4. Open the upper pinch guide assembly (B) to the right.
5. Remove the finisher diverter gate solenoid. See “Finisher diverter gate solenoid removal” on
page 4-275.
6. Remove the link (C).
7. Move the finisher diverter gate (D) toward the rear, to the right, and forward, as shown.
8. Remove the finisher diverter gate (D).
Finisher diverter gate solenoid removal
1. Open the finisher front door assembly.
2. Remove the rear upper cover. See “Rear upper cover removal” on page 4-309.
3. Disconnect the connector from the finisher diverter gate solenoid (A).
4. Release the harness from the clamp.
5. Remove the two screws securing the bracket (B) to the finisher.
Note: The bracket should not be removed from the finisher, it should be gently moved to provide better
access to the finisher diverter gate solenoid mounting screws.
6. Remove the two screws securing the finisher diverter gate solenoid (A) to the finisher.

 Loading...


