EasyManuals Logo

Lexmark C950 Service Manual

Lexmark C950
1014 pages
To Next Page IconTo Next Page
To Previous Page IconTo Previous Page
Page #614 background imageLoading...
Page #614 background image
4-186 Service Manual
5058-030
Go Back
Previous
Next
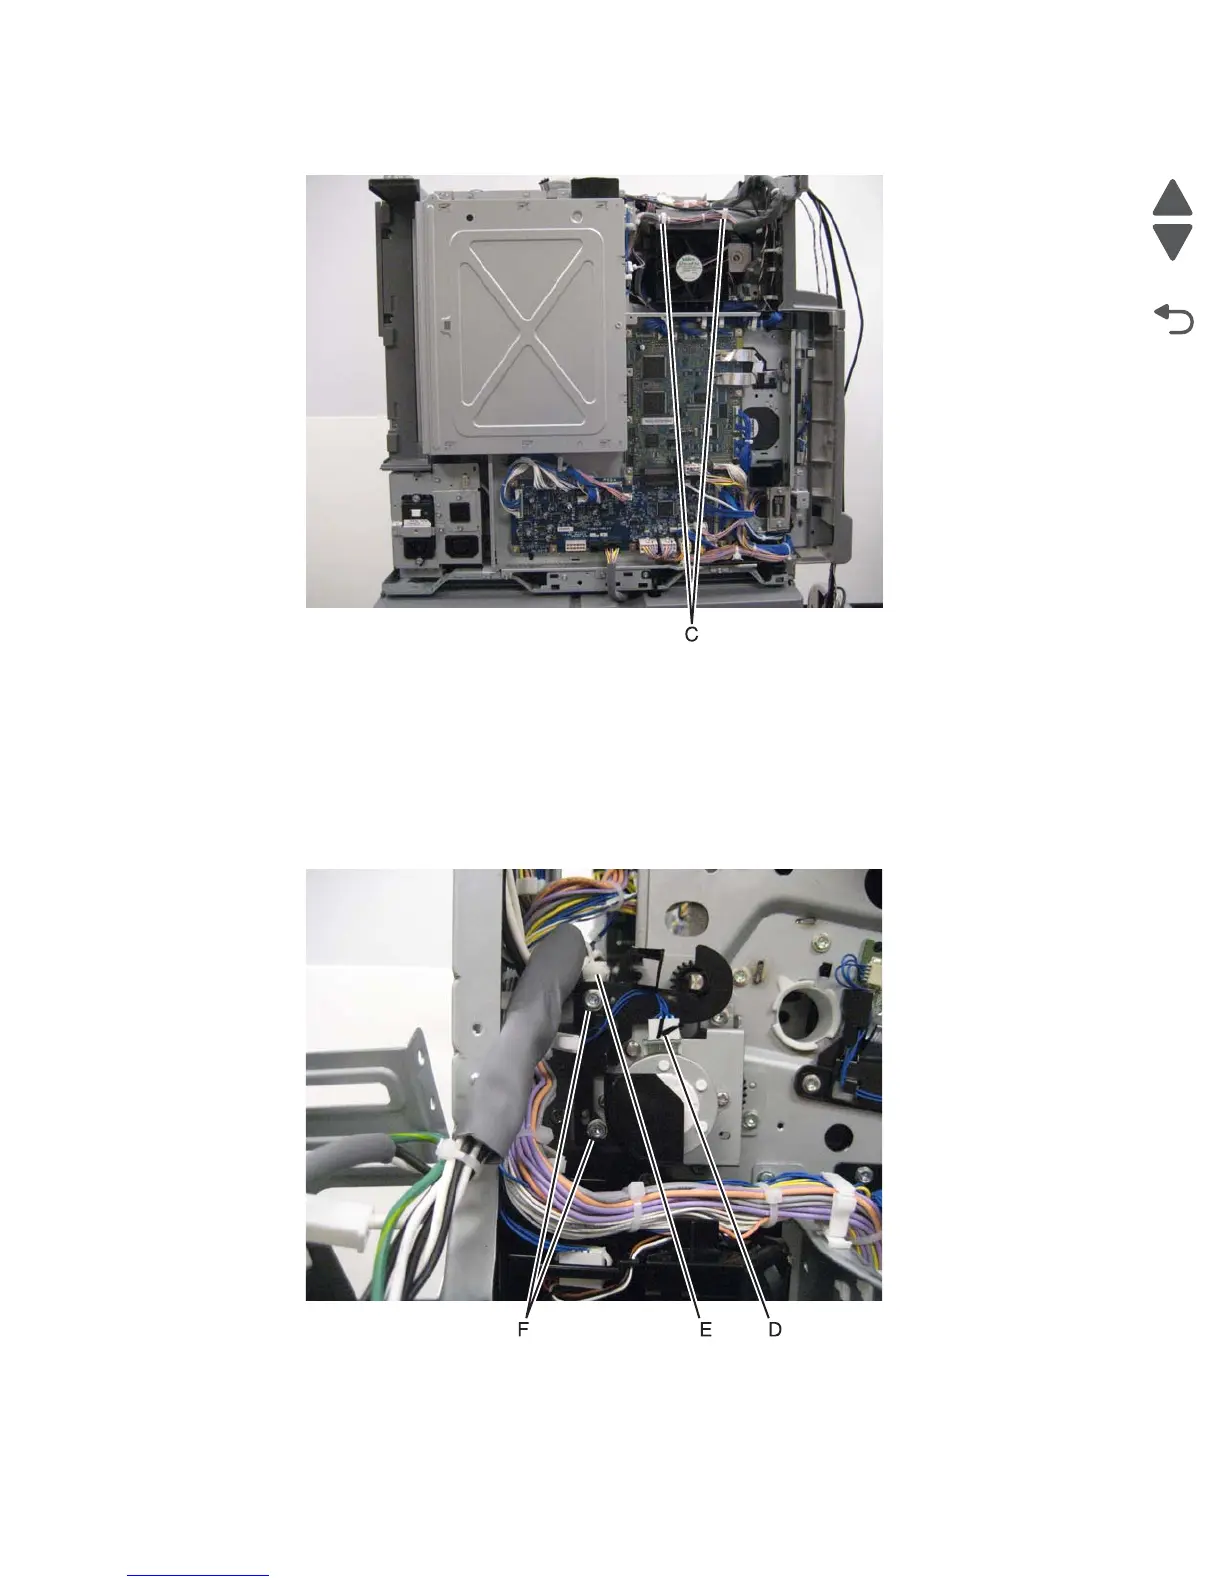
4. Release the two clamps (C) to release the harness.
5. Swing the PCBA door open.
6. Pull the main power GFI interface out of the machine, and swing it out of the way. See the “Main power
GFI interface removal” on page 4-113.
Note: The cables do not have to be removed from the main power GFI interface to remove this part.
7. Remove the PC/developer drive motor. See the “PC/developer drive motor removal” on page 4-132.
8. Disconnect the cable (D) from the waste toner agitator motor.
9. Release the harness from the clamp (E).
10. Remove the two screws (F) securing the motor cover to the machine.
11. Remove the motor cover.

Table of Contents

Other manuals for Lexmark C950

Questions and Answers:

Question and Answer IconNeed help?

Do you have a question about the Lexmark C950 and is the answer not in the manual?

Lexmark C950 Specifications

General IconGeneral
Print Resolution1200 x 1200 dpi
Duplex PrintingYes
Processor Speed1.2 GHz
ConnectivityEthernet, USB
Print TechnologyLaser
Print Speed50 ppm
Monthly Duty Cycle300000 pages
Recommended Monthly Page Volume5, 000 - 33, 000 pages
Memory1024 MB
Hard DriveOptional
Output Capacity500 sheets
InterfaceUSB 2.0
Media TypePlain paper, Card stock, Labels, Envelopes, Transparencies
Total Media Capacity5140 sheets
Media SizesLetter, Legal, A4, A5, Executive, Folio, Statement
Operating Systems SupportedWindows, Mac, Linux

Related product manuals