Service Parts Disassembly
Phaser 7100 Service Manual Xerox Internal Use Only4-60
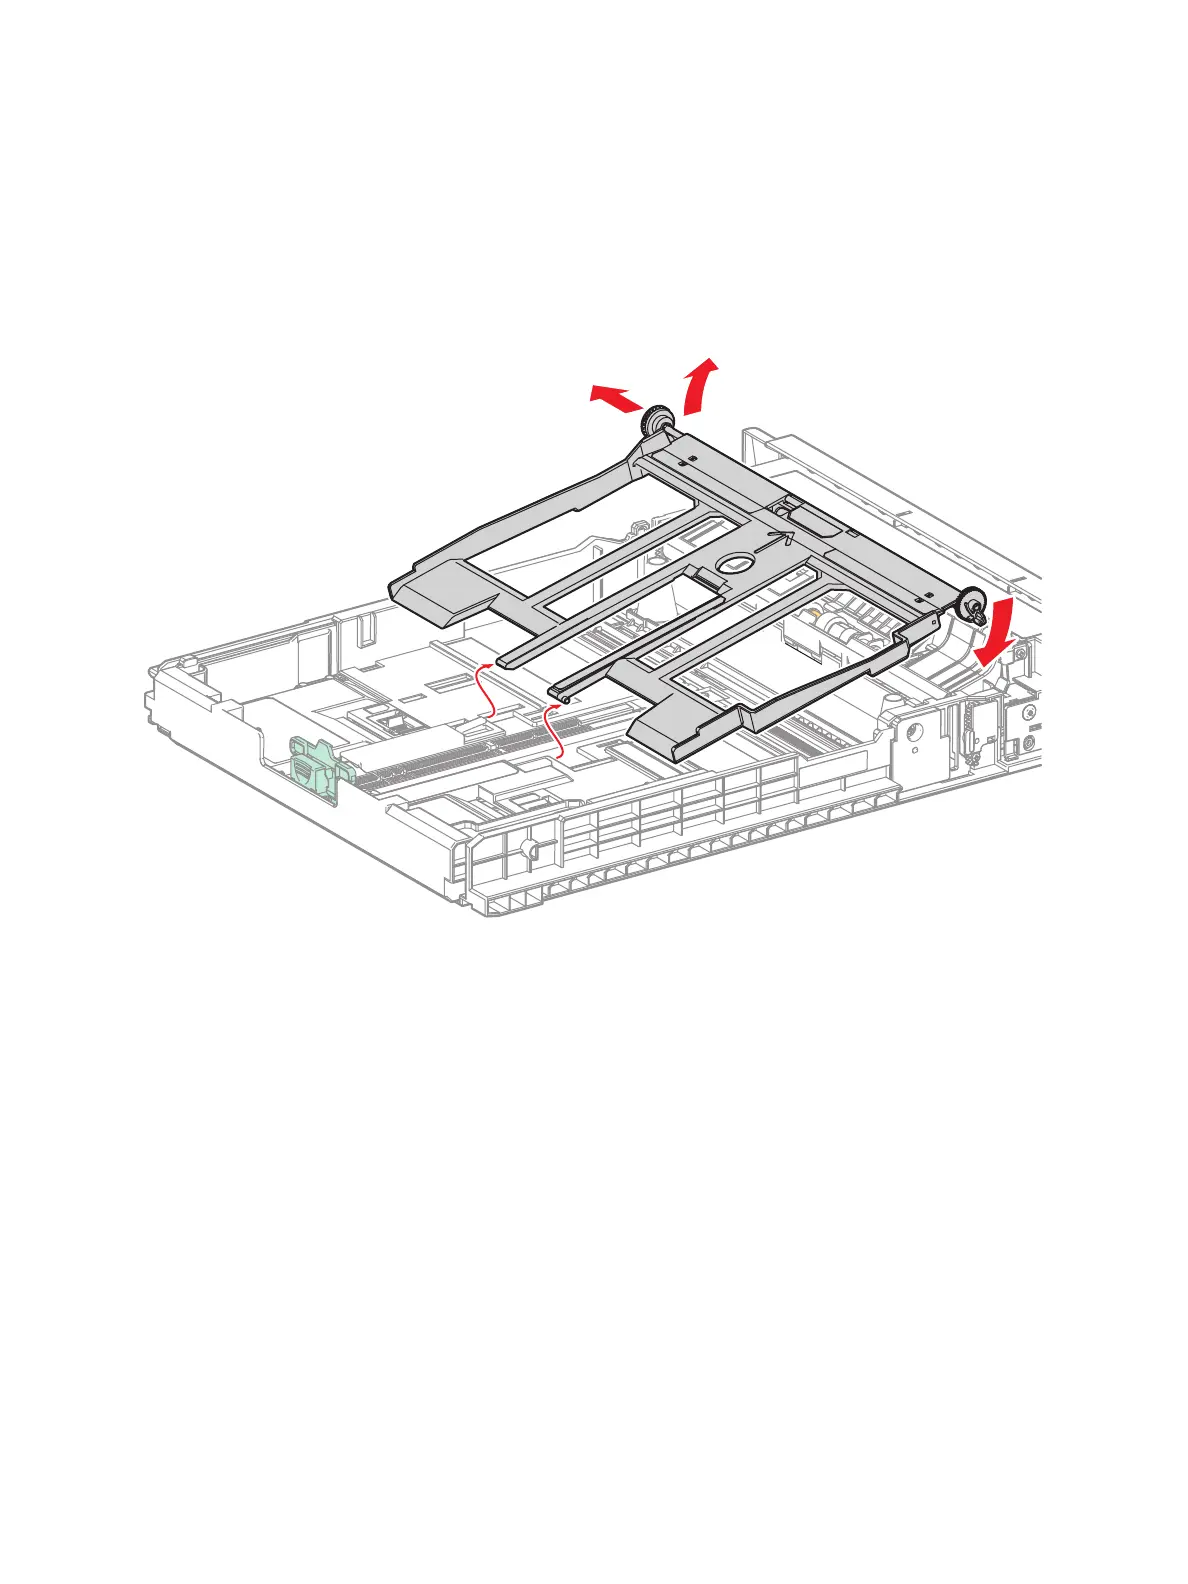
4. Press down on the Shaft of the Bottom Plate while moving the Left PB Gear (PL 2.3.10) side
upwards from the Base Housing, then pull out the Shaft slightly to lift up the front of the Bottom
Plate Assembly.
5. Release the notches on the rear side of the Bottom Plate Assembly and remove the Plate
Assembly.
Figure 2
Replacement Notes:
• When installing the Right PB Gear, make sure you install the Right PB Gear with the D cut
surface of the Shaft facing up (see Figure 1 on page 4-59). This way, the hook of the
Right PB Gear will be facing down and the Bottom Plate Assembly can be positioned
correctly.
• When installing the Bottom Plate Assembly, be sure the Bottom Up Spring (PL 2.3.17) is
mounted securely.

 Loading...


