Service Parts Disassembly
Xerox Internal Use Only Phaser 7100 Service Manual 4-71
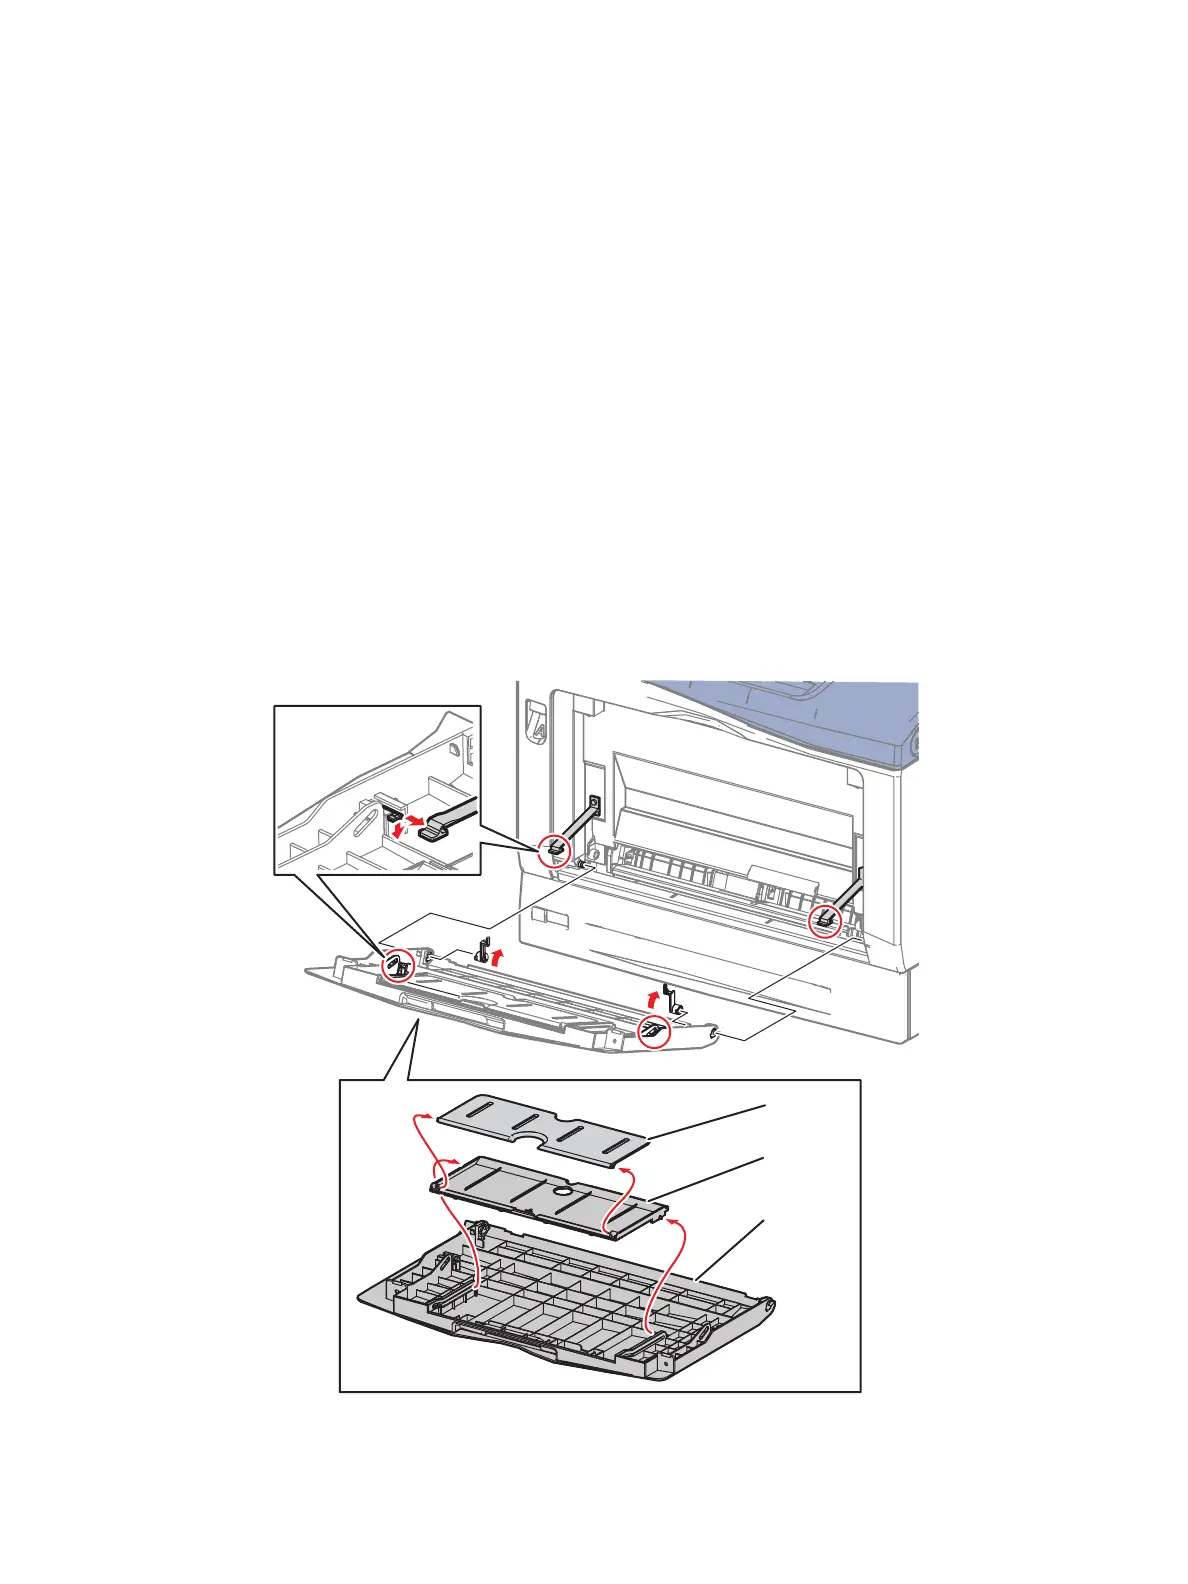
REP 3.3 Bypass Tray Cover Assembly/ Exit 1 Cover/ Exit 2 Cover
PL 3.1.9/ PL 3.1.14/ PL 3.1.15
1. Open the Bypass Tray Cover Assembly (PL 3.1.9).
2. Remove the Bypass Tray Assembly (REP 3.5 Bypass Tray Assembly on page 4-73).
3. While pressing down on the 2 tabs on the Bypass Tray Cover side of the Bypass Tray Strap (PL
3.1.1), slide the Bypass Tray Strap horizontally to remove it.
Note: In the following steps, be careful not to mix the Left and Right Bypass Tray Cover Locks (PL
3.1.11/ PL 3.1.12) in the following step. The Left Bypass Tray Cover Lock has an “L” engraved mark,
while the Right Bypass Tray Cover Lock has an “R” engraved mark.
4. Rotate the Left/ Right Bypass Tray Cover Lock that secure the Bypass Tray Cover Assembly to the
Left/ Right Pin (PL 3.1.10/ PL 3.1.13) upward and pull the Bypass Tray Cover Assembly toward the
inner side to remove it.
5. Release the Left/ Right Pin that secures it to the printer and remove the Bypass Tray Cover (PL
3.1.16).
6. Release the boss on the Exit 1 Cover from the groove of the Bypass Tray Cover and remove the Exit
1 Cover and Exit 2 Cover.
s7100-090
Exit 2 Cover
Exit 1 Cover
Bypass Tray
Cover

 Loading...


