Service Parts Disassembly
Xerox Internal Use Only Phaser 7100 Service Manual 4-87
REP 4.3 Slide Bracket Assembly/ Slide Guide
PL 4.1.8/ PL 4.1.9
1. Remove the I/P PWB Cover Assembly (REP 1.5 Image Processor (I/P) PWB Cover Assembly on
page 4-19).
2. Remove the Rear Cover (REP 1.6 Rear Cover on page 4-20).
3. Remove the Left Side Cover (REP 1.10 Left Side Cover on page 4-25).
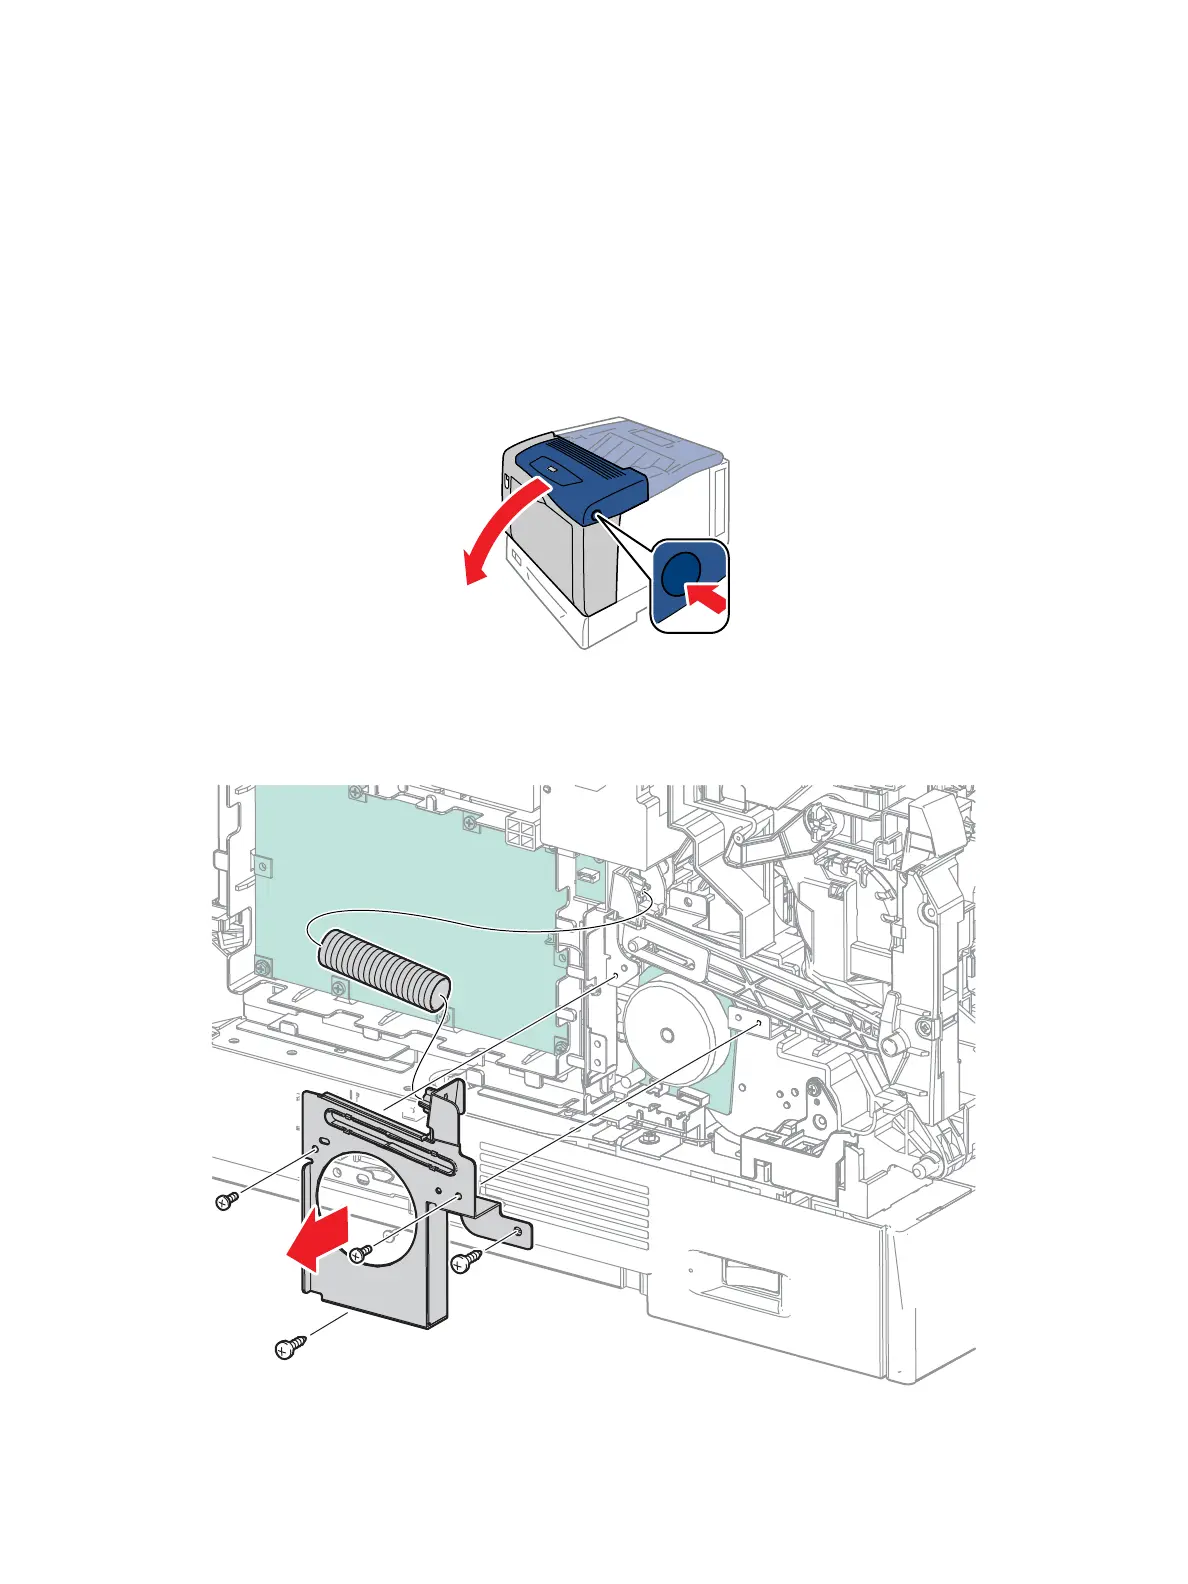
4. Press the B button and open the Front Cover Assembly (PL 1.1.38).
5. Remove the Damper Spring (PL 4.1.3) from the Damper Assembly.
6. Remove 2 screws (silver, tapped, 12 mm) and 2 screws (silver, 6 mm) that secure the Rail Bracket
Assembly (PL 4.1.5) and remove the Rail Bracket.
2
1

 Loading...


