Service Parts Disassembly
Xerox Internal Use Only Phaser 7100 Service Manual 4-223
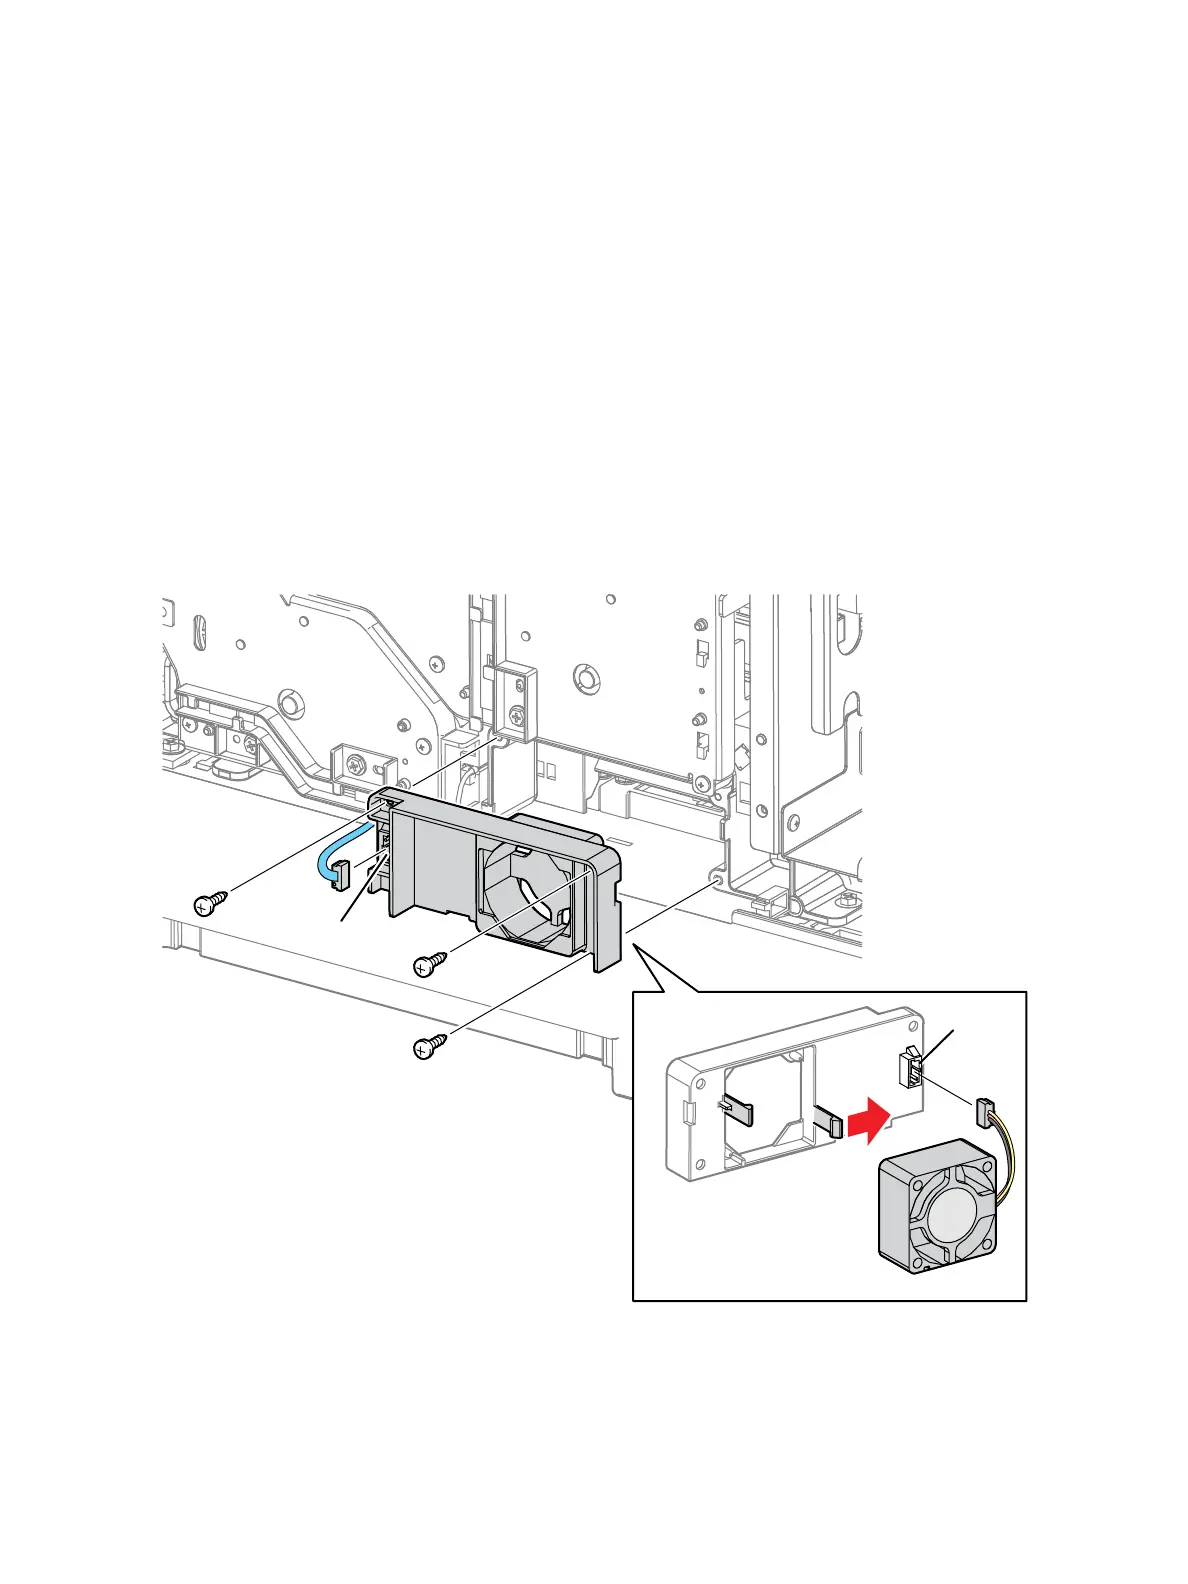
REP 12.14 Developer Fan
PL 12.2.16
1. Remove the I/P PWB Cover Assembly (REP 1.5 Image Processor (I/P) PWB Cover Assembly on
page 4-19).
2. Remove the Rear Cover (REP 1.6 Rear Cover on page 4-20).
3. Remove the Right Side Cover (REP 1.11 Right Side Cover on page 4-27).
4. Disconnect the wiring harness connector P/J4652B that is connected to the Developer Fan Duct
(PL 12.2.17).
5. Remove 3 screws (silver, tapped, 8 mm) that secure the Developer Fan Duct to the printer.
6. Remove the Developer Fan Duct together with the Developer Fan.
7. Disconnect the wiring harness connector P/J4652B on the harness that is connected to the
Developer Fan.
8. Release the 2 hooks that secure the Developer Fan and remove the Fan.

 Loading...


