Service Parts Disassembly
Phaser 7100 Service Manual Xerox Internal Use Only4-200
REP 11.8 PR Drive Assembly (K)
PL 11.1.99
1. Remove Tray 1.
2. Remove the I/P PWB Cover Assembly (REP 1.5 Image Processor (I/P) PWB Cover Assembly on
page 4-19).
3. Remove the Rear Cover (REP 1.6 Rear Cover on page 4-20).
4. Remove the Right Side Cover (REP 1.11 Right Side Cover on page 4-27).
5. Remove the Right Feeder Cover (REP 2.3 Right Feeder Cover on page 4-40).
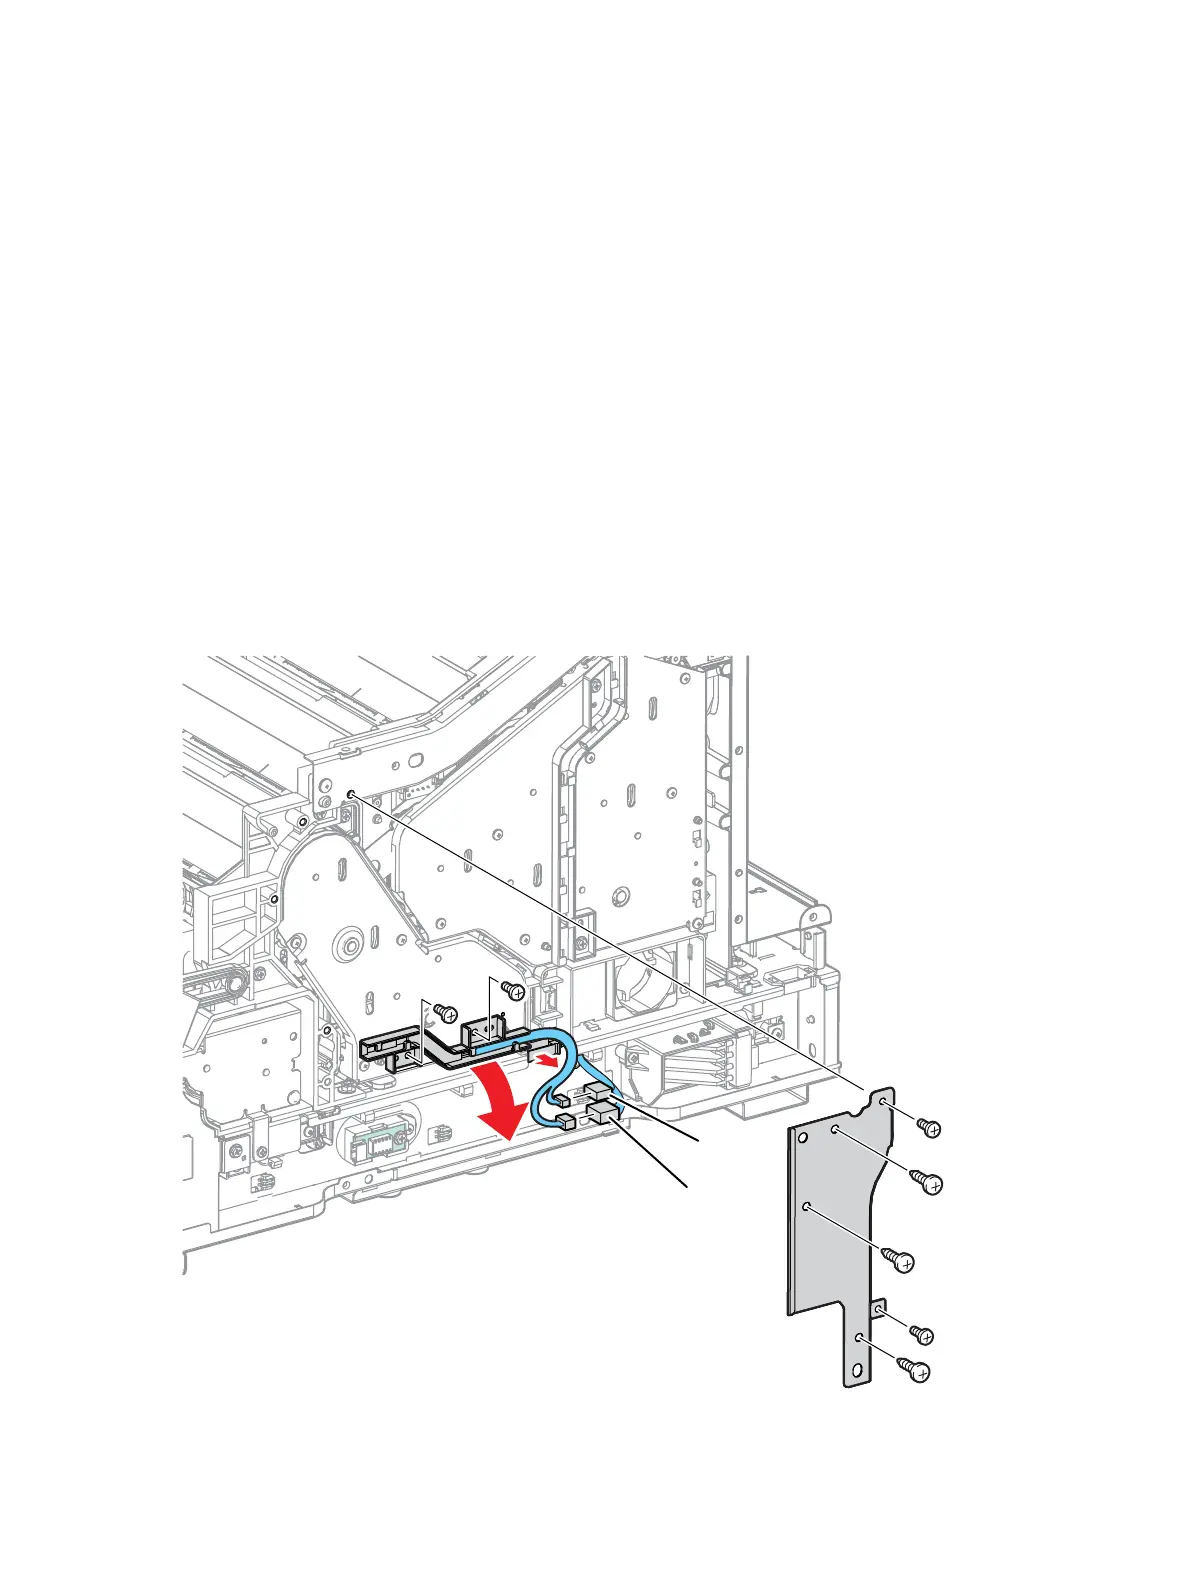
6. Remove 2 screws (silver, 6 mm) and 3 screws (silver, tapped, 12 mm) that secure the Right Front
Outside Frame (PL 11.1.14) to the printer and remove the Right Front Outside Frame.
7. Release the wiring harness from the Edge Saddle.
8. Disconnect 2 wing harness connectors P/J4523 and P/J4723 that are connected to the Imaging
Unit Guide Assembly (K).
9. Remove 2 screws (silver, 6 mm) that secure the Harness Guide (K) (PL 11.1.13) and remove the
Harness Guide.

 Loading...


