Service Parts Disassembly
Xerox Internal Use Only Phaser 7100 Service Manual 4-209
6. Remove the Main Switch Link Shaft (PL 13.1.14).
7. Release the wiring harness with the Clamp from the printer frame.
8. Disconnect the wiring harness connector P/J4611 from the Connector Drawer that is connected to
the 550-Sheet Feeder.
9. Remove one screw (silver, 6 mm) that secures the Option Feeder Harness Guide (PL 12.1.17).
10. Disconnect the wiring harness and remove the Option Feeder Harness Guide.
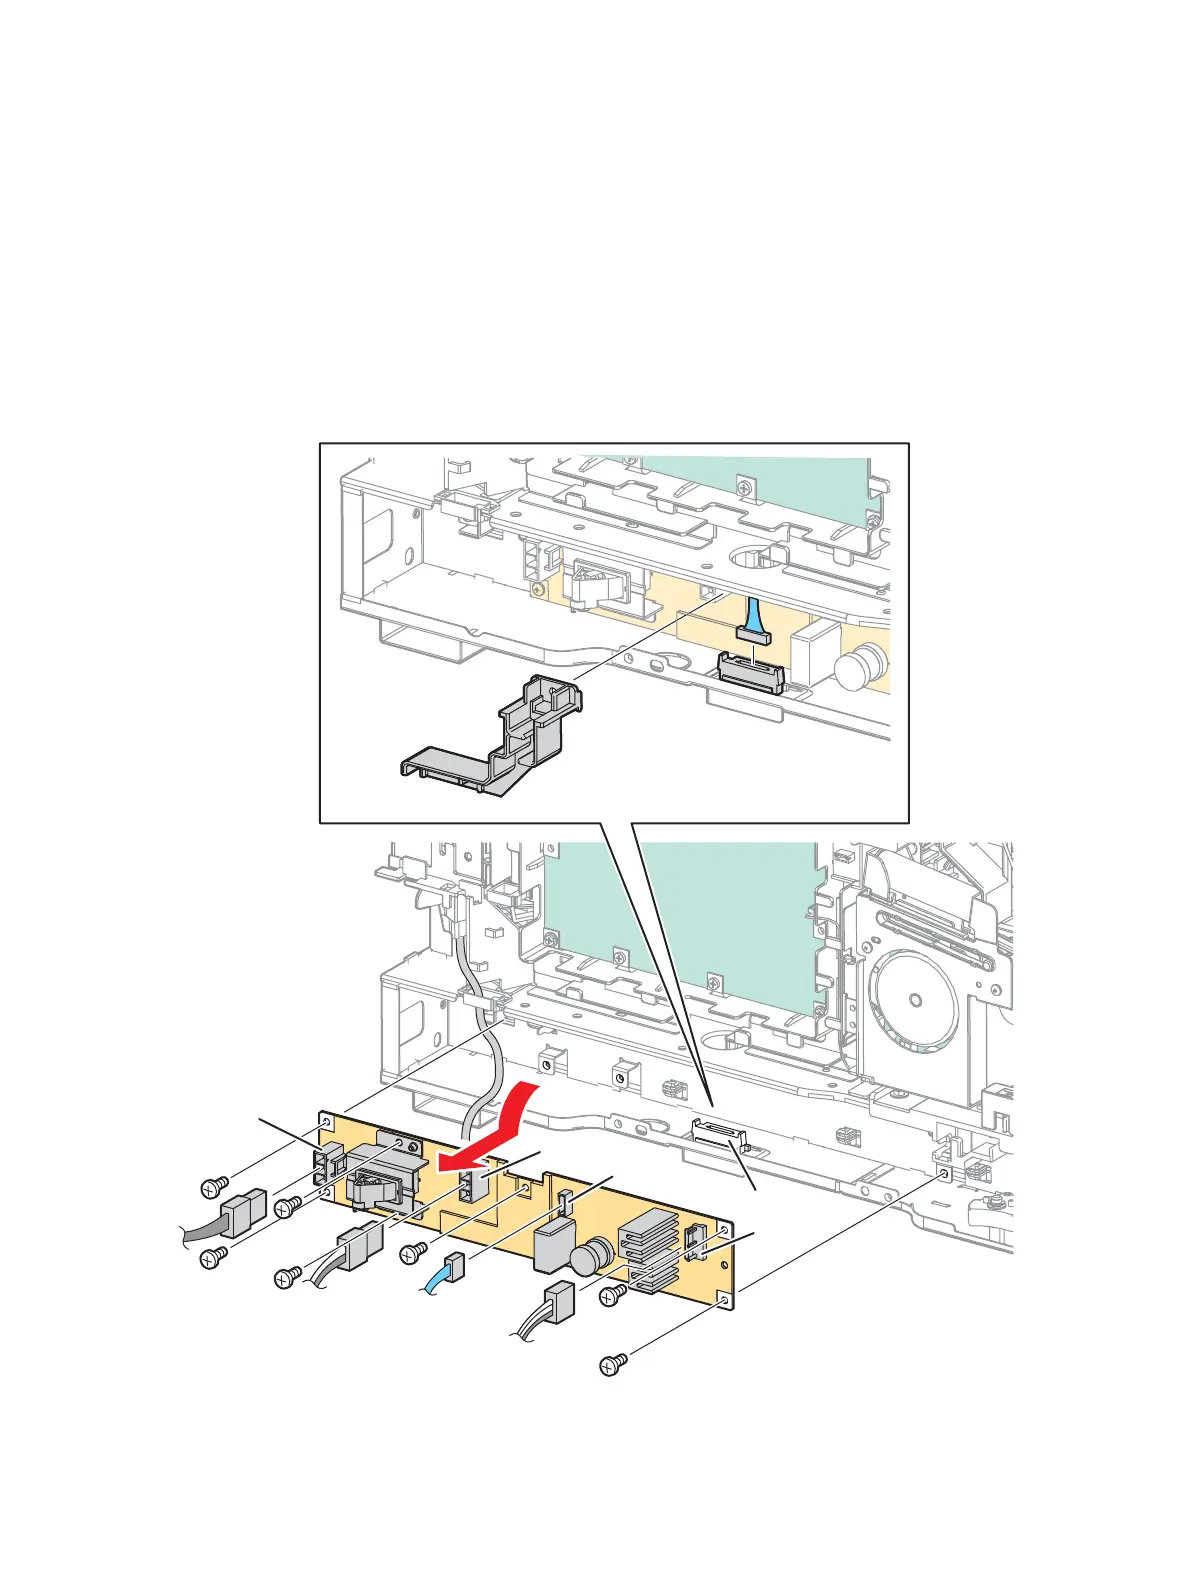
11. Disconnect all wiring harness connectors that are connected to the AC PWB.
12. Remove 7 screws (silver, 6 mm) that secure the AC PWB to the printer.
13. Tilt the AC PWB upward at angle to remove.
s7100-272
P/J503
P/J4611
P/J505
P/J502
P/J501

 Loading...


