Service Parts Disassembly
Xerox Internal Use Only Phaser 7100 Service Manual 4-287
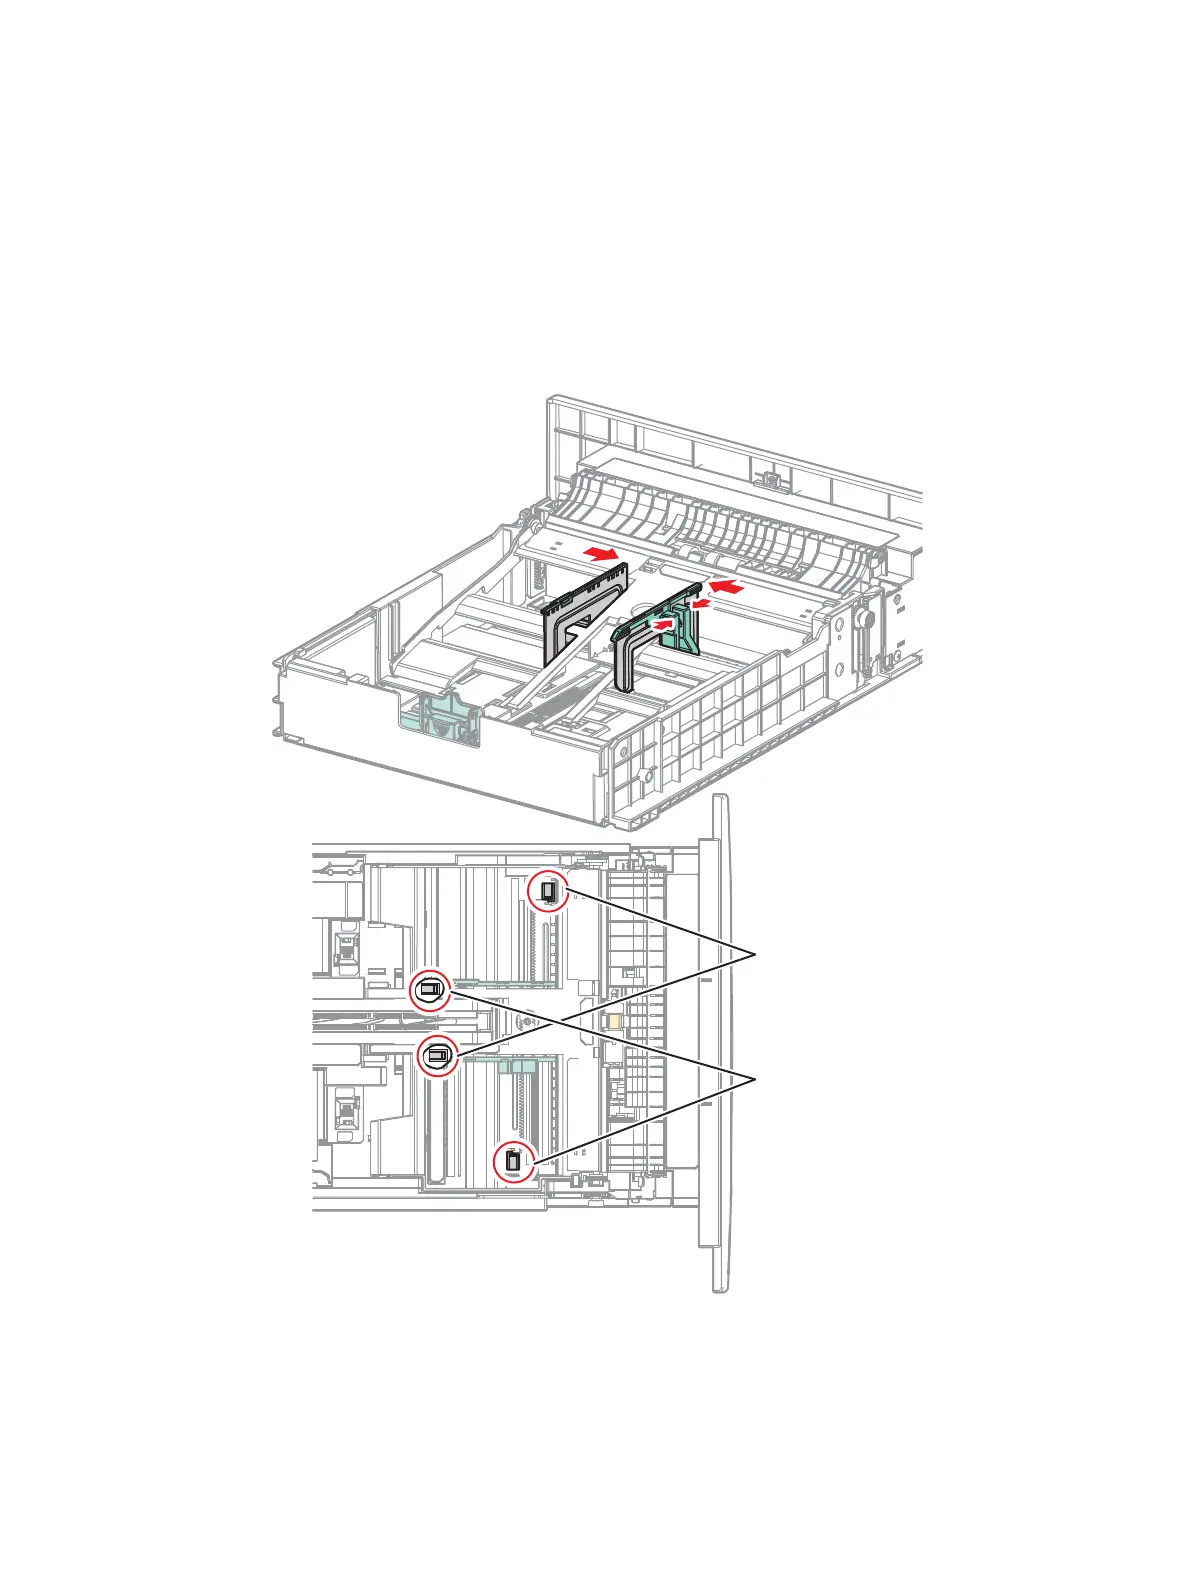
5. Pinch the knob of the Right Side Guide Assembly and move it towards the inner side.
6. While pressing down the 2 hooks that attach the Right Side Guide Assembly to the Base Housing
(PL 15.3.47), free the3 tabs of the Right Side Guide Assembly from the notch of the Base Housing
and remove the Right Side Guide Assembly.
7. Move the Left Side Guide Assembly towards the inner side.
8. While pressing down the 2 hooks that attach the Left Side Guide Assembly to the Base Housing,
free the 3 tabs of the Left Side Guide Assembly from the notch of the Base Housing and remove
the Left Side Guide Assembly.
Replacement Note: When installing the Pinion Gear, make sure that both Right Side Guide
Assembly and Left Side Guide Assembly have been moved towards the outer side until they could
go no further before performing the installation.
s7100-245
Hook
(Left Side
Guide Assembly)
Hook
(Right Side
Guide Assembly)

 Loading...


