14-16
Cisco ONS 15454 Procedure Guide, R5.0
December 2004
Chapter 14 Add and Remove Nodes
NTP-A312 Add a Node to a Linear ADM Using the Wizard
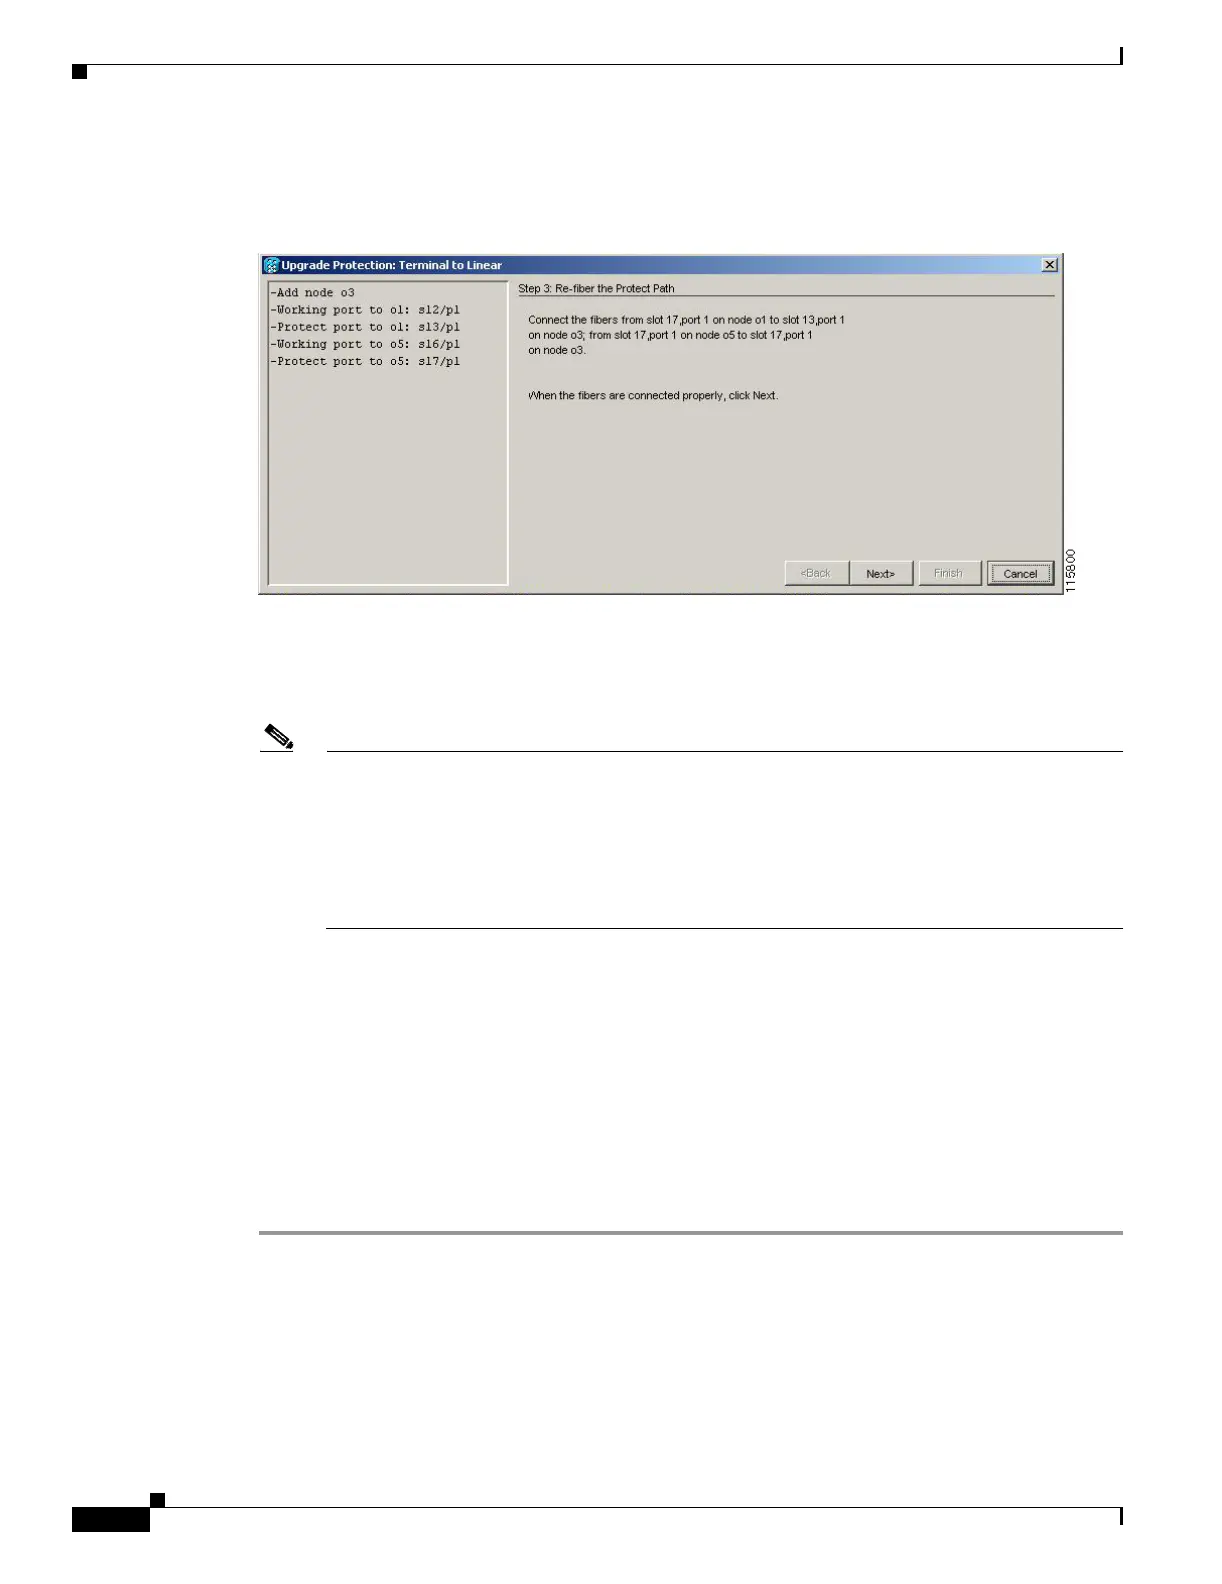
Step 9 Click Next. The Re-fiber the Protected Path dialog box appears (Figure 14-5).
Figure 14-5 Refibering the Protect Path
Step 10 Follow the instructions in the dialog box for connecting the fibers between the nodes.
Step 11 When the fibers are connected properly, click Next. The Update Circuit(s) on Node-Name dialog box
appears.
Note The Back button is not enabled in the wizard. You can click the Cancel button at this point and
choose the Yes button if you want to cancel the upgrade protection procedure. If the procedure
fails after you have physically moved the fiber-optic cables, you will need to restore the cables
to the original positions and verify through CTC that traffic is on the working path of the nodes
before restarting the process. To check traffic status, go to node view and click the Maintenance
> Protection tabs. In the Protection Groups area, click the 1+1 protection group. You can see
the status of the traffic in the Selected Group area.
Step 12 Click Next on the Update Circuit(s) on Node-Name page to continue with the procedure.
Step 13 The Force Traffic to Protect Path page states that it is about to force the traffic from the working to
protect path for the terminal nodes. When you are ready to proceed, click Next.
Step 14 Follow each step as instructed by the wizard as it guides you through the process of re-fibering the
working path between nodes and forcing the traffic back to the working path.
Step 15 The Force Traffic to Working Path page states that it is about to force the traffic from the protect to
working path for the terminal nodes. When you are ready to proceed, click Next.
Step 16 The Completed page appears. This page is the final one in the process. Click Finish.
Stop. You have completed this procedure.

 Loading...


