22-16
Cisco ONS 15454 Procedure Guide, R5.0
October 2005
Chapter 22 DLPs A500 to A599
DLP-A521 Modify Alarm, Condition, and History Filtering Parameters
Step 10 Return to your originating procedure (NTP).
DLP-A521 Modify Alarm, Condition, and History Filtering Parameters
Step 1 At the node, network, or card view, click the Alarms tab, Conditions tab, or History tab.
Step 2 Click the Filter button at the lower-left of the bottom toolbar.
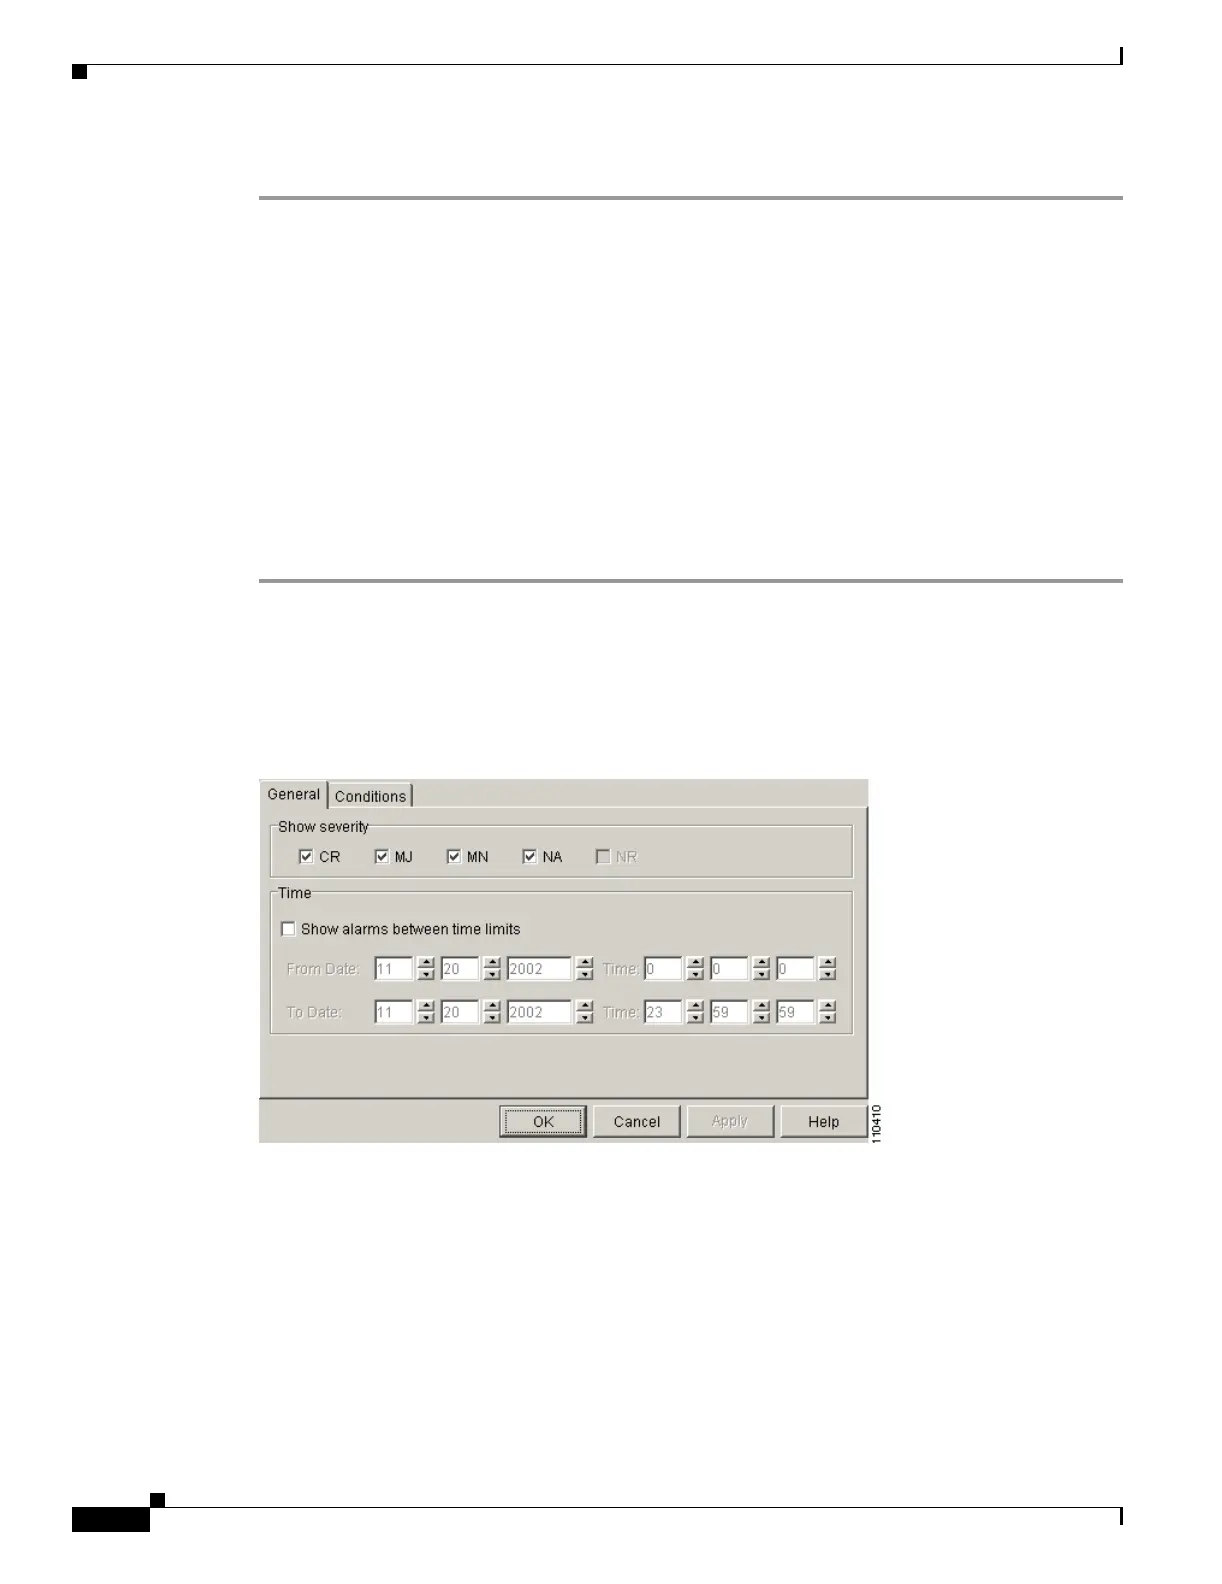
The filter dialog box appears, displaying the General tab. Figure 22-7 shows the Alarm Filter dialog box;
the Conditions and History tabs have similar dialog boxes.
Figure 22-7 Alarm Filter Dialog Box General Tab
Step 3 In the Show Severity area, click the check boxes for the severities [CR, MJ, MN, or Not-Alarmed (NA)]
that you want to show through the alarm filter and be reported at the network level. Leave severity check
boxes deselected (unchecked) to prevent those severities from appearing.
When alarm filtering is disabled, all alarms show.
Step 4 In the Time area, click the Show alarms between time limits check box to enable it. Click the up and
down arrows in the From Date, To Date, and Time fields to modify the period of alarms that is shown.
Step 5 To modify filter parameters for conditions, click the filter dialog box Conditions tab (Figure 22-8). If
you do not need to modify them, continue with Step 6.
Purpose This task changes alarm and condition reporting in all network nodes.
Tools/Equipment None
Prerequisite Procedures DLP-A225 Enable Alarm Filtering, page 19-17
DLP-A60 Log into CTC, page 17-66
Required/As Needed As needed
Onsite/Remote
Onsite or remote
Security Level
Retrieve or higher

 Loading...


