2-16
Cisco ONS 15454 Procedure Guide, R5.0
May 2006
Chapter 2 Install Cards and Fiber-Optic Cable
NTP-A247 Install Fiber-Optic Cables on OC-N Cards
Step 2 Inspect and clean all fiber connectors thoroughly. See the “NTP-A112 Clean Fiber Connectors”
procedure on page 15-13 for instructions. Dust particles can degrade performance. Put caps on any fiber
connectors that are not used.
Step 3 As needed, complete the “DLP-A207 Install Fiber-Optic Cables on the LGX Interface” task on
page 19-5.
Step 4 As needed, complete the “DLP-A428 Install Fiber-Optic Cables in a 1+1 Configuration” task on
page 21-8.
Note To install fiber-optic cables on Ethernet cards, FC_MR-4 cards, or transponder/muxponder
cards, see the “DLP-A469 Install GBIC or SFP Connectors” task on page 21-24.
Step 5 As needed, complete the “DLP-A43 Install Fiber-Optic Cables for Path Protection Configurations” task
on page 17-49.
Step 6 As needed, complete the “DLP-A44 Install Fiber-Optic Cables for BLSR Configurations” task on
page 17-52.
Step 7 As needed, complete the “DLP-A45 Install the Fiber Boot” task on page 17-54.
Step 8 Continue with the “NTP-A245 Route Fiber-Optic Cables” procedure on page 2-17.
Stop. You have completed this procedure.
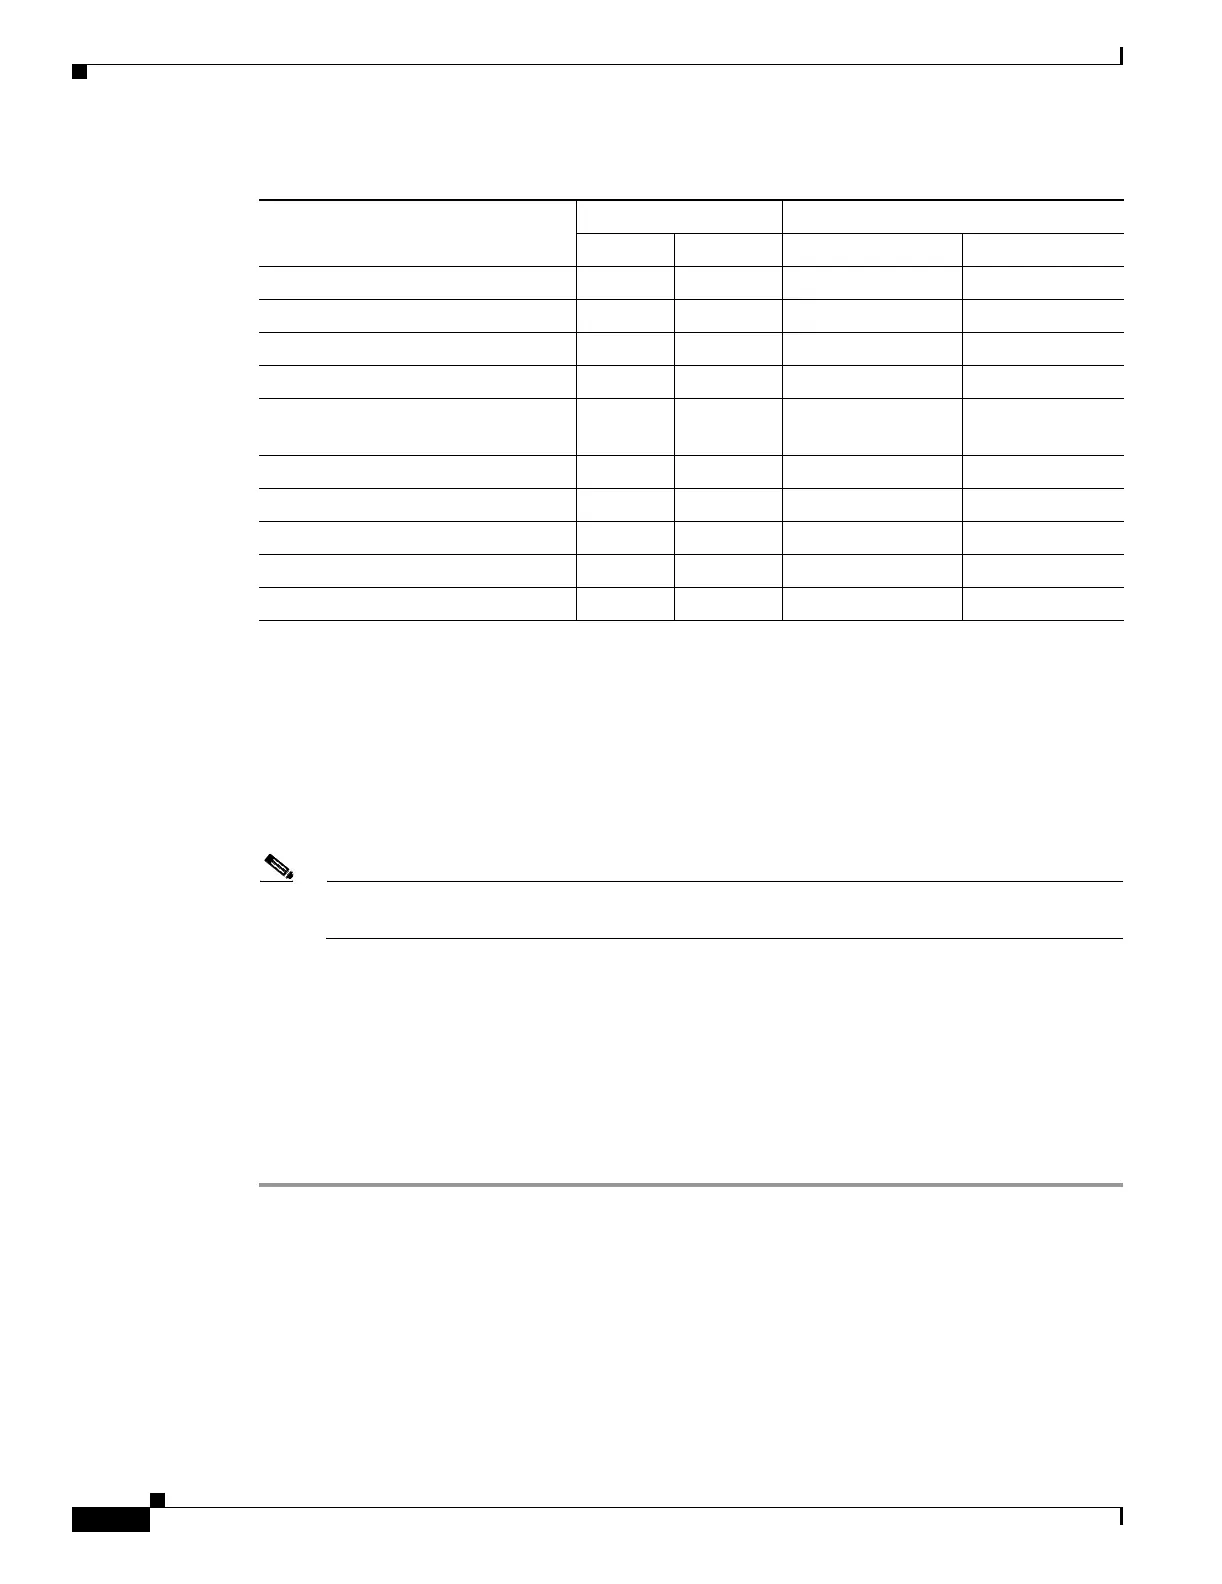
OC48 IR 1310 –5 dBm 0 dBm –18 dBm 0 dBm
OC48 LR 1550 –2 dBm +3 dBm –28 dBm –8 dBm
OC48 IR/STM16 SH AS 1310 –5 dBm 0 dBm –18 dBm 0 dBm
OC48 LR/STM16 LH AS 1550 –2 dBm +3 dBm –28 dBm –8 dBm
OC48 ELR/STM16 EH 100 GHz –2 dBm 0 dBm –27 dBm at
1E-12 BER
–9 dBm
OC48 ELR/STM16 EH 200 GHz –2 dBm 0 dBm –28 dBm –8 dBm
OC192 SR/STM64 IO 1310 –6 dBm –1 dBm –11 dBm –1 dBm
OC192 IR/STM64 SH 1550 –1 dBm +2 dBm –14 dBm –1 dBm
OC192 LR/STM64 LH 1550 +7 dBm +10 dBm –19 dBm –10 dBm
OC192 LR/STM64 LH ITU 15xx.xx +3 dBm +6 dBm –22 dBm –9 dBm
Table 2-3 OC-N Card Transmit and Receive Levels (continued)
Card
Transmit Receive
Minimum Maximum Minimum Maximum

 Loading...


