15-28
Cisco ONS 15454 Procedure Guide, R5.0
December 2004
Chapter 15 Maintain the Node
NTP-A290 Replace the Alarm Interface Panel
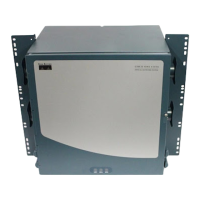
Figure 15-7 Lower Backplane Cover
Step 6
Grip the lower backplane cover and gently pull it away from the backplane.
Step 7 Unscrew the two screws that hold the AIP cover in place.
Step 8 Grip the cover and gently pull away from the backplane.
Note On the 15454-SA-HD (P/N: 800-24848), 15454-SA-NEBS3E, 15454-SA-NEBS3, and
15454-SA-R1 (P/N: 800-07149) shelves, the AIP cover is clear plastic. On the 15454-SA-ANSI
shelf (P/N: 800-19857), the AIP cover is metal.
Step 9 Grip the AIP and gently pull it away from the backplane.
Step 10 Disconnect the fan-tray assembly power cable from the AIP.
Step 11 Set the old AIP aside for return to Cisco.
Caution The type of shelf the AIP resides in determines the version of AIP that should replace the failed AIP. The
15454-SA-ANSI shelf (P/N: 800-19857) and 15454-SA-HD (P/N: 800-24848) currently use the 5A AIP,
(P/N: 73-7665-01). The 15454-SA-NEBS3E, 15454-SA-NEBS3, and 15454-SA-R1 (P/N: 800-07149)
shelves and earlier use the 2A AIP (P/N: 73-5262-01).
Caution Do not put a 2A AIP (P/N: 73-5262-01) into a 15454-SA-ANSI shelf (P/N: 800-19857) or 15454-SA-HD
(P/N: 800-24848); doing so will cause a blown fuse on the AIP.
Step 12 Attach the fan-tray assembly power cable to the new AIP.
Step 13 Place the new AIP on the backplane by plugging the panel into the backplane using the DIN connector.
Step 14 Replace the AIP cover over the AIP and secure the cover with the two screws.
Step 15 Replace the lower backplane cover and secure the cover with the five screws.
Caution Cisco recommends that TCC2/TCC2P card resets be performed in a maintenance window to avoid any
potential service disruptions.
Step 16 Reset the standby TCC2/TCC2P card:
a. Right-click the standby TCC2/TCC2P card and choose Reset Card.
32069
Retaining
screws

 Loading...