1-40 BASIC OVERVIEW INTRODUCCIÓN GENERAL
3. Tool Presetter
Preajustador
de herra-
mienta
1) Open the door.
2) Move down
*1
/install
*2
the tool presetter.
[[Presetter Mode] button illuminated]
[TOOL GEOMETRY OFFSET screen
displayed]
3) Close the door.
1) Abra la puerta.
2) Haga descender
*1
/instale
*2
el preajustador
de herramientas.
[Botón [Modo del preajustador]
iluminado]
[Se visualiza la pantalla CORRECCIÓN
GEOMETRÍA DE HRRTA]
3) Cierre la puerta.
4. Indexing
Turret
Indización de
torreta
Index the turret station number on which the
tool to be measured is mounted.
Indice el número de estación de torreta en el
que se instalará la herramienta que se vaya a
medir.
5. Measurement/
Value Entry
Medición/
entrada de
valor
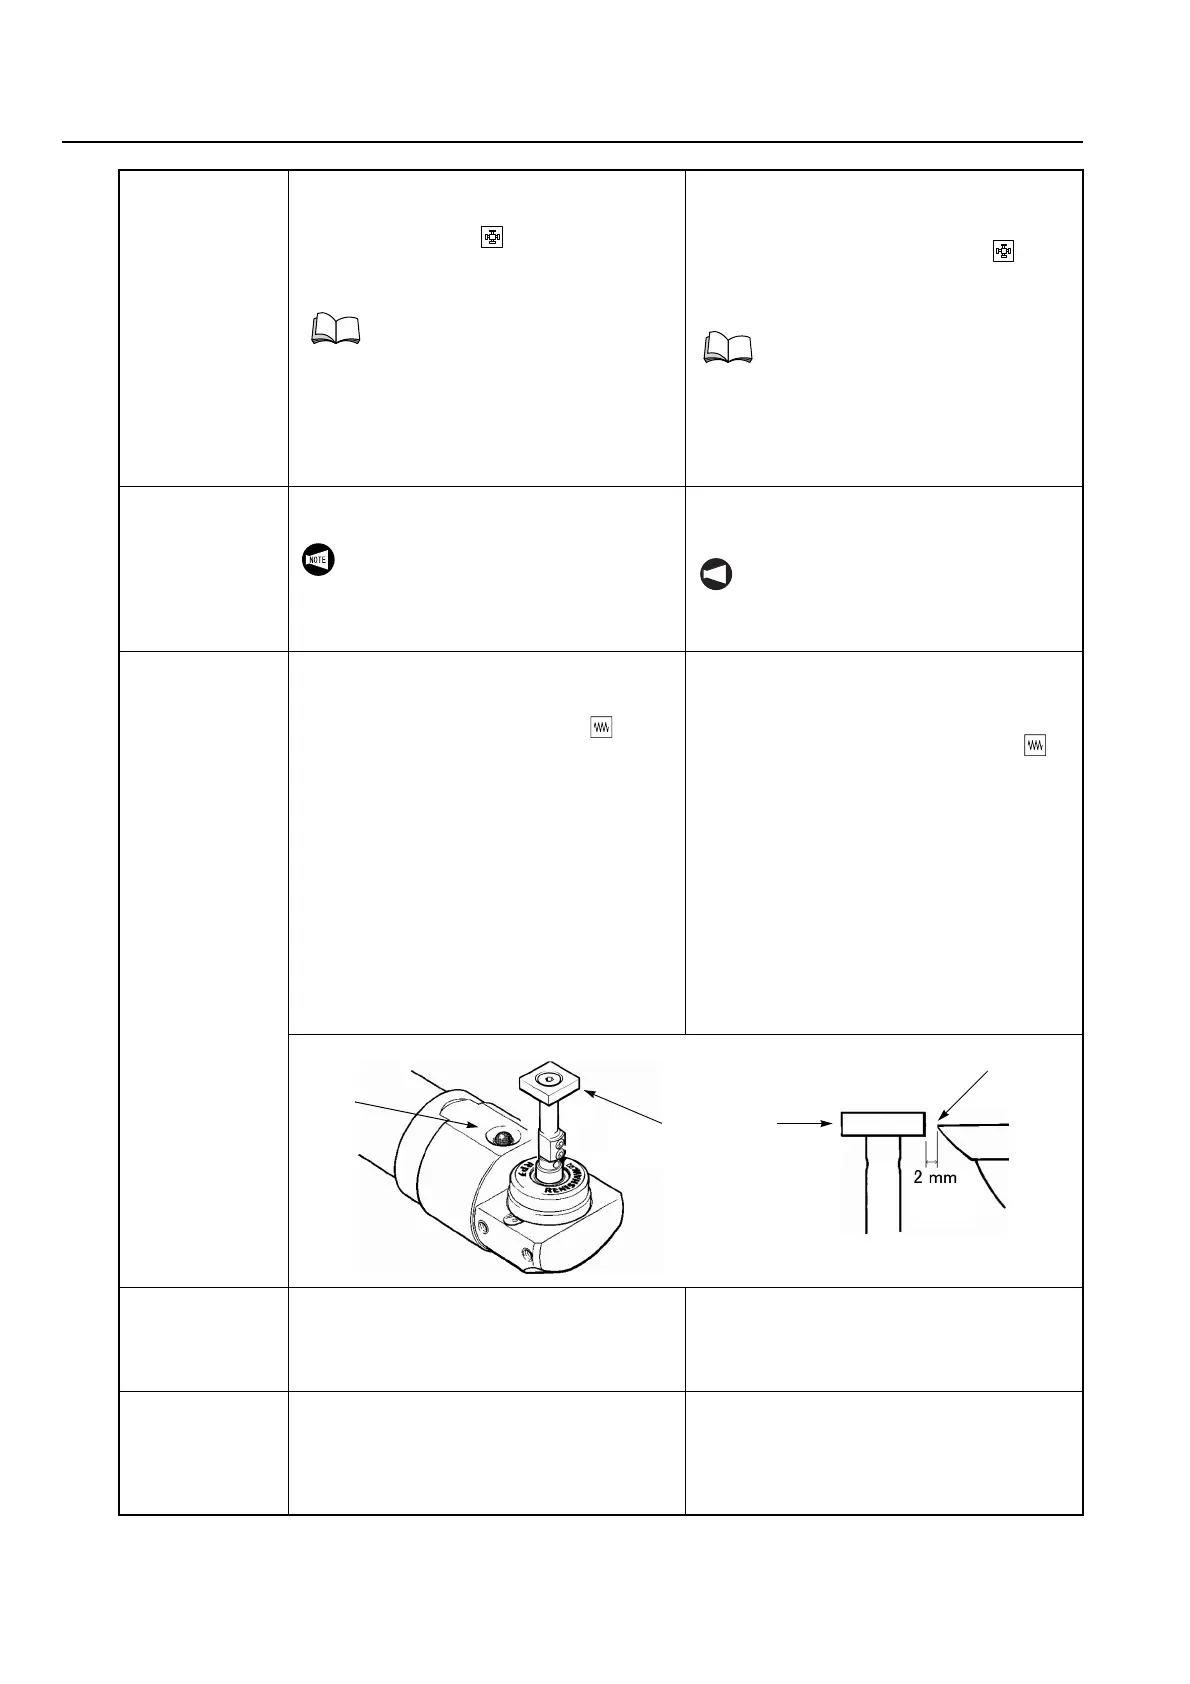
1) Using the manual pulse generator, move
the tool tip to a point approximately 2 mm
from the stylus.
2) Press the mode selection button [Jog].
[Presetter measurement sub mode starts]
3) Press the required axis feed button to bring
the tool tip into contact with the stylus.
[Contact with stylus.]
[Buzzer activated]
[Presetter lamp changes from green to red]
[Axis automatically moves away the stylus,
and lamp changes to green.]
[Geometry offset value is entered in the
geometry offset column of the indexed tool.]
1) Utilizando el generador manual de
impulsos, desplace la punta de la
herramienta a un punto situado a
aproximadamente 2 mm del palpador.
2) Pulse el botón de selección de modo
[Impulsos intermitentes].
[Se inicia el submodo de medición del
preajustador]
3) Pulse el botón de avance de ejes preciso
para poner la punta de la herramienta en
contacto con el palpador.
[Contacto con el palpador.]
[Señal sonora activada]
[La luz del preajustador pasa de verde a
rojo]
[El eje se distancia automáticamente del
palpador, y la luz pasa de nuevo a verde.]
[Se introduce el valor de corrección
geométrica en la columna de corrección
geométrica de la herramienta indizada.]
6. Multi-Direc-
tional Mea-
surement
Medición mul-
tidireccional
Measure and enter the tool geometry offset
values for the X- and Z-axes by following the
procedure given above.
Mida e introduzca los valores de corrección
geométrica de los ejes X y Z siguiendo el
procedimiento anteriormente mencionado.
7. Next Tool
Measurement
Medición de la
herramienta
siguiente.
1) Prior to rotating the turret head, move the
turret to a position free from interference
between the tools and the tool presetter.
2) Repeat the steps 3. to 6. above.
1) Antes de girar el cabezal de la torreta,
mueva la torreta hasta una posición libre de
interferencias entre las herramientas y el
preajustador de herramienta.
2) Lleve a cabo los pasos 3. a 6.
anteriormente mencionados.
For the installation procedure, refer
to "PREPARING THE MANUAL IN-
MACHINE TOOL PRESETTER"
(page 1-33).
Si desea obtener mayor información
acerca del procedimiento de instala-
ción, consulte "PREPARACIÓN DEL
PREAJUSTADOR MANUAL DE
HERRAMIENTA INTEGRADO EN
LA MÁQUINA" (página 1-33).
Before indexing the turret, confirm that
the indexing motion will cause no
interference.
NOT A
Antes de indizar la torreta, verifique que
no se produzca ninguna interferencia
como resultado del movimiento de
indización.
Stylus
Palpador
Lamp
Testigo
 Loading...