1-34 BASIC OVERVIEW INTRODUCCIÓN GENERAL
9-1 Installing and Removing the Manual In-Machine Tool Presetter Arm
(Detachable Type, Spindle 2 Side)
Instalación y retirada del brazo del preajustador manual de herramienta integrado en la
máquina (desmontable, lado del husillo 2)
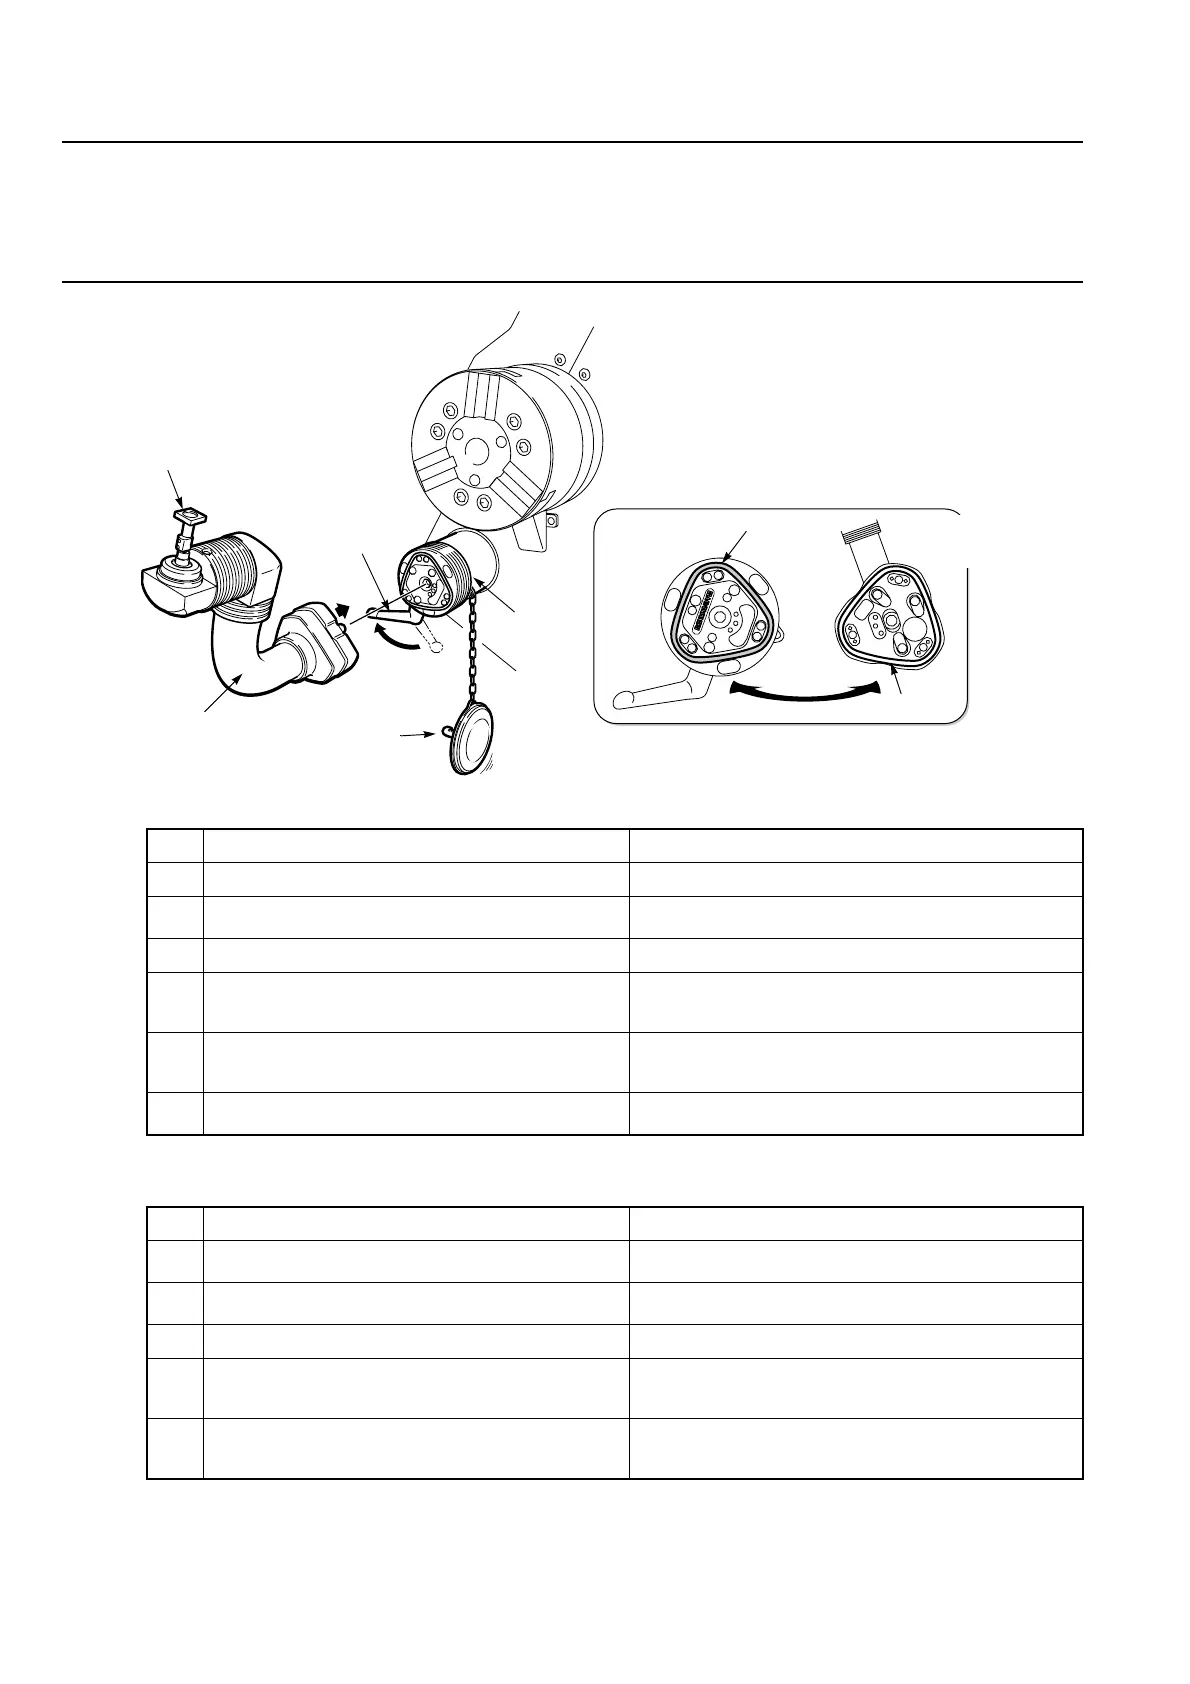
<Installing the Presetter Arm> <Instalación del brazo del preajustador>
<Removing the Presetter Arm> <Retirada del brazo del preajustador>
Stylus
Palpador
Locking Lever
Palanca de bloqueo
Presetter Arm
Brazo del
preajustador
Base Side
Lado de la base
Presetter Arm Side
Lado del brazo del
preajustador
Packing
Embalaje
Groove
Ranura
Protective Cover
Cubierta protectora
Base
Base
Procedure Procedimiento
1.
Clean the area around the base. Limpieza del área que rodea la base.
2.
Turn the locking lever counterclockwise and
remove the protective cover.
Gire la palanca de bloqueo en sentido contrario al de
las agujas del reloj y retire la cubierta protectora.
3.
Remove the presetter arm from the container. Retire el brazo del preajustador de su contenedor.
4.
Make sure that the connecting parts of the presetter
arm and the base are free of chips and foreign mat-
ter.
Asegúrese de que las zonas de conexión del brazo del
preajustador y la base están limpias, sin virutas ni
cuerpos extraños.
5.
Install the presetter arm on the base while aligning
the packing of the base with the groove on the pre-
setter, with the stylus upward.
Instale el brazo del preajustador sobre la base ali-
neando el embalaje de esta última con la ranura del
preajustador, con el palpador hacia arriba.
6.
Turn the locking lever clockwise.
Gire la palanca de bloqueo en sentido de las agujas
del reloj.
Procedure Procedimiento
1.
Hold the presetter arm and turn the locking lever
counterclockwise.
Sujete el brazo del preajustador y gire la palanca de
bloqueo en sentido contraio al de las agujas del reloj.
2.
Pull the presetter arm to remove it from the base.
Tire del brazo del preajustador para extraerlo de la
base.
3.
Store the presetter arm in the container. Guarde el brazo del preajustador en su caja.
4.
Make sure that the connecting parts of the base
and the protective cover are free of chips and
foreign matter.
Asegúrese de que las zonas de conexión de la base y
de la cubierta de protección están limpias, sin virutas ni
cuerpos extraños.
5.
Insert the protective cover onto the base and turn
the locking lever clockwise.
Instale la cubierta protectora sobre la base y gire la
palanca de bloqueo en el sentido de las agujas del
reloj.
 Loading...