2-585MACHINE OPERATIONS OPERACIONES DE MECANIZADO
28-14-4 Air Filter Inspection and Element Replacement
Inspección del filtro de aire y reemplazo del elemento
<Procedure>
1) Turn OFF the main power.
2) Turn the valve CW to shut off the compressed air
supply.
3) Turn the manual drain cock in the counterclock-
wise direction to release residual pressure.
4) Confirm the pressure gage indicates 0 MPa.
5) Inspect/replace the air filter element.
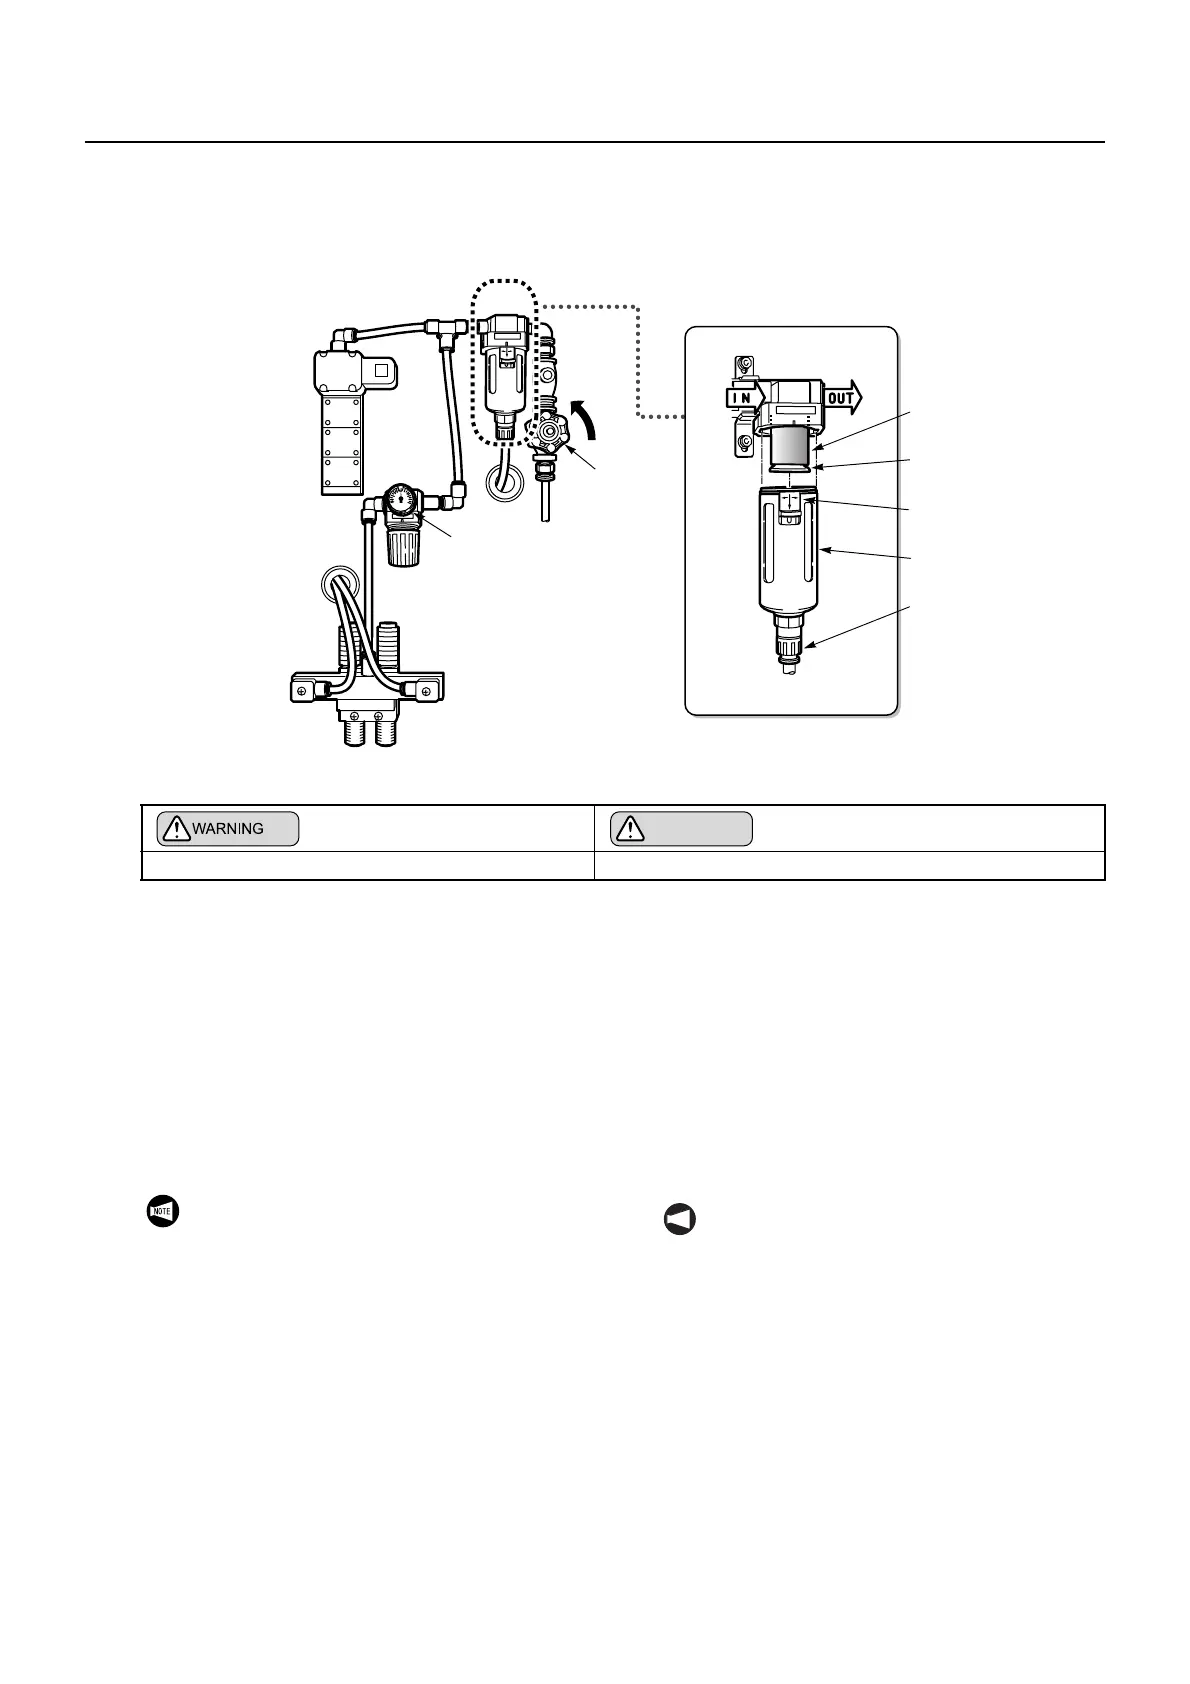
<Removing Air Filter Assembly Case>
Slide the lock button downward and rotate the
assembly case 45 degrees CW or CCW. Pull the
assembly case downward to remove.
<Inspecting/Replacing Filter Element>
If the filter element is clogged, replace it using the
following procedure:
a) Rotate the baffle CCW to remove the
baffle and filter element.
b) Mount a new filter element on the valve
guide.
c) Rotate the baffle CW to secure the baffle
and filter element.
6) Tighten the manual drain cock by CW rotation.
7) Turn the valve CCW to restart compressed air
supply.
8) Check for air leakage and confirm the air pres-
sure is set at 0.5 MPa.
<Procedimiento>
1) DESCONECTE la alimentación principal.
2) Gire la válvula en el sentido de las agujas del reloj para
cortar el suministro de aire comprimido.
3) Gire el grifo de drenaje manual en el sentido contrario al
de las agujas del reloj para eliminar la presión residual.
4) Verifique que el manómetro indique 0 MPa.
5) Inspeccione/sustituya el filtro de aire.
<Retirada de la carcasa del filtro del aire>
Deslice el botón de bloqueo hacia abajo y gire la
carcasa 45 grados en el sentido de las agujas del reloj o
en sentido contrario al de las agujas del reloj. Tire de la
carcasa de montaje hacia abajo para retirarla.
<Inspección/sustitución del filtro>
En caso de que el filtro esté obstruido, sustitúyalo
siguiendo el siguiente procedimiento.
a) Gire el deflector en el sentido contrario al de las
agujas del reloj para retirar tanto el deflector como
el filtro.
b) Instale un nuevo filtro en la guía de la válvula.
c) Gire el deflector en el sentido de las agujas del reloj
para fijar tanto el deflector como el filtro.
6) Apriete la llave de paso de drenaje manual girándolo en
el sentido de las agujas del reloj.
7) Gire la válvula en el sentido contrario al de las agujas
del reloj para reiniciar el suministro de aire comprimido.
8) Compruebe si se producen fugas de aire y confirme que
la presión del aire esté ajustada a 0,5 MPa.
ATENCION
Turn OFF the main power. DESCONECTE la alimentación principal.
Lock Button
Botón de bloqueo
Assembly Case
Caja de montaje
Filter Element
Elemento del filtro
Valve
Válvula
Manual Drain Cock
Espita de drenaje
manual
Pressure Gage
Manómetro
Air Filter
Filtro de aire
Baffle
Deflector
Take care not to damage the O-ring mounted in
the upper part of the assembly case.
NOT A
Tenga cuidado de no dañar la junta tórica
instalada en la parte superior de la carcasa.

 Loading...


