2-631MACHINE OPERATIONS OPERACIONES DE MECANIZADO
29-10When Sub-Standard Machining Occurs
Cuando se produce un mecanizado por debajo del estándar requerido
29-10-1 Adjusting Machine Level
Ajuste de la nivelación de la máquina
If we consider the machine body, a reduction in
machining precision is caused primarily by incorrect
machine level adjustment. Using a level, measure
the machine horizontal level and degree of twisting.
Si consideramos el cuerpo de la máquina, se produce una
merma de la precisión de mecanizado debida principalmente
a una nivelación incorrecta del equipo. Mida el nivel horizon-
tal de la máquina y su grado de torsión empleando un nivel.
29-10-2 Backlash Check
Comprobación del huelgo
If machining accuracy varies substantially, confirm
the machine backlash.
<Necessary Tools>
• Lever type dial test indicators
• Magnet stand
<Procedure>
1) Using a magnet stand, mount a lever type dial
test indicators on the spindle head.
2) Position the turret close to the spindle head using
the manual pulse generator.
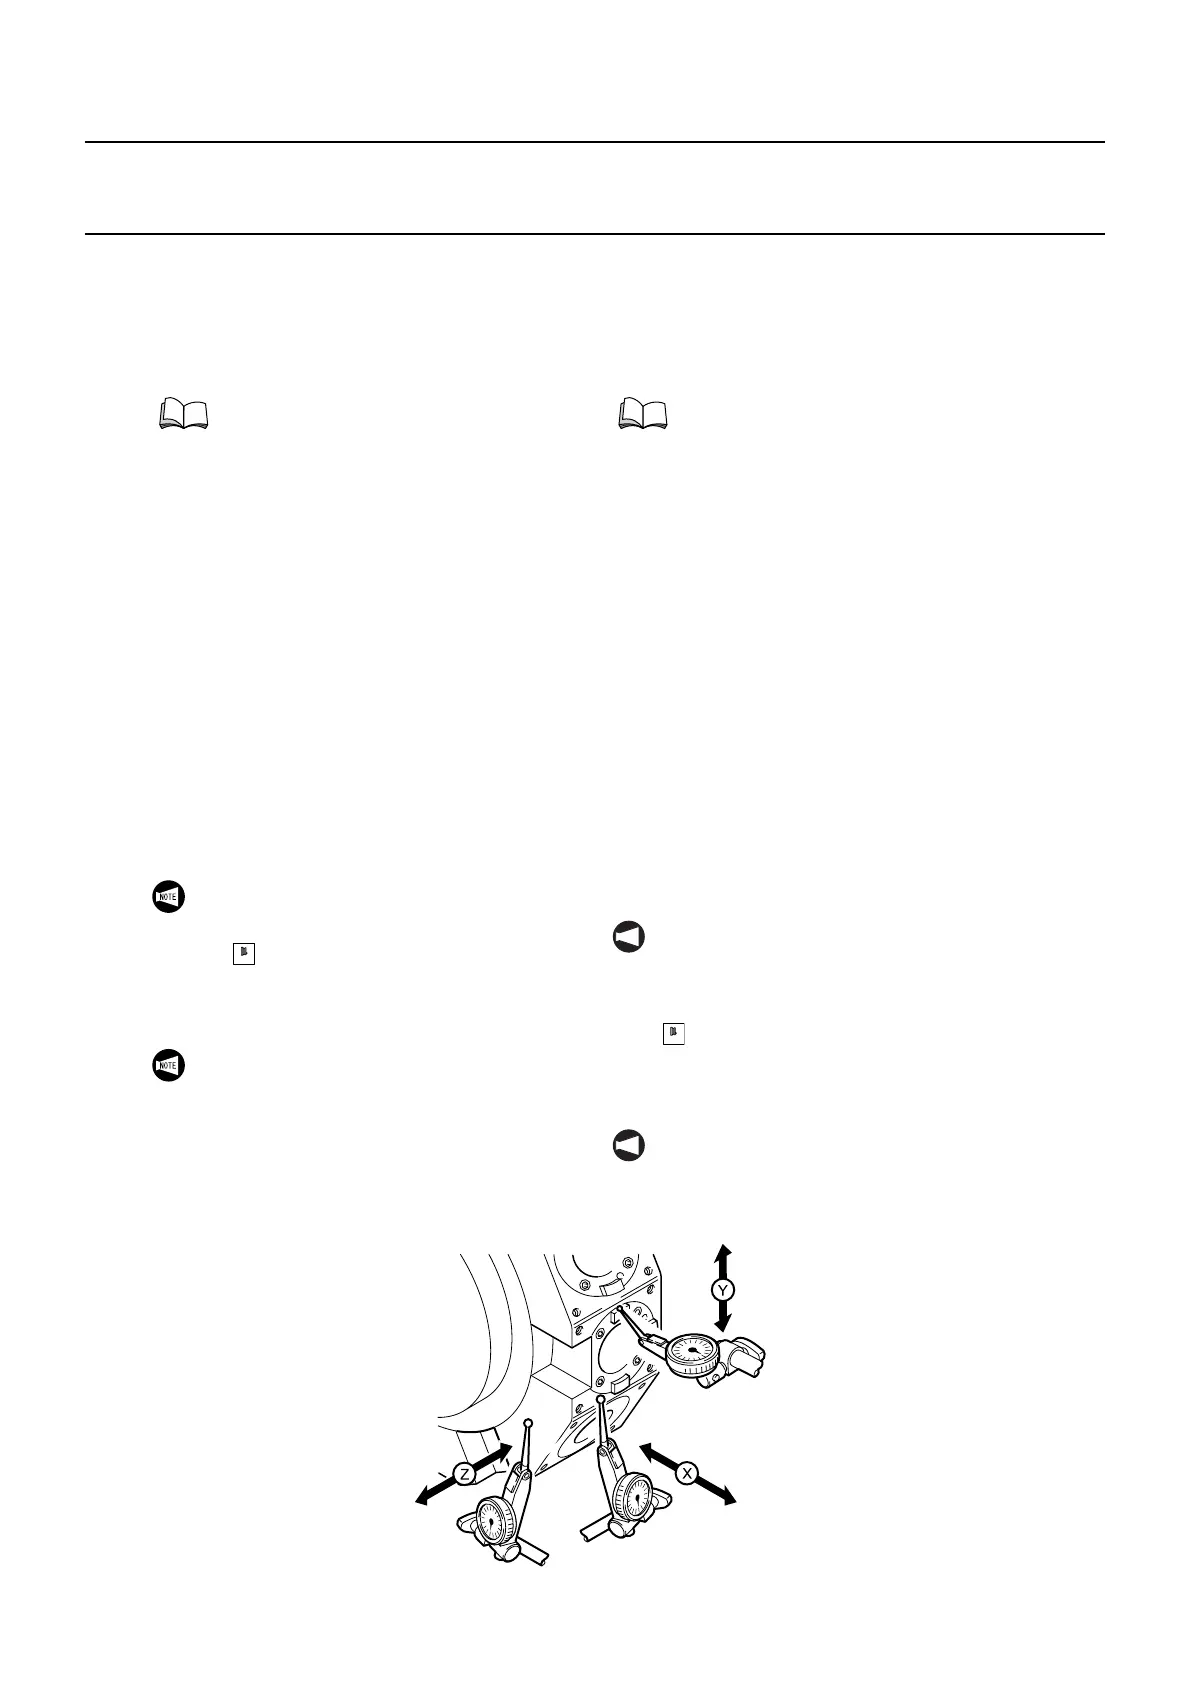
3) While observing the lever type dial test indicators,
rotate the manual pulse generator until the gage
stylus is aligned with the measuring point as
shown in the diagram below.
4) Stop rotating the manual pulse generator when
the stylus turns 1/4 of a rotation and set the scale
to "0".
Verifique el juego de la máquina si la precisión del mecani-
zado varía considerablemente.
<Herramientas necesarias>
• Indicadores de prueba mediante un calibrador de dial
• Soporte magnético
<Procedimiento>
1) Instale un indicador de prueba mediante calibrador de
dial sobre el cabezal del husillo valiéndose para ello de
un soporte magnético.
2) Coloque la torreta cerca del cabezal del husillo
utilizando el generador manual de impulsos.
3) Mientras observa el indicador de prueba mediante un
calibrador de dial, gire el generador manual de impulsos
hasta que la aguja del calibrador esté alineada con el
punto de medición tal y como se muestra en el siguiente
diagrama.
4) Detenga el giro del generador manual de impulsos
cuando la aguja llegue al 1/4 de vuelta y configure la
escala a "0".
Separate volume, MACHINE INSTALLA-
TION GUIDE Chapter 1 "ADJUSTING
MACHINE LEVEL"
Volumen que se entrega por separado, GUÍA DE
INSTALACIÓN DE LA MÁQUINA; capítulo 1
"AJUSTE DEL NIVEL DE LA MÁQUINA"
When aligning the stylus on the lever type dial
test indicators with the measuring point, ensure
the axis feed amount is set to 0.001 mm using
the [×1] axis feed amount selection switch.
Take care not to rotate the stylus on the lever
type dial test indicators more than a single
rotation to prevent damage to the gage.
× 1
NOT A
Cuando alinee la aguja del indicador de prueba
mediante calibrador de dial con el punto de medición,
asegúrese de que la cantidad de avance del eje se
configura a 0,001 mm mediante la utilización del
interruptor de selección de cantidad de avance del eje
[×1].
NOT A
Tenga cuidado de no hacer girar más de una vuelta la
aguja del calibrador de dial para no deteriorar dicho
calibrador.
× 1
 Loading...