2-638 MACHINE OPERATIONS OPERACIONES DE MECANIZADO
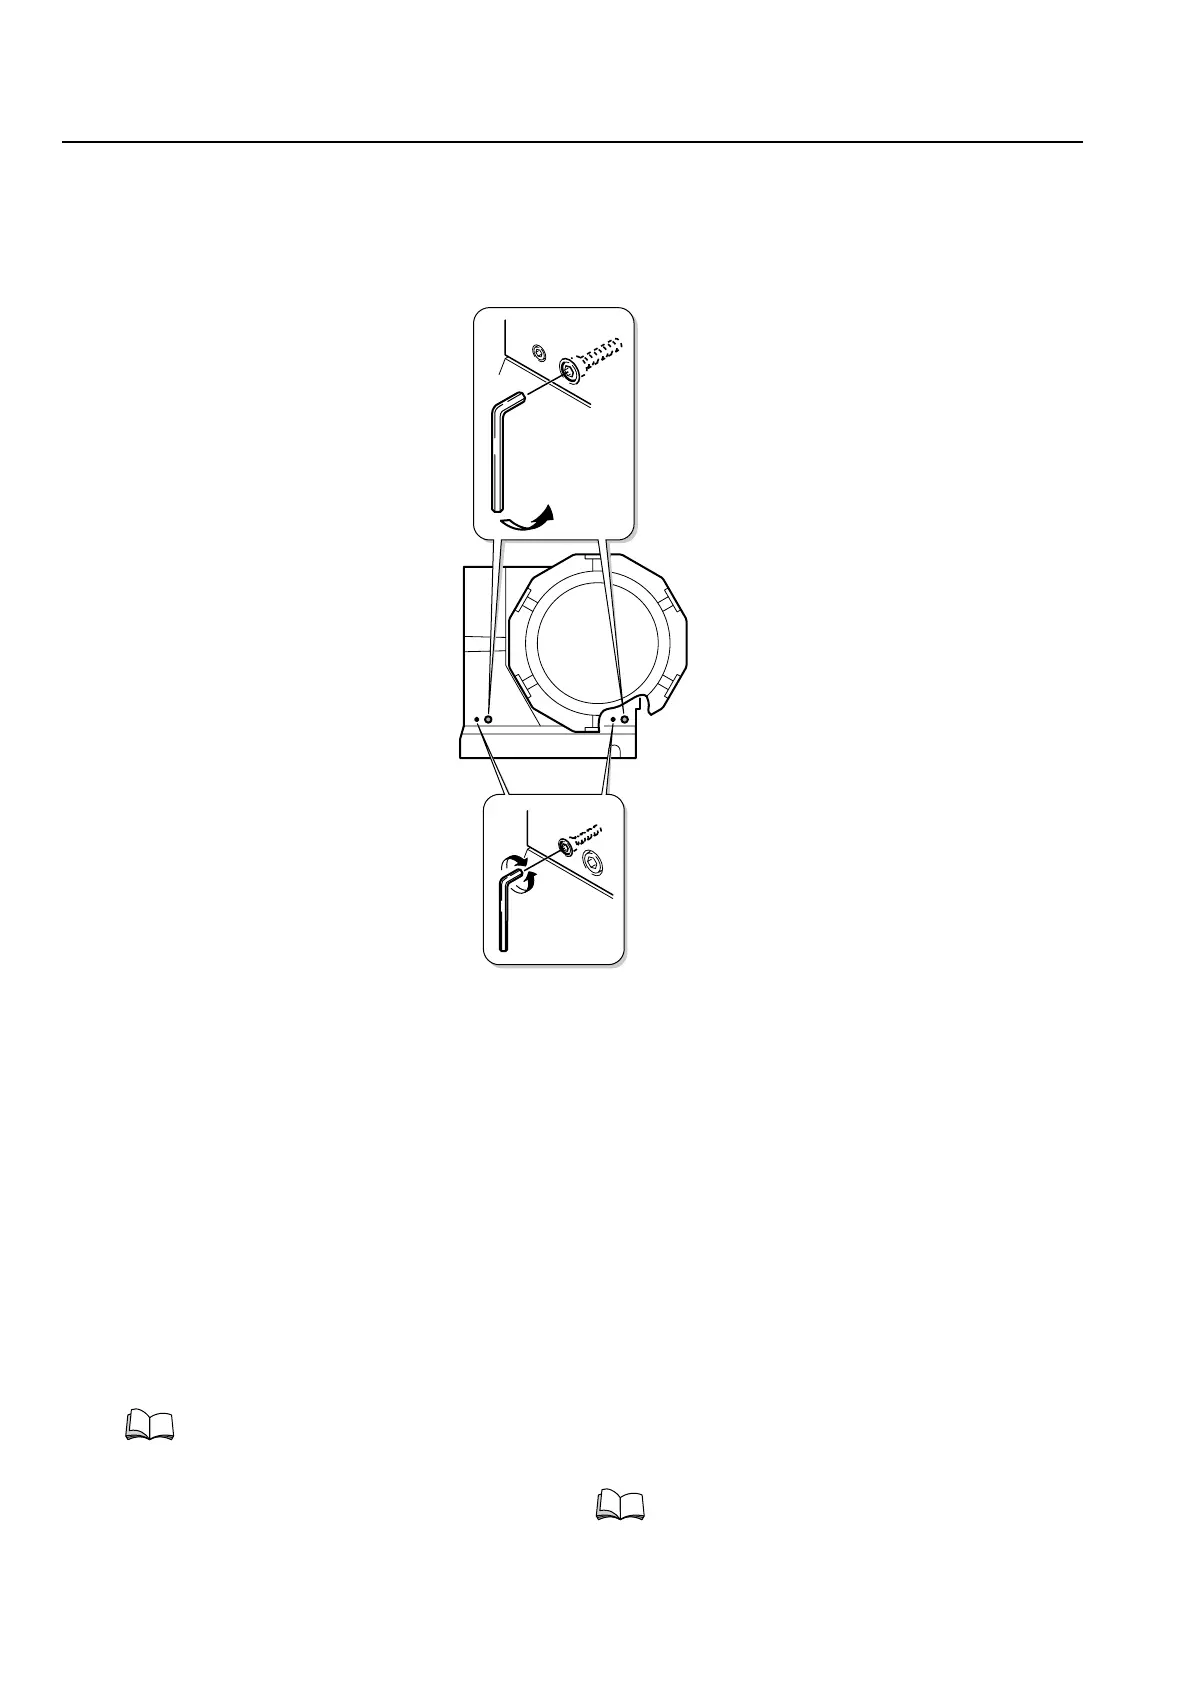
14) Loosen the 2 hexagon socket head cap screws at
the base of the turret using a hex wrench.
14) Afloje los 2 tornillos de cabeza cilíndrica con hueco
hexagonal situados en la base de la torreta utilizando
una llave hexagonal.
15) As shown in the diagram above, turret inclination
is adjusted by loosening/tightening the 2 hexagon
socket set screws (pull/push) with a hex wrench.
Using the lever type dial test indicators as a refer-
ence, gradually adjust the inclination of the turret.
16) Using a hex wrench, tighten the 2 hexagon
socket head cap screws at the base of the turret.
17) Using a hex wrench, firmly tighten the 7 hexagon
socket head cap screws (NL3000: × 6) to secure
the turret.
18) Turn ON the main power.
19) Observing the lever type dial test indicators,
move the turret in the Z-axis direction using the
manual pulse generator to confirm the degree of
inclination. If necessary perform steps 13) to 16)
again to readjust.
15) Tal y como se muestra en el diagrama precedente, la
inclinación de la torreta se ajusta aflojando/ciñendo con
una llave hexagonal los 2 tornillos de fijación con
cabeza hexagonal (tirar/empujar). Tomando el indicador
de prueba mediante un calibrador de dial como
referencia, ajuste gradualmente la inclinación de la
torreta.
16) Ciña los 2 tornillos de cabeza cilíndrica con hueco
hexagonal situados en la base de la torreta utilizando
una llave hexagonal.
17) Sirviéndose de una llave hexagonal, apriete con fuerza
los 7 tornillos de cabeza cilíndrica con hueco hexagonal
(NL3000: × 6) para sujetar firmemente la torreta.
18) Conecte la alimentación principal.
19) Mientras observa el indicador de prueba mediante un
calibrador de dial, desplace la torreta en la dirección del
eje Z utilizando el generador manual de impulsos para
verificar el grado de inclinación. En caso necesario,
realice de nuevo los pasos
13) a 16) para efectuar otro
reajuste.
Hexagon Socket Head Cap Screws (2)
Tornillos de cabeza cilíndrica con hueco hexagonal (2)
Hexagon Socket Set Screws (2)
Tornillos de fijación con cabeza hexagonal (2)
For details on adjustment values, refer to the
separate Accuracy Test Results Chart sup-
plied with the machine.
Para mayor información acerca de los valores de
ajuste, consulte el gráfico de resultados de la
prueba de precisión suministrado con la máquina
por separado.
 Loading...