2-647MACHINE OPERATIONS OPERACIONES DE MECANIZADO
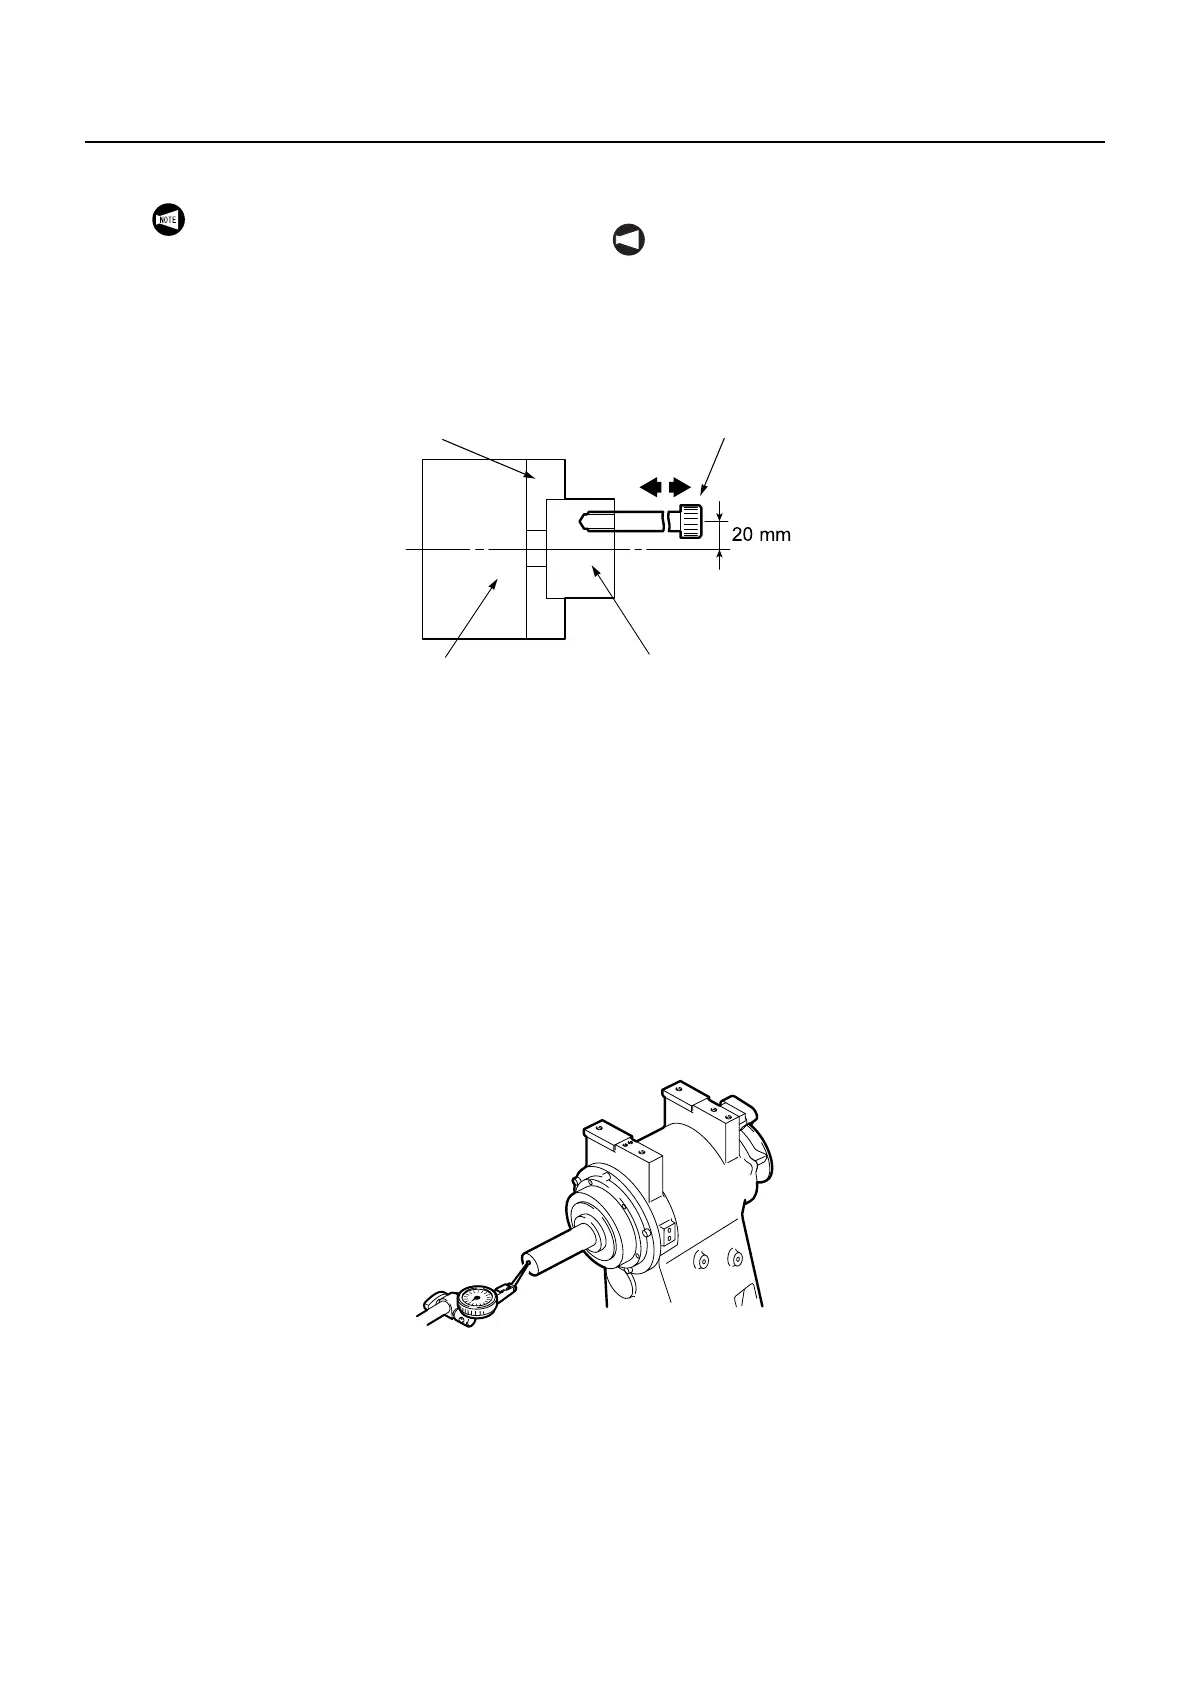
9) Mount a lever type dial test indicators on the jig. 9) Instale un indicador de prueba mediante un calibrador
dial en la mordaza.
10) Using the manual pulse generator, move the
headstock 2 into an easily accessible position for
adjustment.
11) Mount a workpiece in the headstock 2 chuck.
12) Turn OFF the main power.
13) Confirm headstock 2 centerline deviation accord-
ing to the following procedure.
a) Bring the lever type dial test indicators
stylus into contact with the workpiece and
set the scale to "0".
b) Turn the spindle a single rotation by hand
and confirm the tailstock center deviation.
10) Sirviéndose del generador manual de impulsos,
desplace el cabezal fijo 2 hasta una posición fácilmente
accesible para el ajuste.
11) Instale una pieza en el plato del cabezal fijo 2.
12) DESCONECTE la alimentación principal.
13) Compruebe la desviación de la línea central del cabezal
fijo 2 siguiendo los pasos que se muestran a
continuación.
a) Ponga en contacto la aguja del indicador de prueba
mediante un calibrador de dial con la pieza y
configure la escala a "0".
b) Haga girar el husillo manualmente una única vez y
compruebe la desviación del centro del
contrapunto.
Mounting a lever type dial test indicators on the
spindle with a magnet stand will result in
measurement inaccuracy due to gravitational
force. Use a lever type dial test indicators
mounting jig at all times when performing this
procedure.
NOT A
La instalación de un indicador de prueba mediante un
calibrador de dial en el husillo con un soporte
magnético provocará una imprecisión en la medición
debido a la fuerza de la gravedad. Utilice siempre una
mordaza de instalación del indicador de prueba
mediante un calibrador de dial cuando lleve a cabo
este procedimiento.
Soft Jaw
Mordazas blandas
M10 Cap Bolt
M10 Perno de cabeza
Chuck
Plato
Appropriate Sized Workpiece
Pieza de tamaño adecuado
 Loading...