2-649MACHINE OPERATIONS OPERACIONES DE MECANIZADO
17) While observing the lever type dial test indicators,
adjust headstock 2 according to the following pro-
cedure.
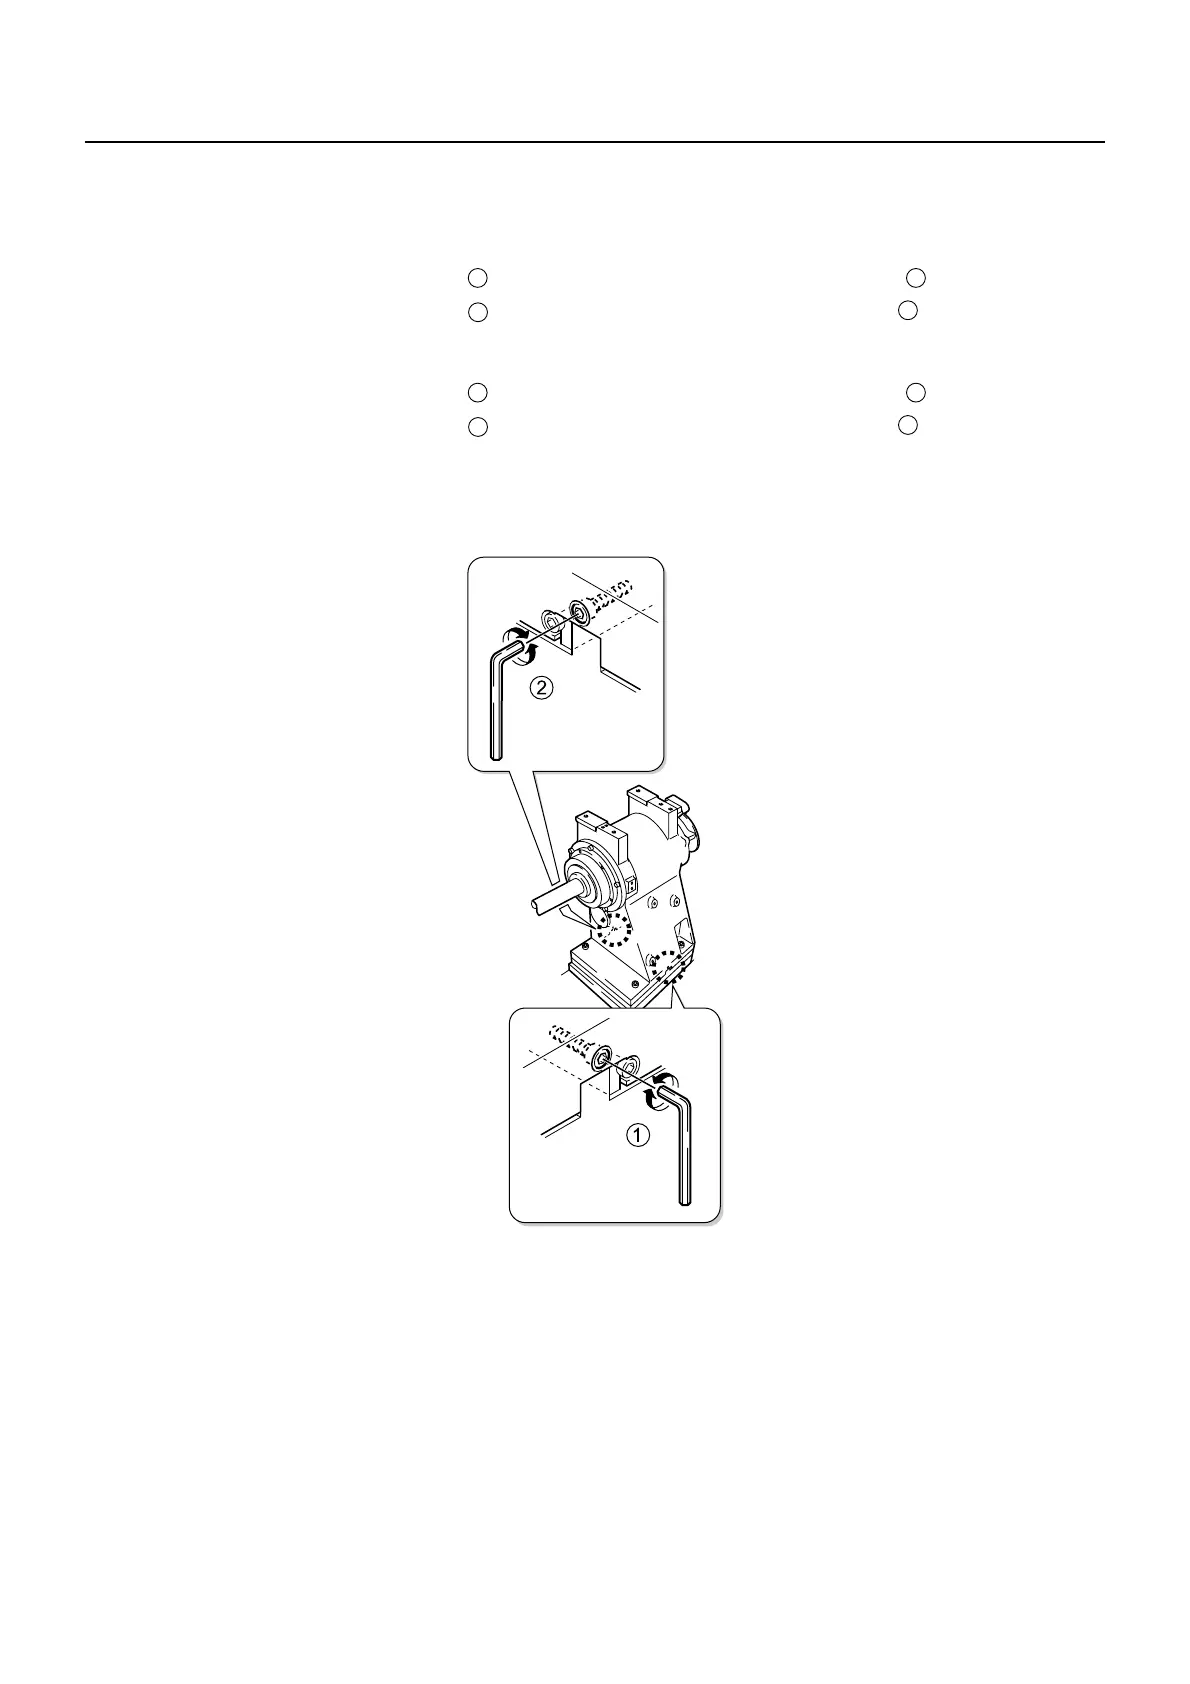
<To Adjust Headstock 2 Toward the Turret>
a) Loosen adjustment screw
b) Tighten adjustment screw
<To Adjust Headstock 2 Toward the Operator
Side>
a) Loosen adjustment screw
b) Tighten adjustment screw
18) Confirm that the tailstock has been adjusted the
required distance using the lever type dial test
indicators. Repeat step
17) until the adjustment
reaches the required distance.
17) Mientras observa el indicador de prueba mediante un
calibrador de dial, ajuste el cabezal 2 siguiendo los
pasos que se muestran a continuación.
<Para ajustar el cabezal fijo 2 hacia la torreta>
a) Afloje el tornillo de ajuste
b) Ciña el tornillo de ajuste
<Para ajustar el cabezal fijo 2 hacia el lateral del
operador>
a) Afloje el tornillo de ajuste
b) Ciña el tornillo de ajuste
18) Compruebe que el contrapunto se haya ajustado a la
distancia necesaria utilizando los indicadores de prueba
mediante un calibrador de dial. Repita el paso
17) hasta
que el ajuste alcance la distancia deseada.
19) Using a hex wrench, tighten the gib adjustment
screw on the turret side.
20) Tighten the 4 hexagon socket head cap screws
securing headstock 2.
21) As in step 13), confirm the center adjustment of
headstock 2. If necessary, repeat steps
14) to 20) to readjust.
22) Remove the lever type dial test indicators from
the mounting jig.
19) Sirviéndose de una llave hexagonal, apriete el tornillo de
ajuste de la chaveta situado en el lateral de la torreta.
20) Apriete los 4 tornillos de cabeza cilíndrica con hueco
hexagonal que sujetan el cabezal fijo 2.
21) Al igual que en el paso 13), compruebe la regulación del
centro del cabezal fijo 2. En caso necesario, realice de
nuevo los pasos
14) a 20) para reajustar.
22) Retire el indicador de prueba mediante un calibrador de
dial de la mordaza de instalación.
1
2
2
1
1
2
2
1
 Loading...