Send documentation comments to mdsfeedback-doc@cisco.com
13-18
Cisco MDS 9000 Family Fabric Manager Configuration Guide
OL-17256-03, Cisco MDS NX-OS Release 4.x
Chapter 13 Using the CFS Infrastructure
CFS Regions
Step 3 Click the Create Row button on the toolbar.
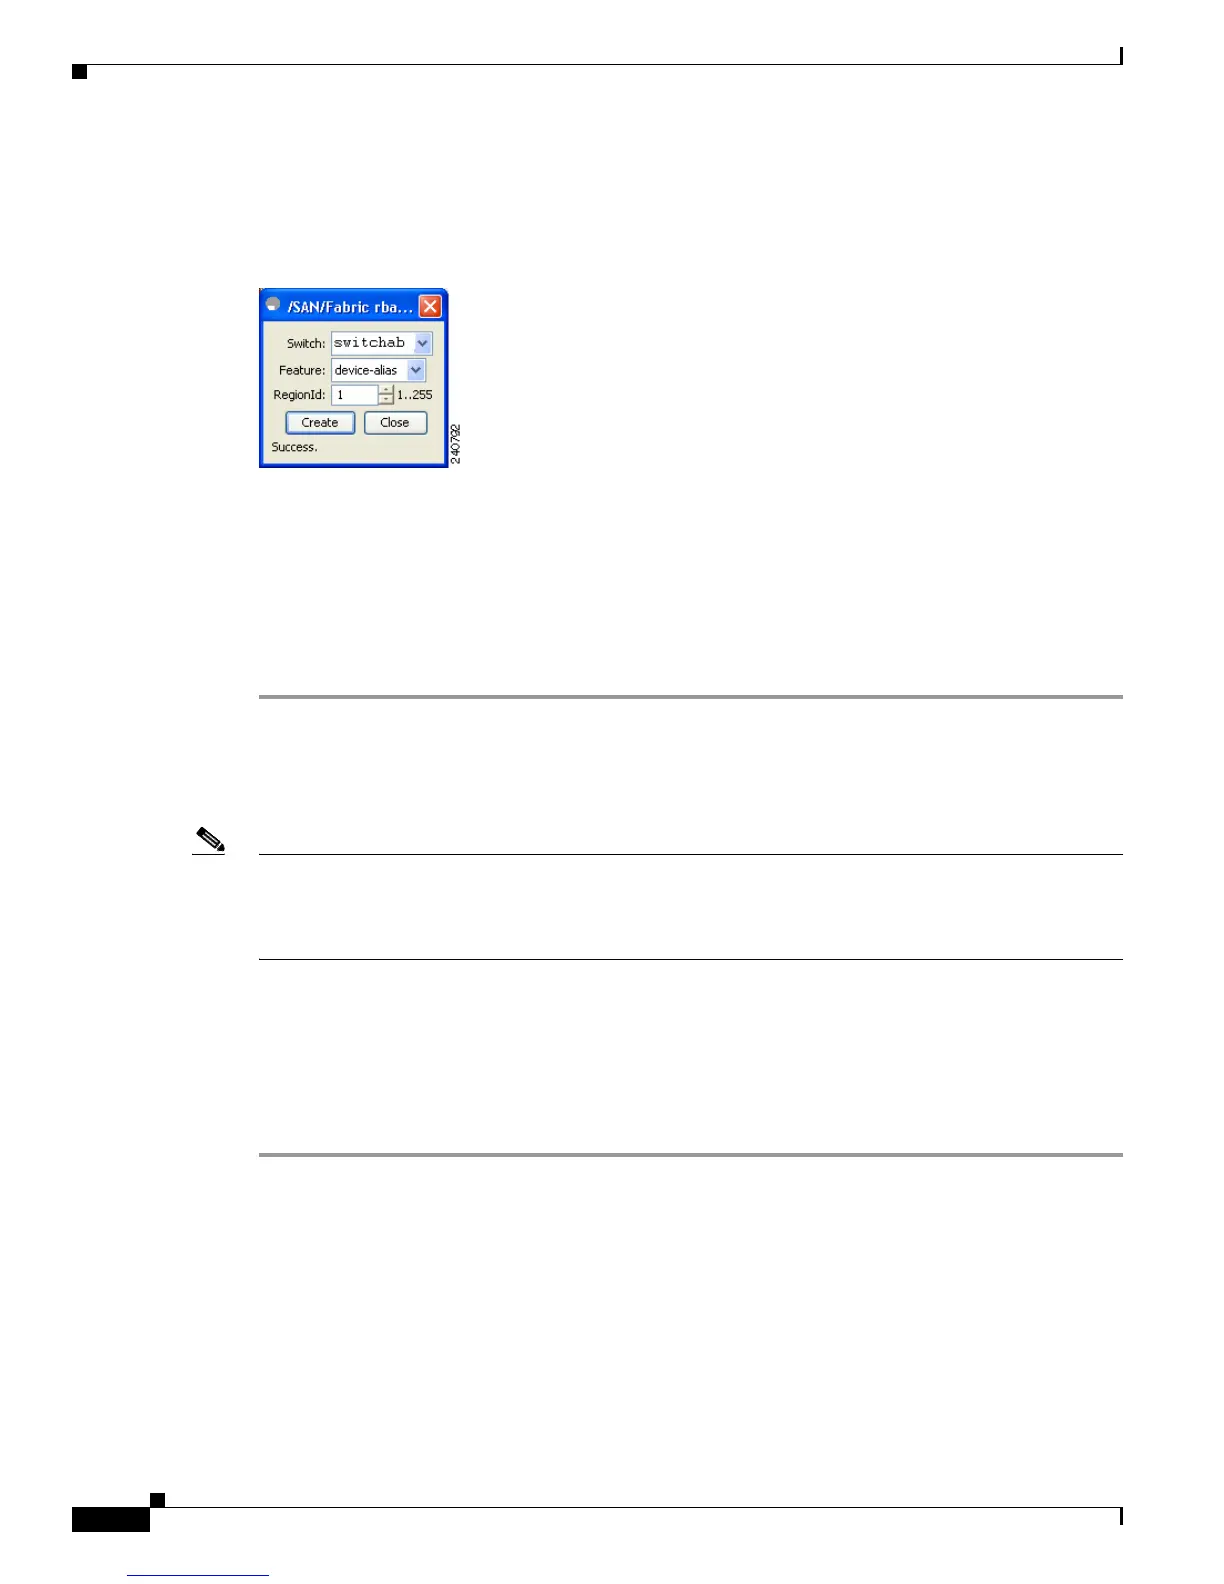
Figure 13-11 shows the Assign a Feature dialog box.
Figure 13-11 Assign a Feature Dialog Box
Step 4
From the drop-down box, select a switch.
The features running on the selected switch are listed in the Feature drop-down list.
Step 5 Select a feature on that switch to associate a region.
Step 6 From the RegionID list, select the region number to associate a region with the selected feature.
Step 7 Click Create to complete assignment of a switch feature to the region.
Upon successful assignment of feature, “Success” is displayed at the bottom of the dialog box.
When a feature is assigned to a new region using the Feature by Region tab, a new row with the new
region is created automatically in the table under the All Regions tab. Alternatively, you can create a
region using the All Regions tab.
Note In the Feature by Region tab, when you try to reassign a feature on a switch to another region by
clicking Create Row, an operation failed message is shown. The error message states that an entry
already exists. However, moving a feature to a different region is a different task and it is described in
the next section.
Moving a Feature to a Different Region
Before moving a feature to a new region, create the new region in the All Regions tab. That is, a new row
has to be added in the All Regions tab with the new Region ID.
To move a feature to a different region using Fabric Manager, follow these steps:
Step 1 Expand the Switches folder in the Physical Attributes pane and select CFS.
The information pane displays the Global, IP Multicast, Feature by Region, and All Regions tabs.
Step 2 Click the Feature by Region tab.
Figure 13-12 shows the Feature by Region tab, which lists all the switches along with their feature and
region details.
 Loading...


