Send documentation comments to mdsfeedback-doc@cisco.com
44-30
Cisco MDS 9000 Family Fabric Manager Configuration Guide
OL-17256-03, Cisco MDS NX-OS Release 4.x
Chapter 44 Configuring IPsec Network Security
Crypto IPv4-ACLs
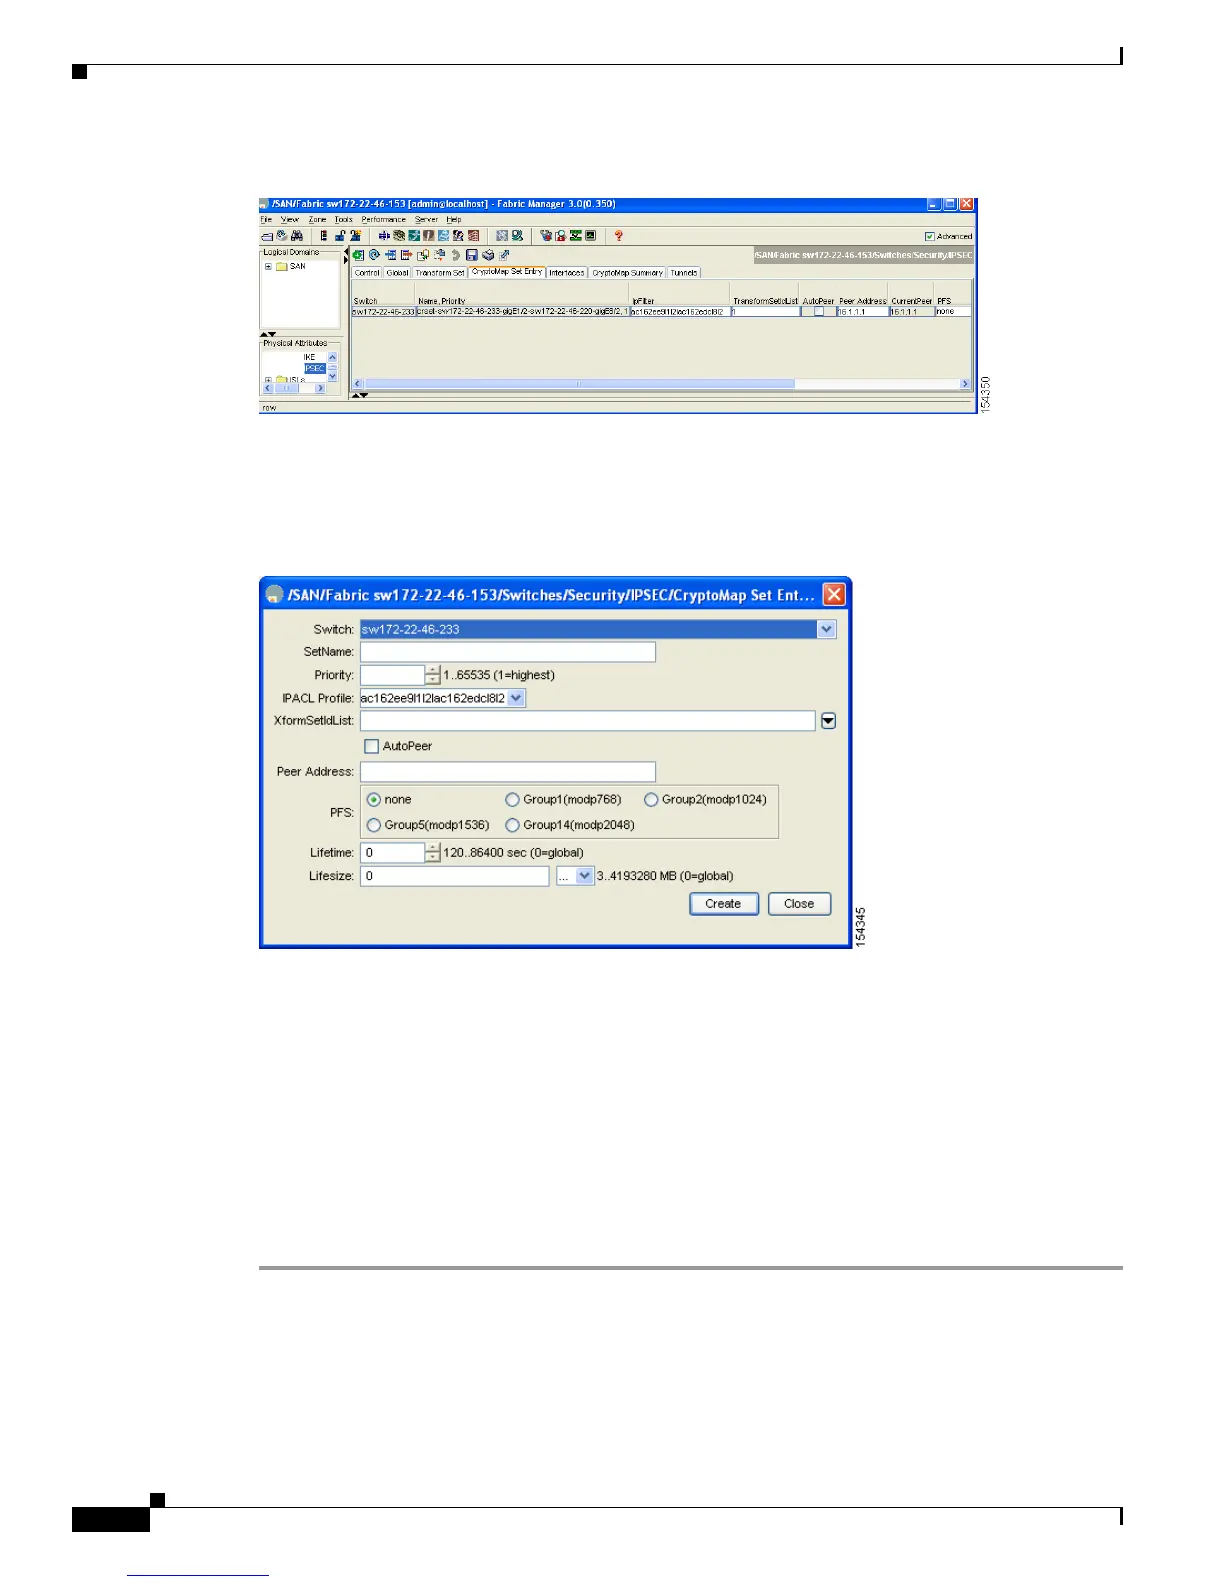
Figure 44-22 Existing Crypto Maps
Step 3 (Optional) Click Create Row to create a crypto map entry.
You see the Create Crypto Map dialog box shown in Figure 44-23.
Figure 44-23 Create Crypto Map Dialog Box
Step 4 Select the switch that you want to configure or modify. If you are creating a crypto map, set the setName
and priority for this crypto map.
Step 5 Select the IPv4-ACL Profile and TransformSetIdList from the drop-down list for this crypto map.
Step 6 (Optional) Check the AutoPeer check box or set the peer address if you are creating a crypto map. See
the
“About the AutoPeer Option” section on page 44-32.
Step 7 Choose the appropriate PFS selection. See the “About Perfect Forward Secrecy” section on page 44-34.
Step 8 Supply the Lifetime and LifeSize. See the “About SA Lifetime Negotiation” section on page 44-30.
Step 9 Click Create if you are creating a crypto map, or click Apply Changes if you are modifying an existing
crypto map.
About SA Lifetime Negotiation
You can override the global lifetime values (size and time) by configuring an SA-specific lifetime value.
 Loading...


