Send documentation comments to mdsfeedback-doc@cisco.com
26-7
Cisco MDS 9000 Family Fabric Manager Configuration Guide
OL-17256-03, Cisco MDS NX-OS Release 4.x
Chapter 26 Configuring and Managing VSANs
VSAN Configuration
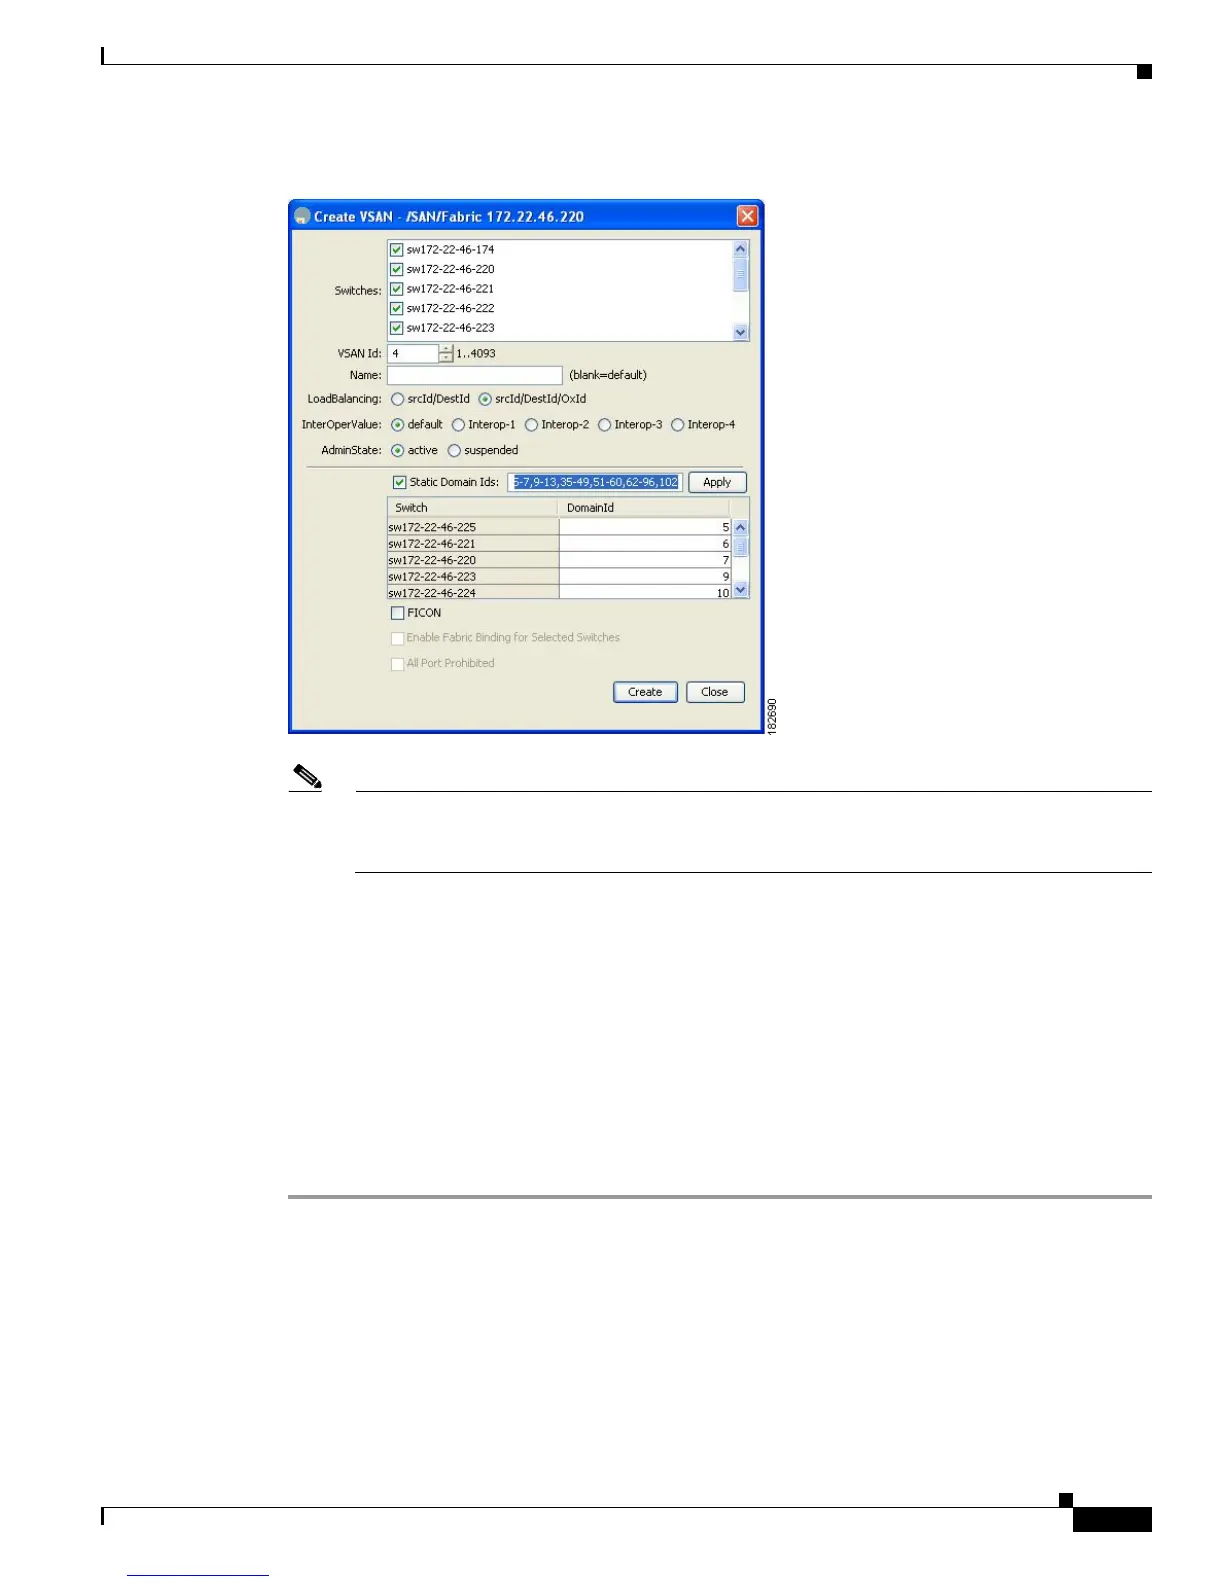
Figure 26-5 Create VSAN Dialog Box
Note As of Cisco SAN-OS Release 3.1(2) and later, if you check the Static Domain IDs check box,
Fabric Manager creates the VSAN in suspended mode and then automatically activates the
VSAN.
Step 2 Check the switches that you want in this VSAN.
Step 3 Fill in the VSAN Name and VSAN ID fields.
Step 4 Set the LoadBalancing value and the InterOperValue.
Step 5 Set the Admin State to active or suspended.
Step 6 Check the Static Domain Ids check box to assign an unused static domain ID to the VSAN.
Step 7 (Optional) Select the FICON and Enable Fabric Binding for Selected Switches options if you want
these features enabled.
See “Configuring FICON” section on page 36-1 and Configuring Fabric Binding, page 47-1 for details.
Step 8 Complete the fields in this dialog box and click Create to add the VSAN or click Close.
About Port VSAN Membership
Port VSAN membership on the switch is assigned on a port-by-port basis. By default each port belongs
to the default VSAN. You can assign VSAN membership to ports using one of two methods:
• Statically—By assigning VSANs to ports.
See the “Assigning Static Port VSAN Membership” section on page 26-8.
 Loading...


