Send documentation comments to mdsfeedback-doc@cisco.com
14-14
Cisco MDS 9000 Family Fabric Manager Configuration Guide
OL-17256-03, Cisco MDS NX-OS Release 4.x
Chapter 14 Configuring FlexAttach Virtual pWWN
Using the Server Admin FlexAttach Wizards
Step 5 Repeat Step 3 through Step 4 for each switch.
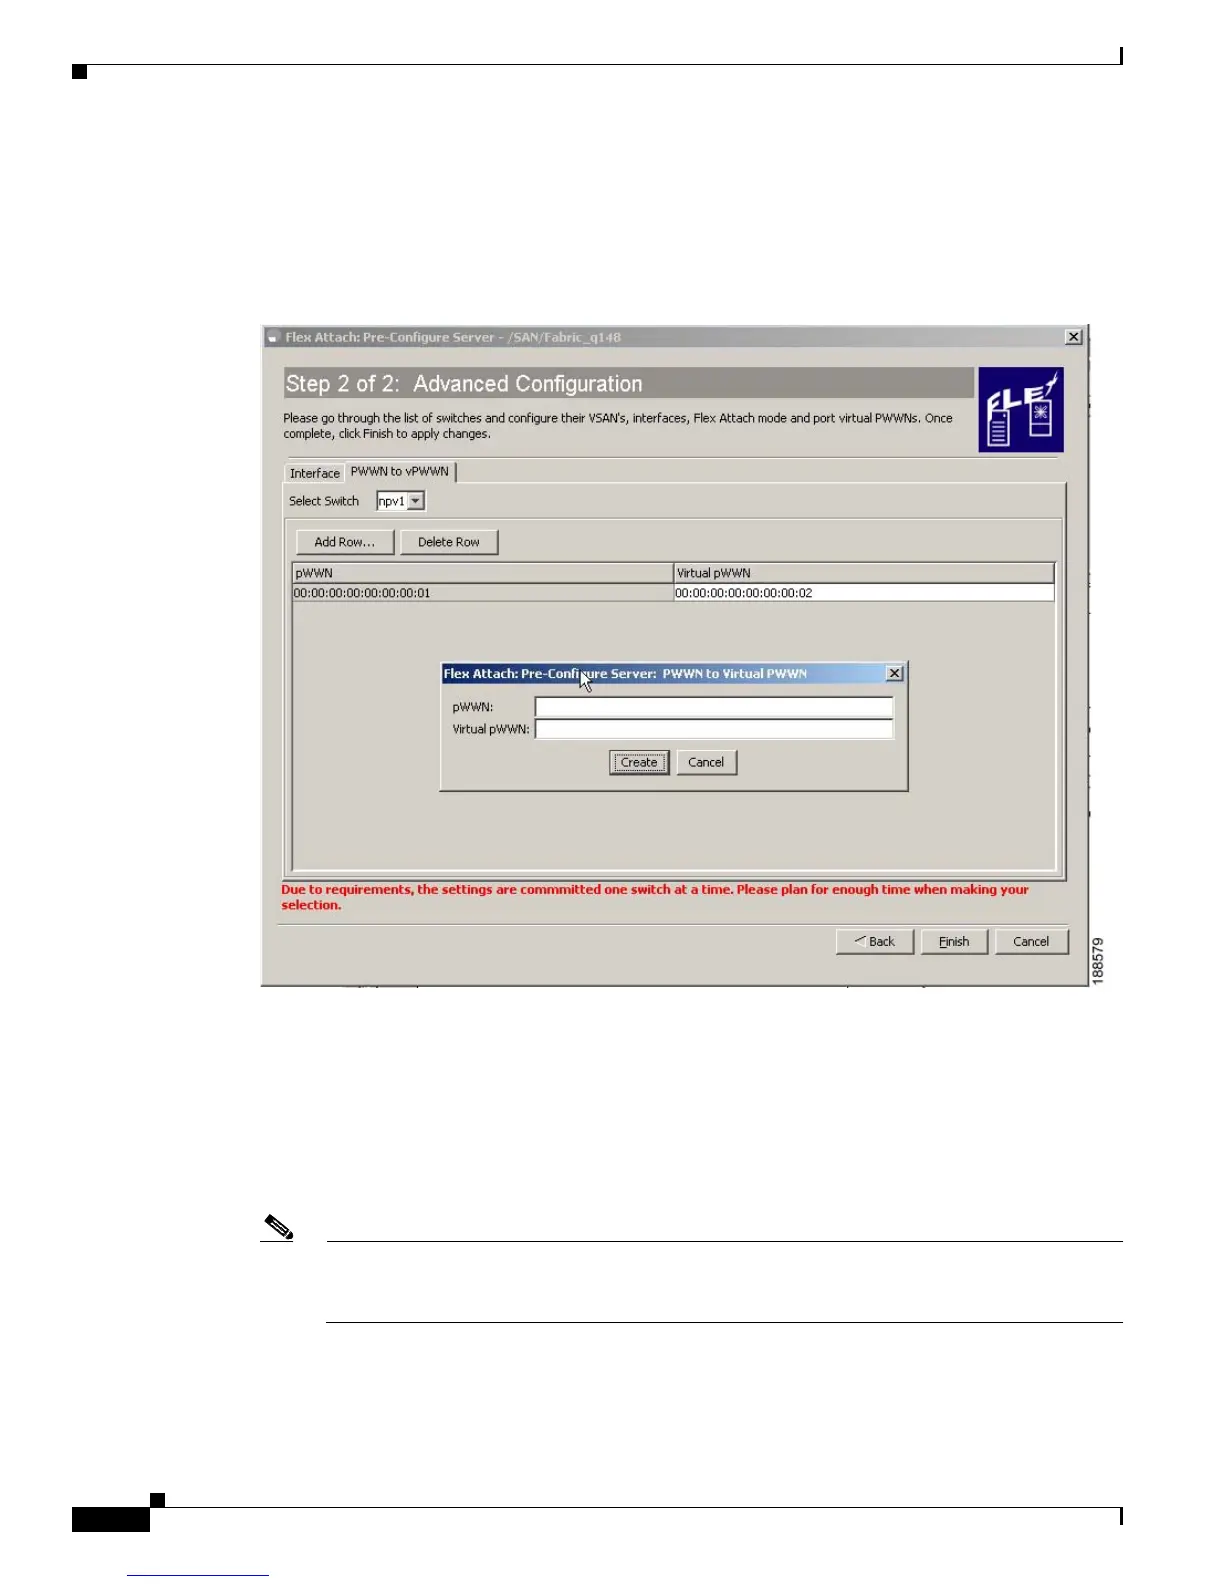
Step 6 Click the PWWN to vPWWN tab to configure pWWN to vPWWN mapping.
The Advanced Configuration window is displayed. (Figure 14-13)
Figure 14-13 Pre-Configure Server - PWWN to vPWWN Configuration
Step 7
From the Select Switch drop-down list, select the switch to display the existing pWWN to Virtual
PWWN mapping table for the CFS region to which the switch belongs, and then follow these steps to
add vPWWN to vPWWN automap entries:
a. Click Add Row to display the PWWN to vPWWN dialog box.
b. Enter the pWWN and the corresponding virtual pWWN.
c. Click Create to add the mapping list.
Note To delete an existing mapping, select the row, and then click Delete Row. Only one pWWN to
vPWWN table can be updated at a time. To update the table for each CFS region, perform
Step 6 though Step 8 for a switch from each CFS region.
Step 8 Click Finish to complete the configurations for each port.
 Loading...


