- 1089 -
5.6.2 LED Indicators
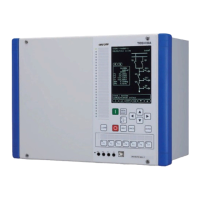
The LED indicators #1 and #2 are used to indicate the IED statuses. The others (#3 to #26) are
provided to indicate statuses, which the user wishes to check; the settings or by the PLC
function can control to indicate the statuses. The user can make a new indicator label using
the label maker of the GR-TIEMS®. (See
Chapter Engineering tool
)
The LED indicators‡ (#3 to #26) are also provided as user-programmable indicators.
Figure 5.6-2 shows the schematic diagrams. Each LED indicator can be lit and controlled using
a logic-gate-switch setting and others. For simplicity, we discuss setting the LED indicator #3
only, but the user can take account that setting the other LED indicators (#4 to #26) is the
same as the #3. Table 5.6-1 shows the LED indicator settings; Table 5.6-2 shows the signal
monitoring points on all LED indicator logics.
‡Note: Setting menus of the LED indicator are also discussed in Chapter
User interface:
I/O setting sub-menu
.
(i) Selection of input signals
The LED indicator (#3) is lit by entering signals from other functions; eight ports are provided
for the entering signals, designated as
input-signal1
to
input-signal8
. The user should ensure
one or more DataIDs are set for the
input-signal1
to
input-signal8
. Entering signals are
designated using DataIDs, respectively; the user should set respective DataIDs for the settings
[Input signal1] to [Input signal8].
(ii) Logic gate switch
In the LED indicator logic #3 a logic scheme is provide for the eight entering signals; the
entering signals are grouped by the selection using scheme switch [LOGIC-SW] for which the
user should set either AND, OR or XOR.
 Loading...
