Layer 2,3,IPv6+QoS Switch
_____________________________________________________________________________
Layer 2,3,IPv6+QoS Network Switch User Manual Version 0.1 Page: 829/970
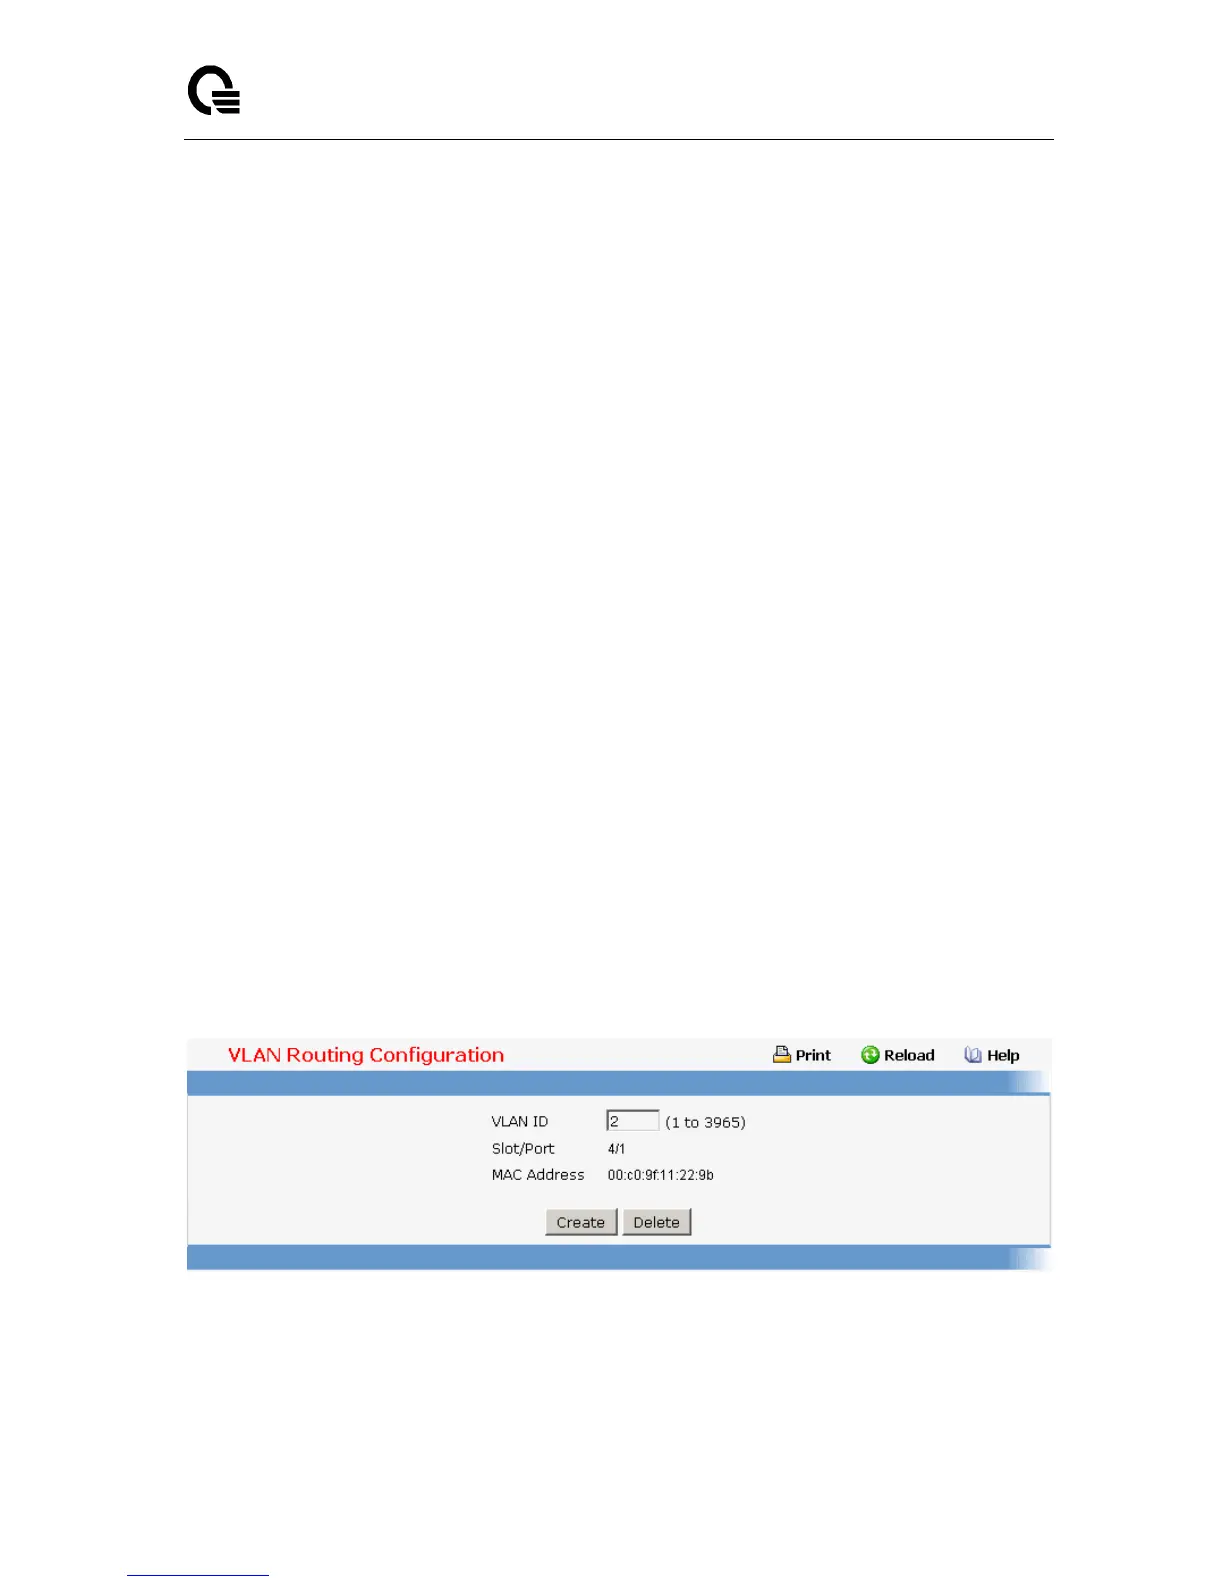
VLAN ID - Enter the ID of a VLAN you want to configure for VLAN Routing. Initially, the
field will display the ID of the first VLAN. After you enter a new VLAN ID and click on the
Create button the non-configurable data will be displayed. See below for detailed
instructions on how to use that data to complete the configuration of the VLAN.
Non-Configurable Data
Slot/Port - The interface assigned to the VLAN for routing.
MAC Address - The MAC Address assigned to the VLAN Routing Interface
Command Buttons
Create - Send the updated configuration to the switch. Configuration changes take effect
immediately. These changes will not be retained across a power cycle unless a save is
performed.
Delete - Remove the VLAN Routing Interface specified in the VLAN ID input field from
the router configuration.
Instructions for creating a VLAN
Enter a new VLAN ID in the field labeled VLAN ID.
Click on the Create button. The page will be updated to display the interface and MAC
address assigned to this new VLAN. The IP address and Subnet Mask fields will be
0.0.0.0.
Note the interface assigned to the VLAN.
Use the index pane to change to the IP Interface Configuration page.
Select the interface assigned to the VLAN. The IP address and Subnet Mask fields
will be 0.0.0.0.
Enter the IP address and subnet mask for the VLAN.
Select the Submit button.
Change back to the VLAN Routing Summary page. The new VLAN should appear in
the table with the correct IP address and subnet mask assigned.
11.2.3.9.2. Viewing VLAN Routing Summary Information
Non-Configurable Data