RUGGEDCOM ROX II
User Guide
Chapter 5
Setup and Configuration
Adding a Prefix Entry 515
1. Change the mode to Edit Private or Edit Exclusive.
2. Depending on the dynamic routing protocol being configured, navigate to routing » dynamic » ospf »
filter » {name} » entry, where {name} is the name of the prefix list.
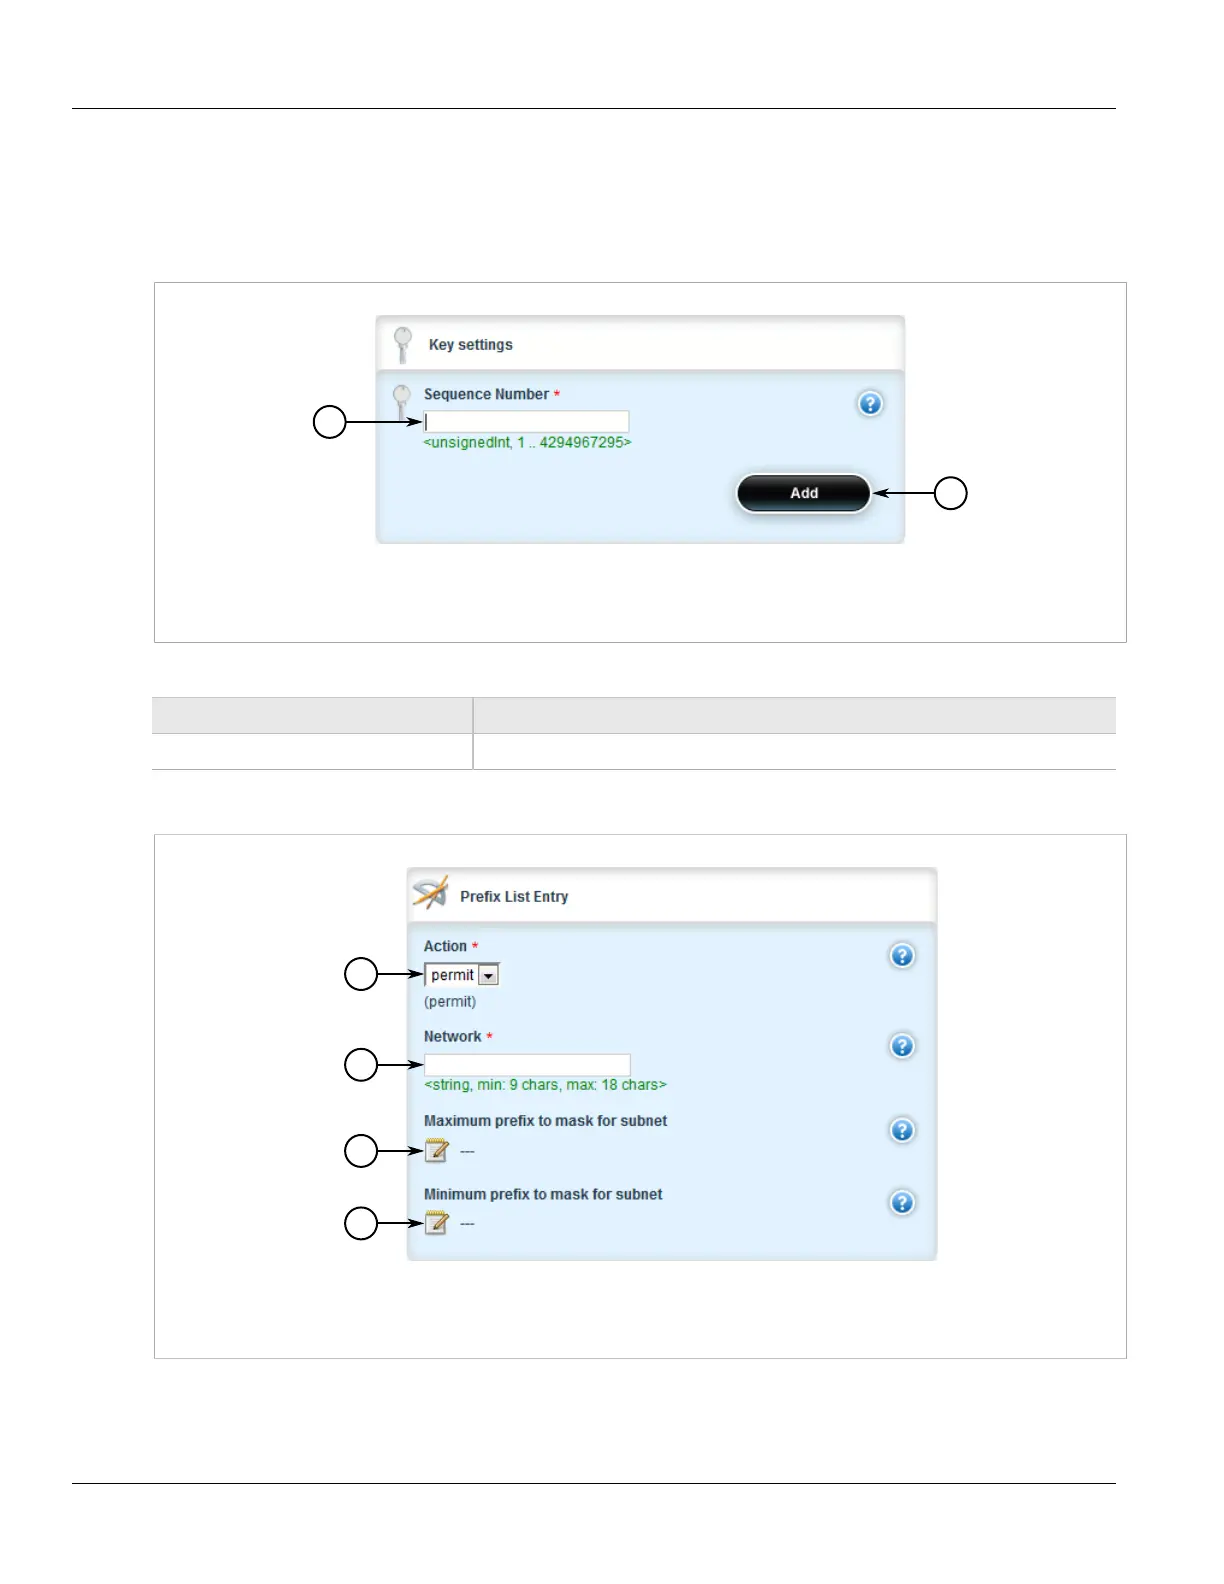
3. Click <Add entry>. The Key Settings form appears.
Figure 590: Key Settings Form
1. Sequence Number Box 2. Add Button
4. Configure the following parameter(s) as required:
Parameter Description
Sequence Number Sequence number of the entry.
5. Click Add to create the new entry. The Prefix List Entry form appears.
Figure 591: Prefix List Entry Form
1. ActionList 2. Network Box 3. Maximum Prefix to Mask for Subnet 4. Minimum Prefix to Mask for Subnet
6. Configure the following parameter(s) as required:
 Loading...