Chapter 5
Setup and Configuration
RUGGEDCOM ROX II
User Guide
518 Viewing a List of Areas
Section 5.21.5.1
Viewing a List of Areas
To view a list of areas configured for dynamic OSPF routes, navigate to routing » dynamic » ospf » area. If
areas have been configured, the OSPF Area table appears.
Figure 594: OSPF Area Table
If no areas have been configured, add areas as needed. For more information, refer to Section 5.21.5.2, “Adding
an Area”.
Section 5.21.5.2
Adding an Area
To add an area for dynamic OSPF routes, do the following:
1. Change the mode to Edit Private or Edit Exclusive.
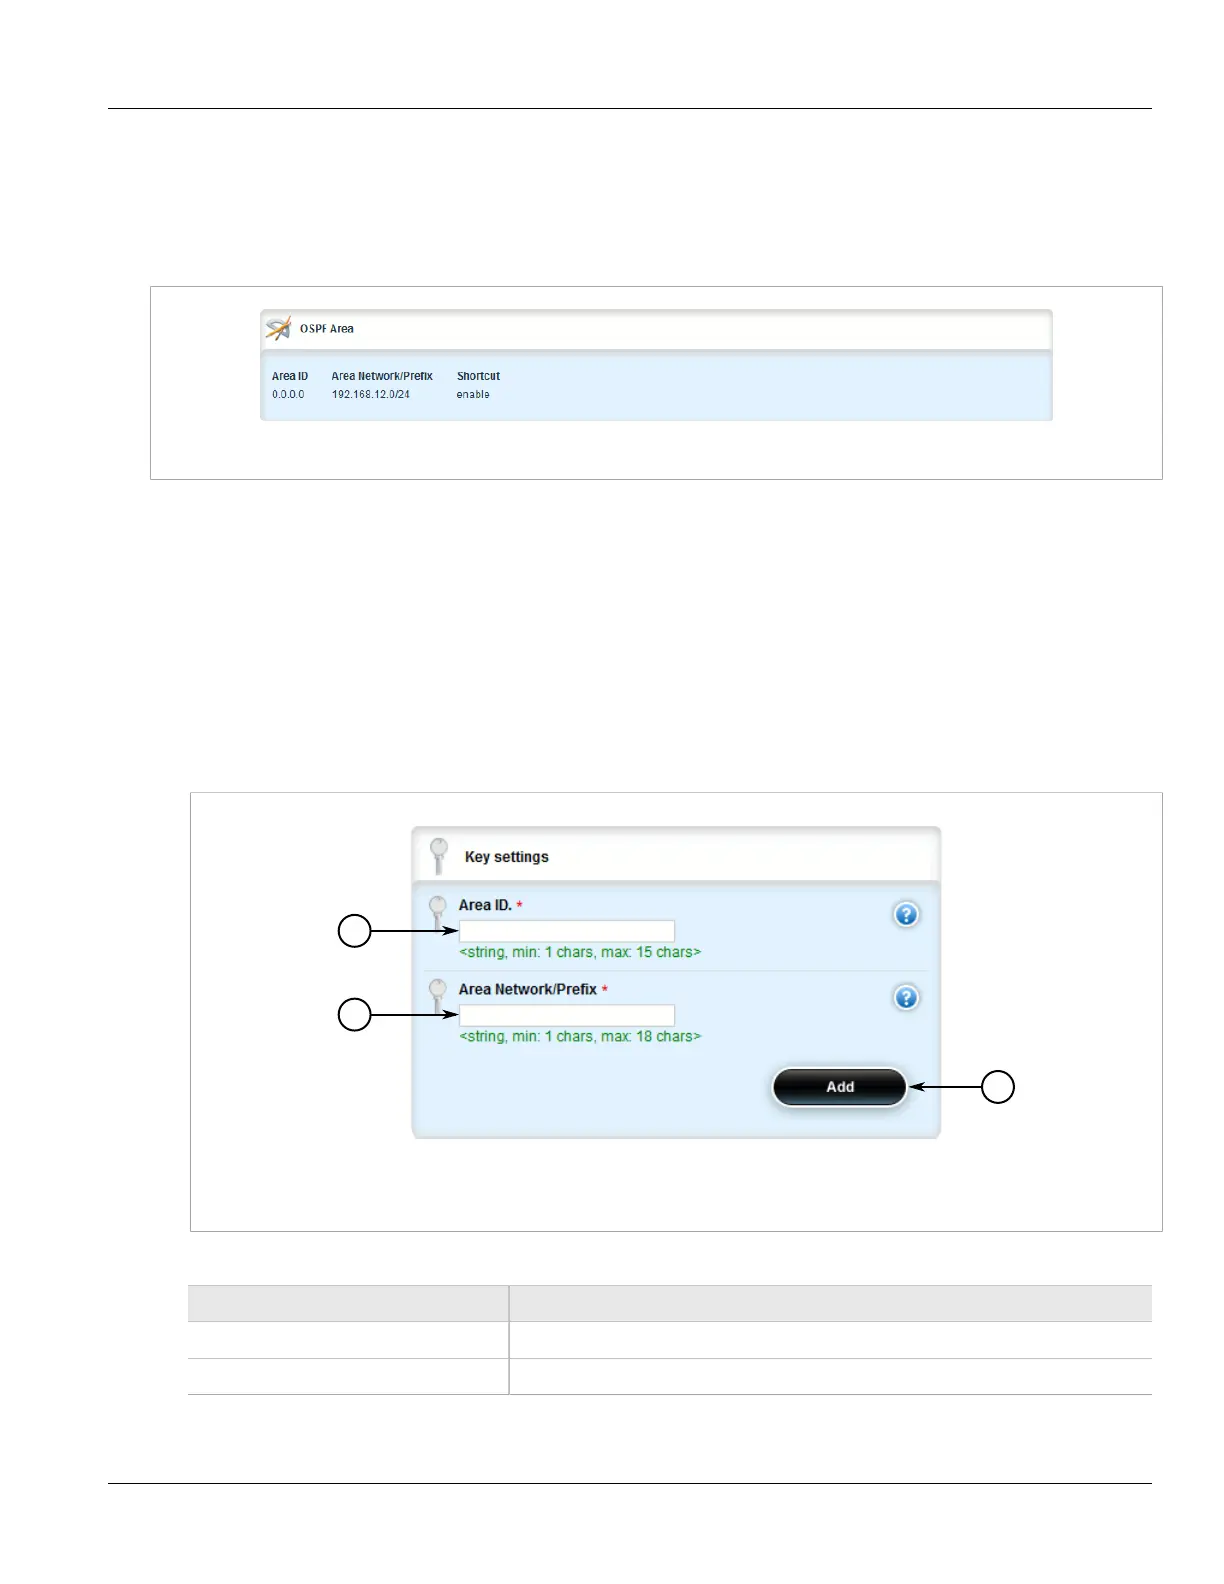
2. Navigate to routing » dynamic » ospf » area and click <Add area>. The Key Settings form appears.
Figure 595: Key Settings Form
1. Area ID Box 2. Area Network/Prefix Box 3. Add Button
3. Configure the following parameter(s) as required:
Parameter Description
Area ID The OSPF Area ID (format: A.B.C.D).
Area Network/Prefix The OSPF area network/prefix.
4. Click Add to create the new area. The OSPF Area form appears.
 Loading...