Chapter 5
Setup and Configuration
RUGGEDCOM ROX II
User Guide
616 Configuring Certificates and Keys
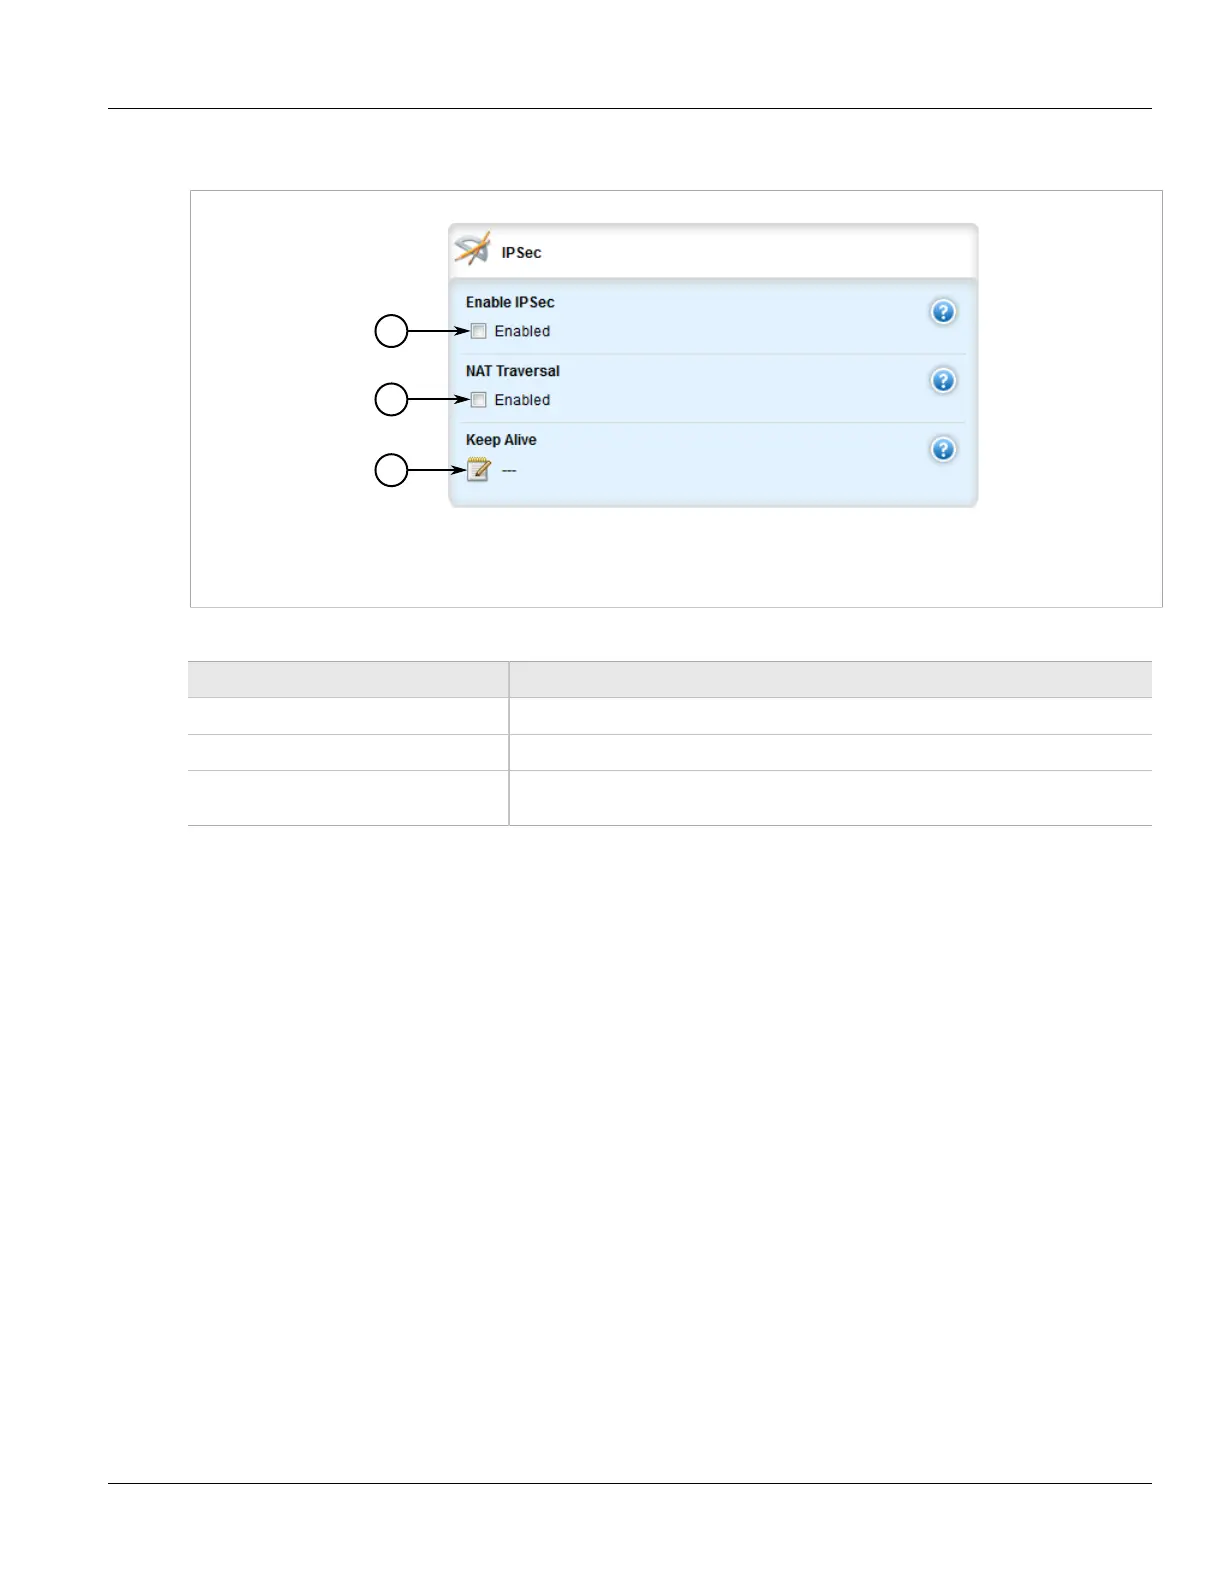
2. Navigate to tunnel » ipsec. The IPsec and Syslog forms appear.
Figure 717: IPsec Form
1. Enable IPsec Check Box 2. NAT Traversal Check Box 3. Keep Alive Box
3. Configure the following parameter(s) as required:
Parameter Description
Enable IPSec Enables IPsec.
NAT Traversal Enables NAT Traversal.
Keep Alive The delay (in seconds) for sending keepalive packets to prevent a NAT router from
closing its port when there is not enough traffic on the IPsec connection.
4. Configure one or more pre-shared keys. For more information, refer to Section 5.28.5.2, “Adding a Pre-
Shared Key”.
5. Configure one or more encrypted connections. For more information, refer to Section 5.28.6.2, “Adding a
Connection”.
6. Click Commit to save the changes or click Revert All to abort. A confirmation dialog box appears. Click OK
to proceed.
7. Click Exit Transaction or continue making changes.
Section 5.28.3
Configuring Certificates and Keys
To configure certificates and keys for IPsec Tunnels, do the following:
1. Change the mode to Edit Private or Edit Exclusive.
2. Add a CA certificate and Certificate Revocation List (CRL). For more information, refer to Section 4.7.1.3,
“Adding a CA Certificate and CRL”
3. Add a private key. For more information, refer to Section 4.7.2.2, “Adding a Private Key”.
4. Add a certificate. For more information, refer to Section 4.7.4.3, “Adding a Certificate”.
5. Add a public key. For more information, refer to Section 4.7.3.2, “Adding a Public Key”.
 Loading...