Chapter 5
Setup and Configuration
RUGGEDCOM ROX II
User Guide
560 Configuring an RP Candidate
1. Change the mode to Edit Private or Edit Exclusive.
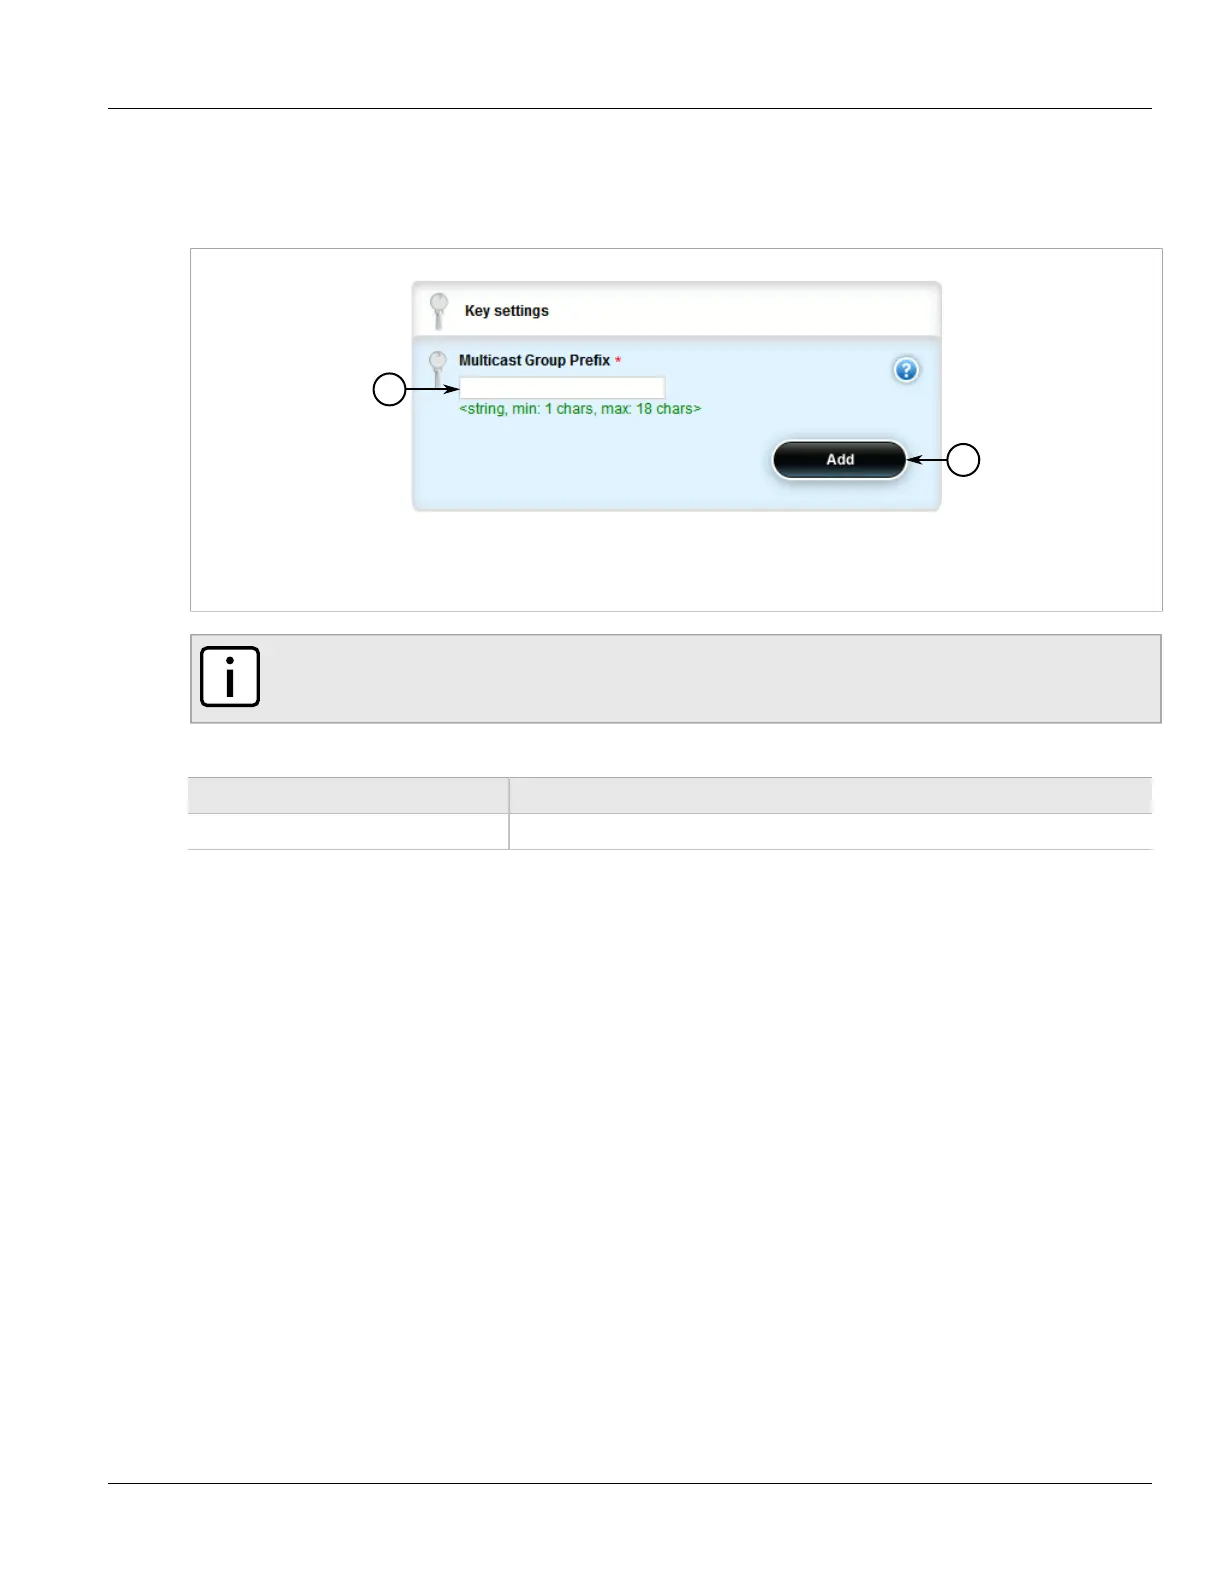
2. Navigate to routing » multicast » dynamic » pim-sm » group-prefix and click <Add group-prefix>. The
Key settings form appears.
Figure 652: Key Settings Form
1. Multicast Group Prefix Box 2. Add Button
NOTE
A maximum of 20 group prefixes can be defined for PIM-SM.
3. Configure the following parameters as required:
Parameter Description
Multicast Group Prefix Multicast group prefix (for example, 225.1.2.0/24).
4. Click Commit to save the changes or click Revert All to abort. A confirmation dialog box appears. Click OK
to proceed.
5. Click Exit Transaction or continue making changes.
Section 5.24.6.3
Configuring an RP Candidate
To configure an RP candidate, do the following:
1. Change the mode to Edit Private or Edit Exclusive.
2. Navigate to routing » multicast » dynamic » pim-sm » rp-candidate. The RP Candidate form appears.
3. Press the + symbol in the menu next to rp-candidate to open the form fields.
 Loading...