January 2007
4-51
WorkCentre 7132
REP 5.1.1
Repairs/Adjustments
Reversion 4.0
REP 5.1.1 Fuser Unit
Parts List on PL 7.1
Removal
WARNING
To avoid personal injury or shock, do not perform repair or adjustment with electrical
power applied to the machine.
CAUTION
Check the Job Status to ensure that there are no jobs in progress.
CAUTION
Do not start servicing until the Fuser has cooled down.
1. Switch off the power.
2. Open the L/H Upper Cover Assembly. (PL 2.6).
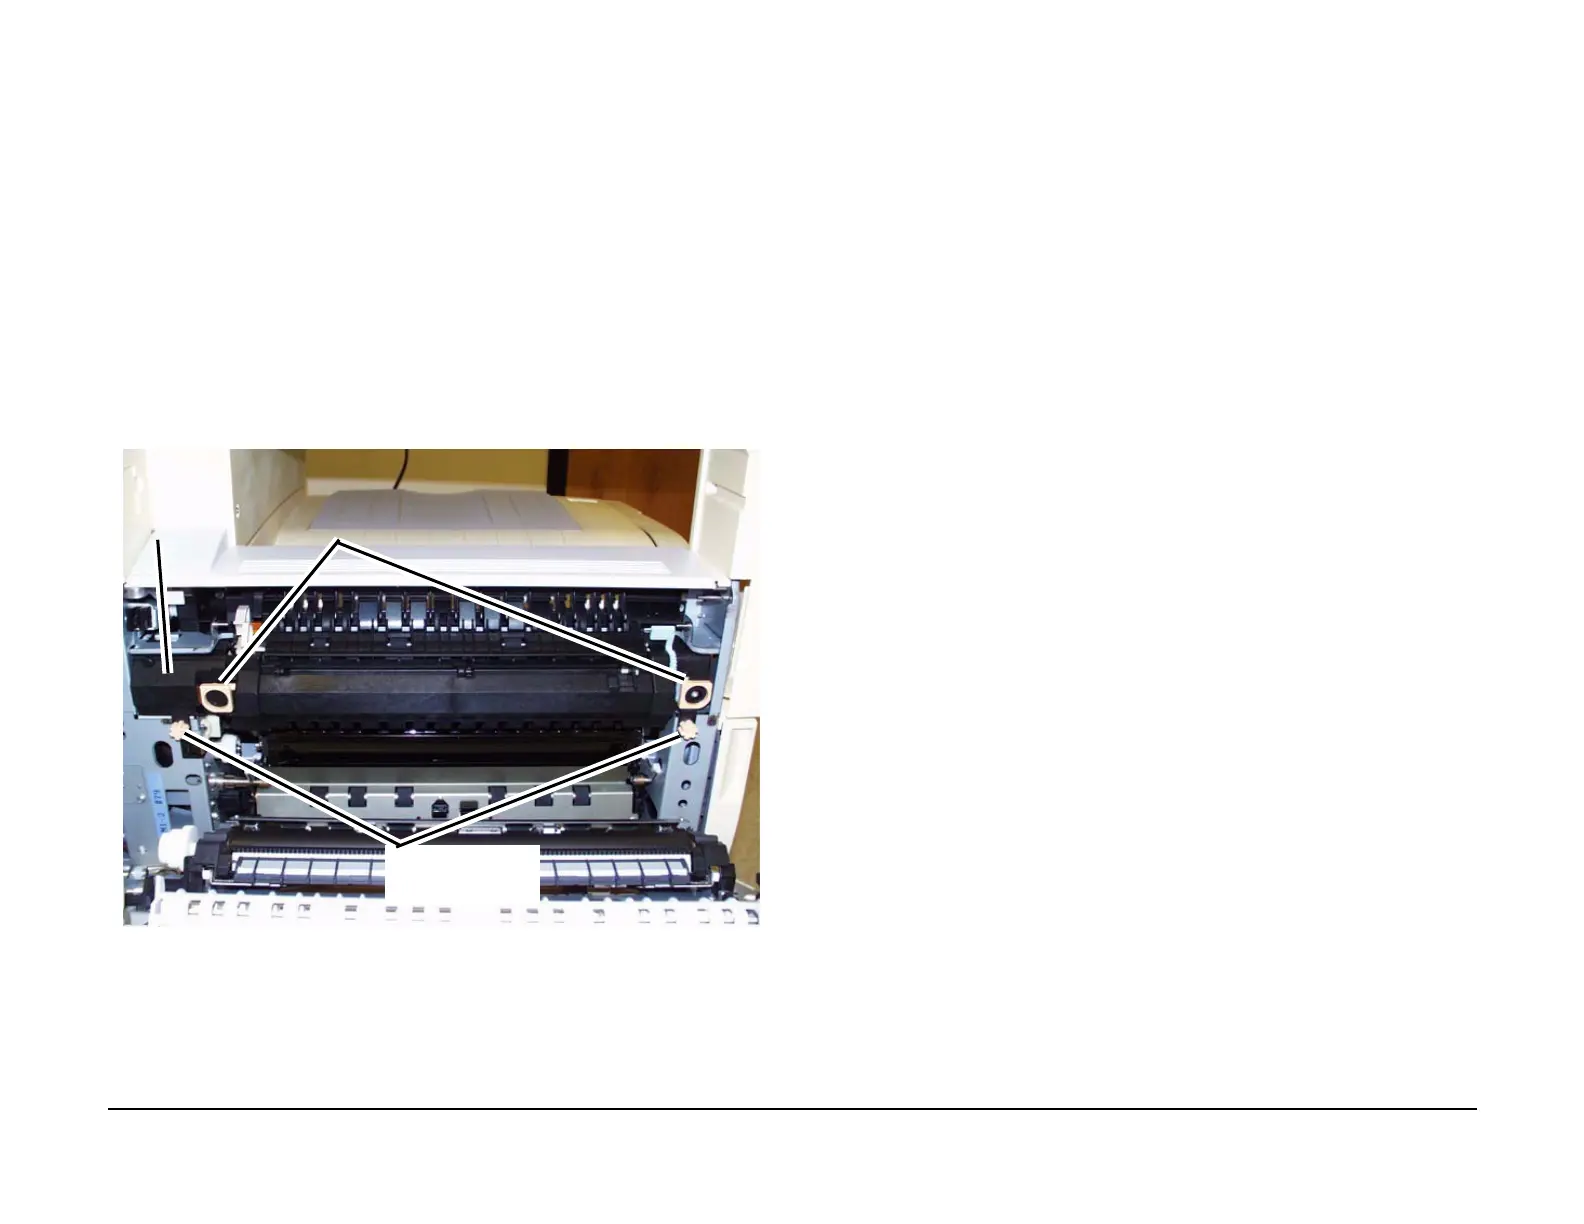
3. Remove the Fuser Unit. (Figure 1)
1. Loosen the knobs (2).
2. Pull the Fuser by the handles (2).
Figure 1 Removing the Fuser
Replacement
1. To install, carry out the removal steps in reverse order.
2. When replacing the Fuser;
a. Press the Machine status button.
b. Select Supplies.
c. Scroll to and select Fuser Smart Kit.
d. Select Reset Counter.
2
Pull the Fuser out by the handles
NOTE: The con-
nector will offer
some resistance to
Fuser removal.
1
Loosen the knobs

 Loading...


