January 2007
4-230
WorkCentre 7132
REP 22.9.6
Reversion 4.0
Repairs/Adjustments
REP 22.9.6 Eject Shaft Assembly
Parts List on PL 22.9
Removal
WARNING
To avoid personal injury or shock, do not perform repair or adjustment with electrical
power applied to the machine.
CAUTION
Before turning OFF the power switch, note the following to prevent loss of customer data.
[with the FAX function]
Check that the “Job in Memory” lamp is off. Press the “Job Status” button and check that no job
is in progress.
[with the Printer function]
Check that “Ready to print/send” is displayed on the Control Panel.
1. Remove the A-Finisher from the machine.
2. Remove the Compile Assembly. (REP 22.9.1)
3. Remove the Bracket Assembly. (Figure 1)
(1)Release Clamps (2) and remove the wire.
(2)Remove Screws (2).
(3)Remove Bracket Assembly.
Figure 1 Removing the Bracket Assembly (j0fa42272)
4. Remove the KL-Clips from the Eject Shaft. (Figure 2)
(1)Remove KL-Clips (2).
Figure 2 Removing the KL-Clips (j0fa42273)
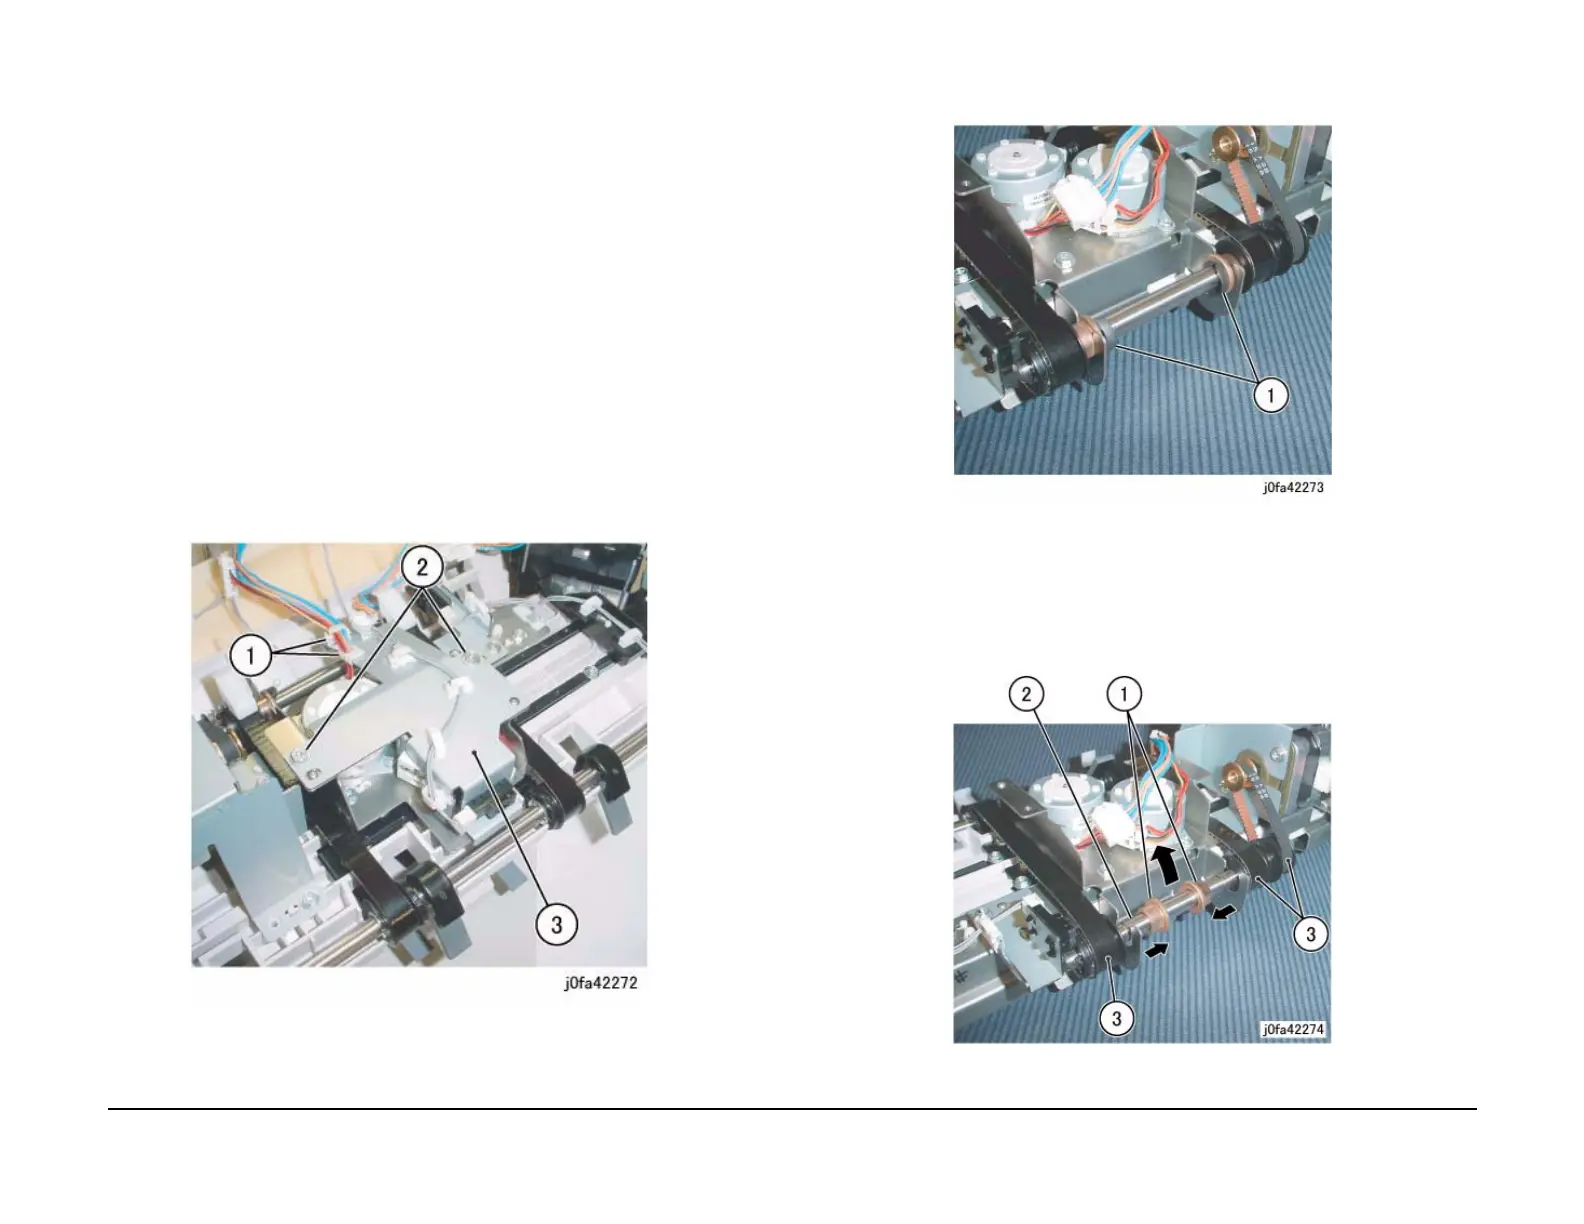
5. Remove the Eject Shaft from the Front/Rear Tamper Motor Assembly. (Figure 3)
(1)Move Bearings (2) in the direction of the arrow.
(2)Remove Eject Shaft in the direction of the arrow.
(3)Remove Belt from Pulley.
Figure 3 Removing the Eject Shaft (j0fa42274)

 Loading...


