May 2006
4-59
WorkCentre 7132
REP 9.1.1
Repairs/Adjustments
Launch Version 3.0
REP 9.1.1 MCU PWB
Parts List on PL 11.1
Removal
WARNING
To avoid personal injury or shock, do not perform repair or adjustment with electrical
power applied to the machine.
CAUTION
Static electricity may damage electrical parts.
Always wear a wrist strap to protect electrical parts from static damage. If a wrist strap is not
available, touch some metallic parts before servicing to discharge the static electricity.
CAUTION
Perform GP 4 Part 2 after each PWB is replaced. To maintain the integrity of the serial number
and billing data NEVER replace all of the PWBs at once. Replacing all three PWBs at once will
cause unrecoverable NVM corruption. If a PWB needs replacing, only replace ONE AT A TIME
and perform this procedure after each one is replaced. If the problem is not resolved, reinstall
the original PWB and re-enter the serial number (if necessary) before attempting to replace a
different PWB.
1. Whenever the MCU PWB is being replaced, go to GP 4 Replacing Billing PWBs and per-
form PART 1 to document Customer Settings and Machine Settings.
2. Switch off the power and disconnect the power cord.
3. Remove the ESS Cover, the MCU Cover and the Rear Lower Cover. (REP 10.2.1)
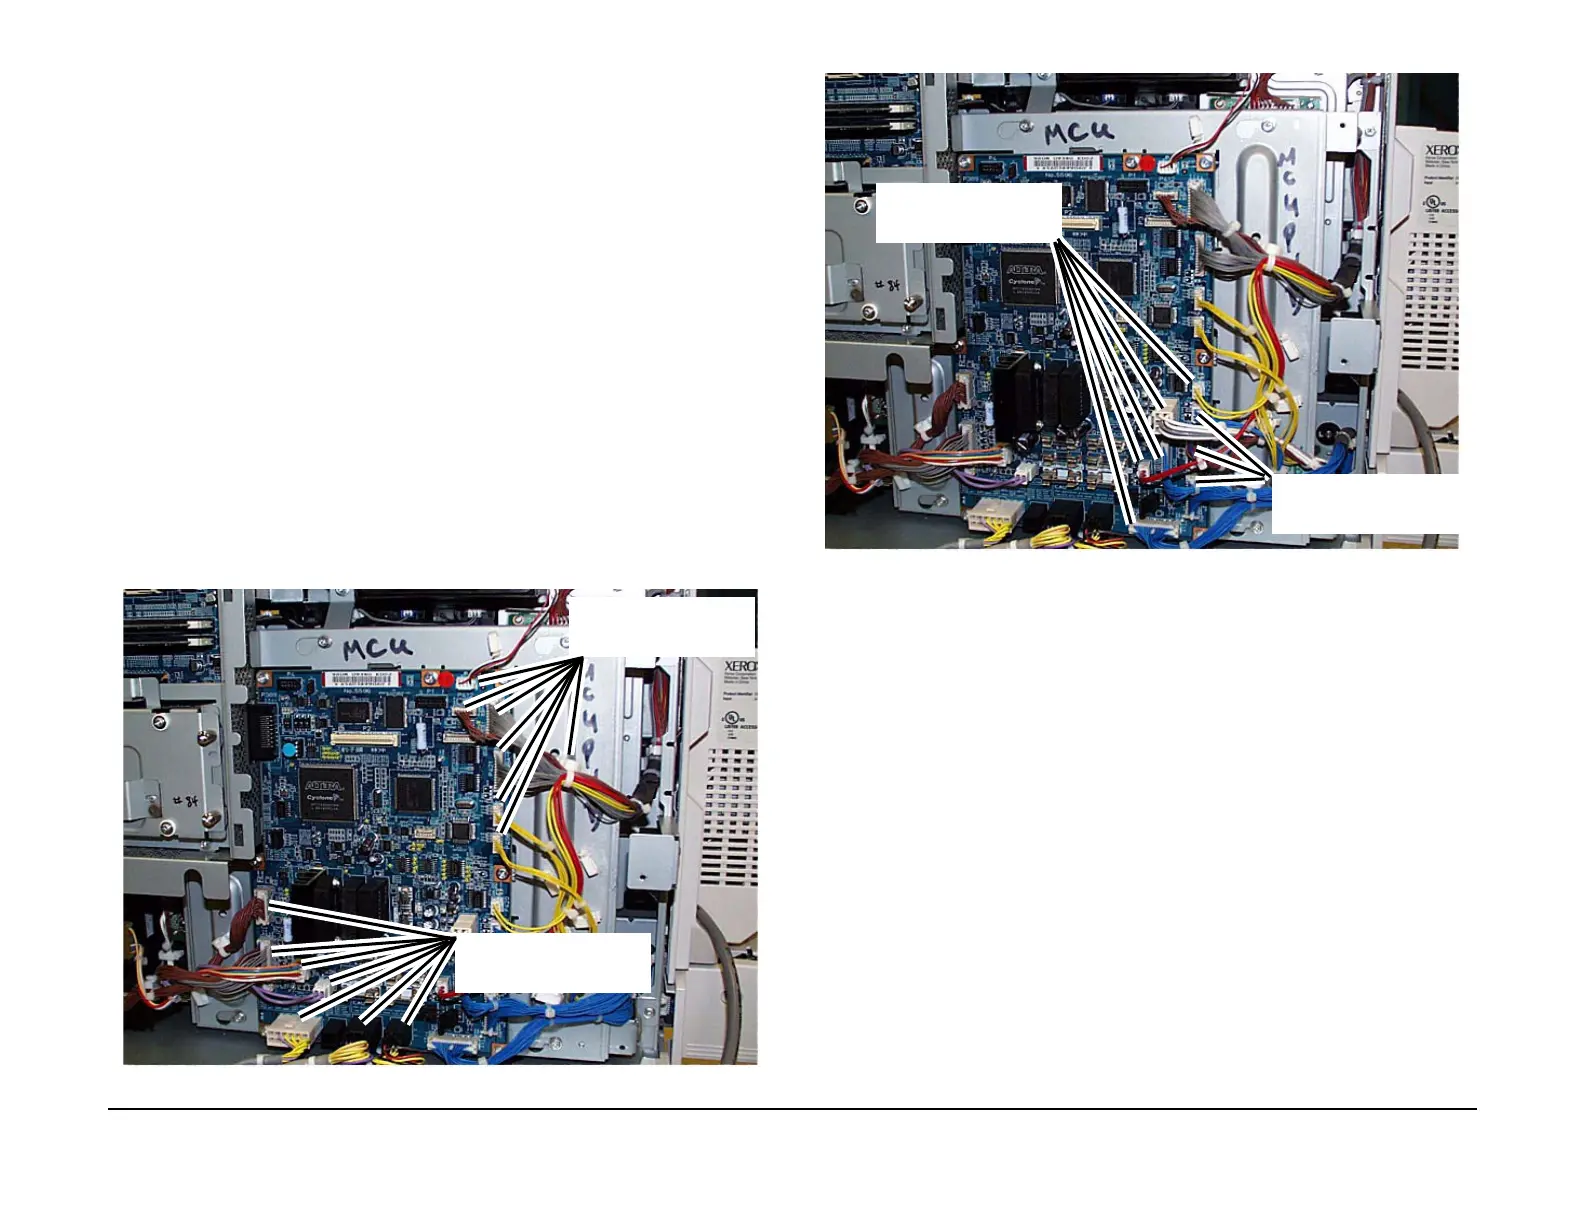
4. Disconnect the connectors from the MCU PWB. (Figure 1, Figure 2)
Figure 1 Disconnecting 13 of the connectors on the MCU PWB
Figure 2 Disconnecting the remaining 8 connectors on the MCU PWB
5. Loosen the screws (5) on the MCU PWB and slide the MCU to the right to disconnect the
P 389 connector. (Figure 3)
Disconnect the connec-
tors and remove the har-
ness from the wire clamp
Disconnect the Connec-
tors and remove the har-
ness from the wire clamps
Disconnect the connec-
tors and remove the har-
ness from the wire clamps
Disconnect the connec-
tors and remove the har-
ness from the wire clamp

 Loading...


