January 2007
4-249
WorkCentre 7132
ADJ 9.1.9
Repairs/Adjustments
Reversion 4.0
ADJ 9.1.9 Optical Axis Alignment
Purpose
The purpose of this adjustment is to align the CCD with the lens. This procedure should only
be performed if the lens or CCD is replaced, or if the documentation specifically directs.
Check
1. Install the Platen Glass.
CAUTION
Stray light will adversely affect the check. If there is significant ambient light around the
machine (especially fluorescent light), open the platen cover as little as required to start the
scan, and/or shroud the machine with a drop cloth, in order to keep as much stray light as pos
-
sible away from the Lens and CCD.
2. Ensure the document cover or DADF is fully raised and that there is nothing on the platen
glass.
3. Enter UI Diagnostic Mode. Raise the platen cover. Select Max Setup, IIT Cal., select the
Optical Axis Correction and press Start.
4. Check the results in the Optical Axis Set Results box. If OK is displayed in the Result
box, the check is good. Adjust the IIT Calibration (ADJ 9.1.8).
5. If the tool displays NG, perform the Adjustment.
Adjustment
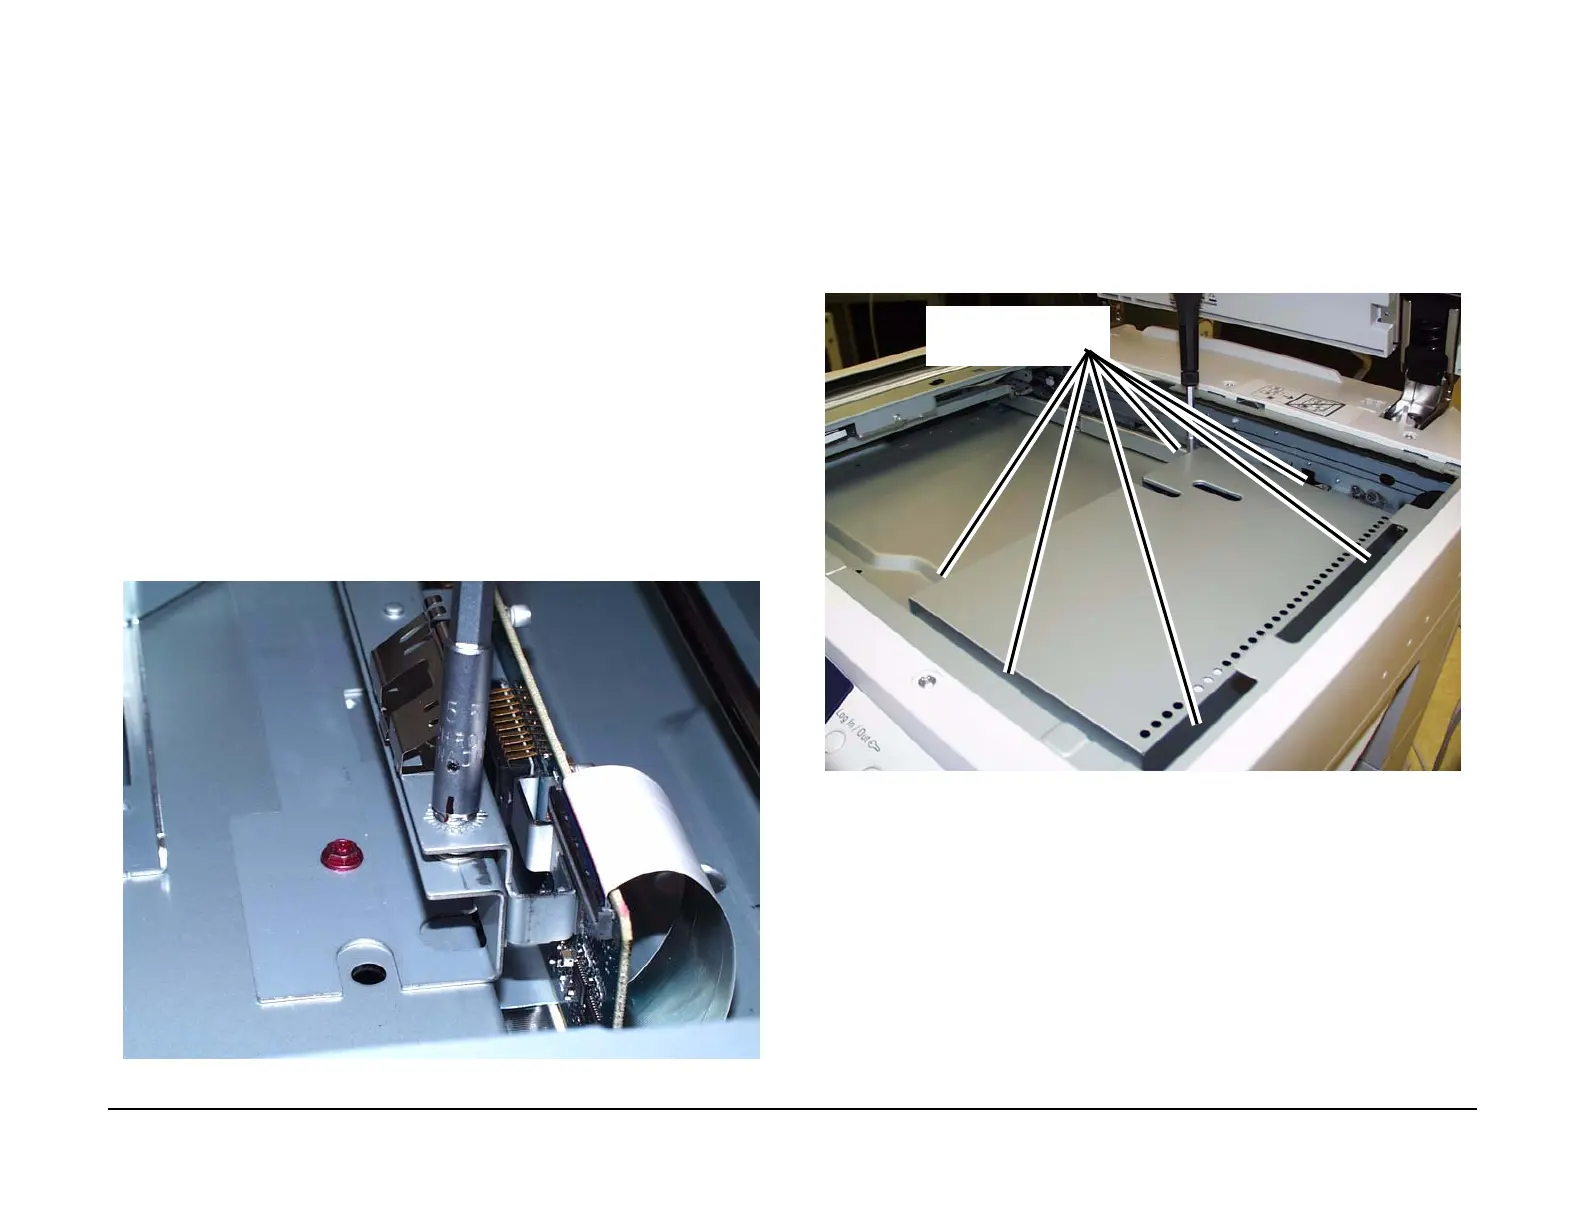
1. Place an index mark on the barrel of a 5.5mm nut driver. The following figure shows the
tool and the adjusting nuts. (Figure 1)
Figure 1 Tool and Front Optics Adjusting Nut
2. Check the results in the Front Nut Correction Angle and the Rear Nut Correction
Angle box. The values displayed indicate the amount and direction of the correction
required:
• + means rotate clockwise
• - means rotate counterclockwise
• The amount of correction is displayed in degrees. Each division around the nut rep-
resents 15 degrees (divide the displayed value by 15 to get the number of divisions).
If a value higher than 990 is displayed, this may indicate that insufficient light is
entering the CCD. Make sure that the Lens and Platen Glass are clean.
3. Remove the Platen Glass and the Optics cover. (Figure 2)
Figure 2 Removing the Optics Cover
4. Make the indicated correction for both the front and rear screws,
5. Reinstall the Platen Glass and the Optics cover, then select on Start on the screen.
6. Repeat steps 2 and 3 until OK is displayed.
7. Reinstall the Optics Cover and reinstall the Platen Glass.
8. Adjust the IIT Calibration (ADJ 9.1.8).
1
Loosen the screws (6)

 Loading...


