January 2007
4-257
WorkCentre 7132
ADJ 11.1.1
Repairs/Adjustments
Reversion 4.0
ADJ 11.1.1 IIT Lead Edge/Side Edge Registration
Purpose
To set the home position for the IIT Lead Edge (Slow Scan) direction/IIT Side Edge (Fast Scan)
direction.
NOTE: The IOT Lead Edge/Side Edge Registration must be adjusted before proceeding with
this procedure.
Check
1. To create a Test Pattern Original, use a plain white sheet of 8.5x11” paper and fold the
sheet precisely in half lengthwise and width wise. Then with a straight edge draw a
straight line in the lengthwise crease and a straight line in the width wise crease. (Figure
1)
Figure 1 Creating a Test Pattern Original
2. Load 8.5x11” paper into Tray 1.
3. Place the Test Pattern Original face down on the platen glass with the long edge (Lead
Edge) against the left registration edge.
4. From the UI Copying screen. select Black, 1-1, 100%, Tray 1 and press the Start button.
5. Remove the copy from the output tray and label the lead edge, and indicate the tray feed
from, type of paper, and color (Black).
6. Fold the copy in half in both directions.
7. The printed lines should align with the folds.
8. Measure and record the direction and distance the image need to be moved to align them
with the folds. (Figure 2)
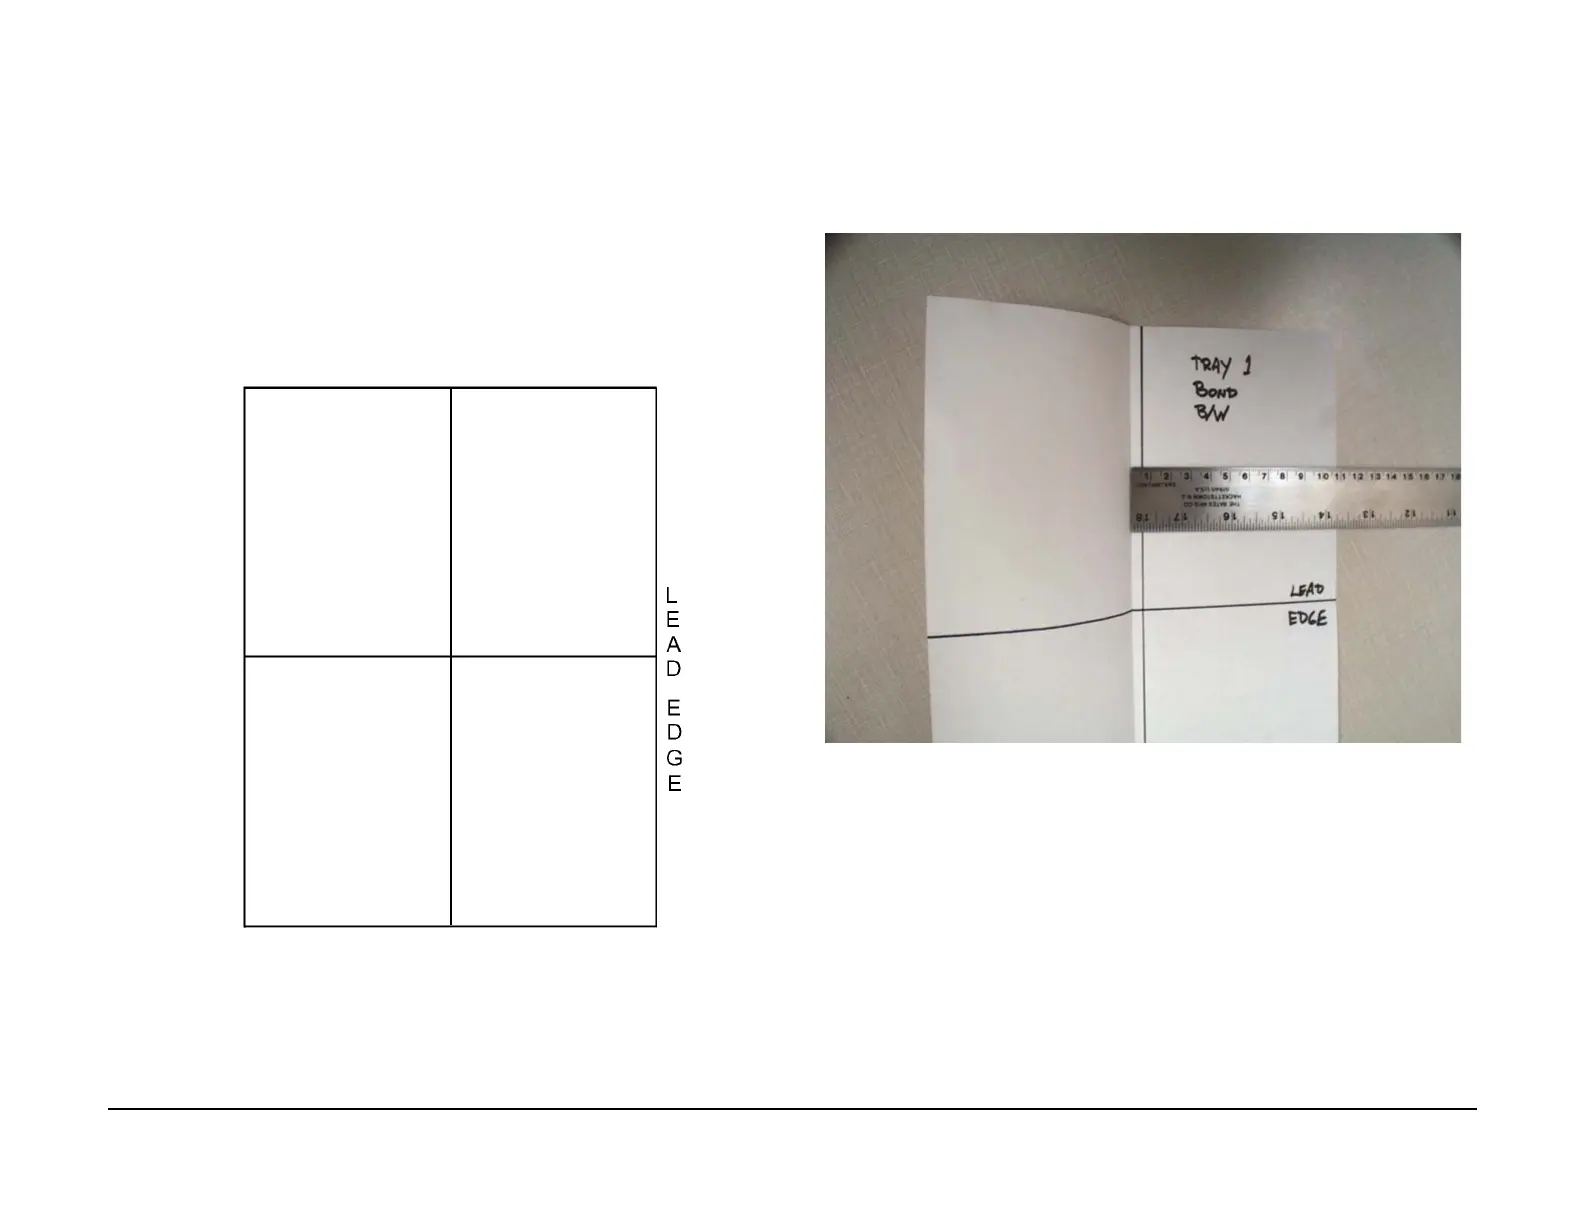
Figure 2 Measuring the distance to move the image
NOTE: Adjusting IIT Lead Edge 715-050. Decrease the value in NVM to move the image
toward the lead edge of the print.
NOTE: Adjust IIT Side Edge 715-053. Decrease the value in NVM to move the image
toward the outboard edge of the print.
9. If the measured distance is 2mm then divide the measured distance by the 0.036mm/
step. 2mm / 0.036mm = 55.5 bits. To move the image to the left, increase the NVM read
-
ing by 55 bits. (If the current reading of 715-050 is 84 then, 84 + 55 = 139)
10. Enter NVM Read/Write, enter 715-050 and change the reading by adding 55 bits to the
current reading.
11. Exit Diagnostics.
12. Place the Test Pattern Original face down on the platen glass with the long edge (Lead
Edge) against the left registration edge.
13. From the UI Copying screen. select Black, 1-1, 100%, Tray 1 and press the Start button.

 Loading...


