January 2007
4-256
WorkCentre 7132
ADJ 9.3.1
Reversion 4.0
Repairs/Adjustments
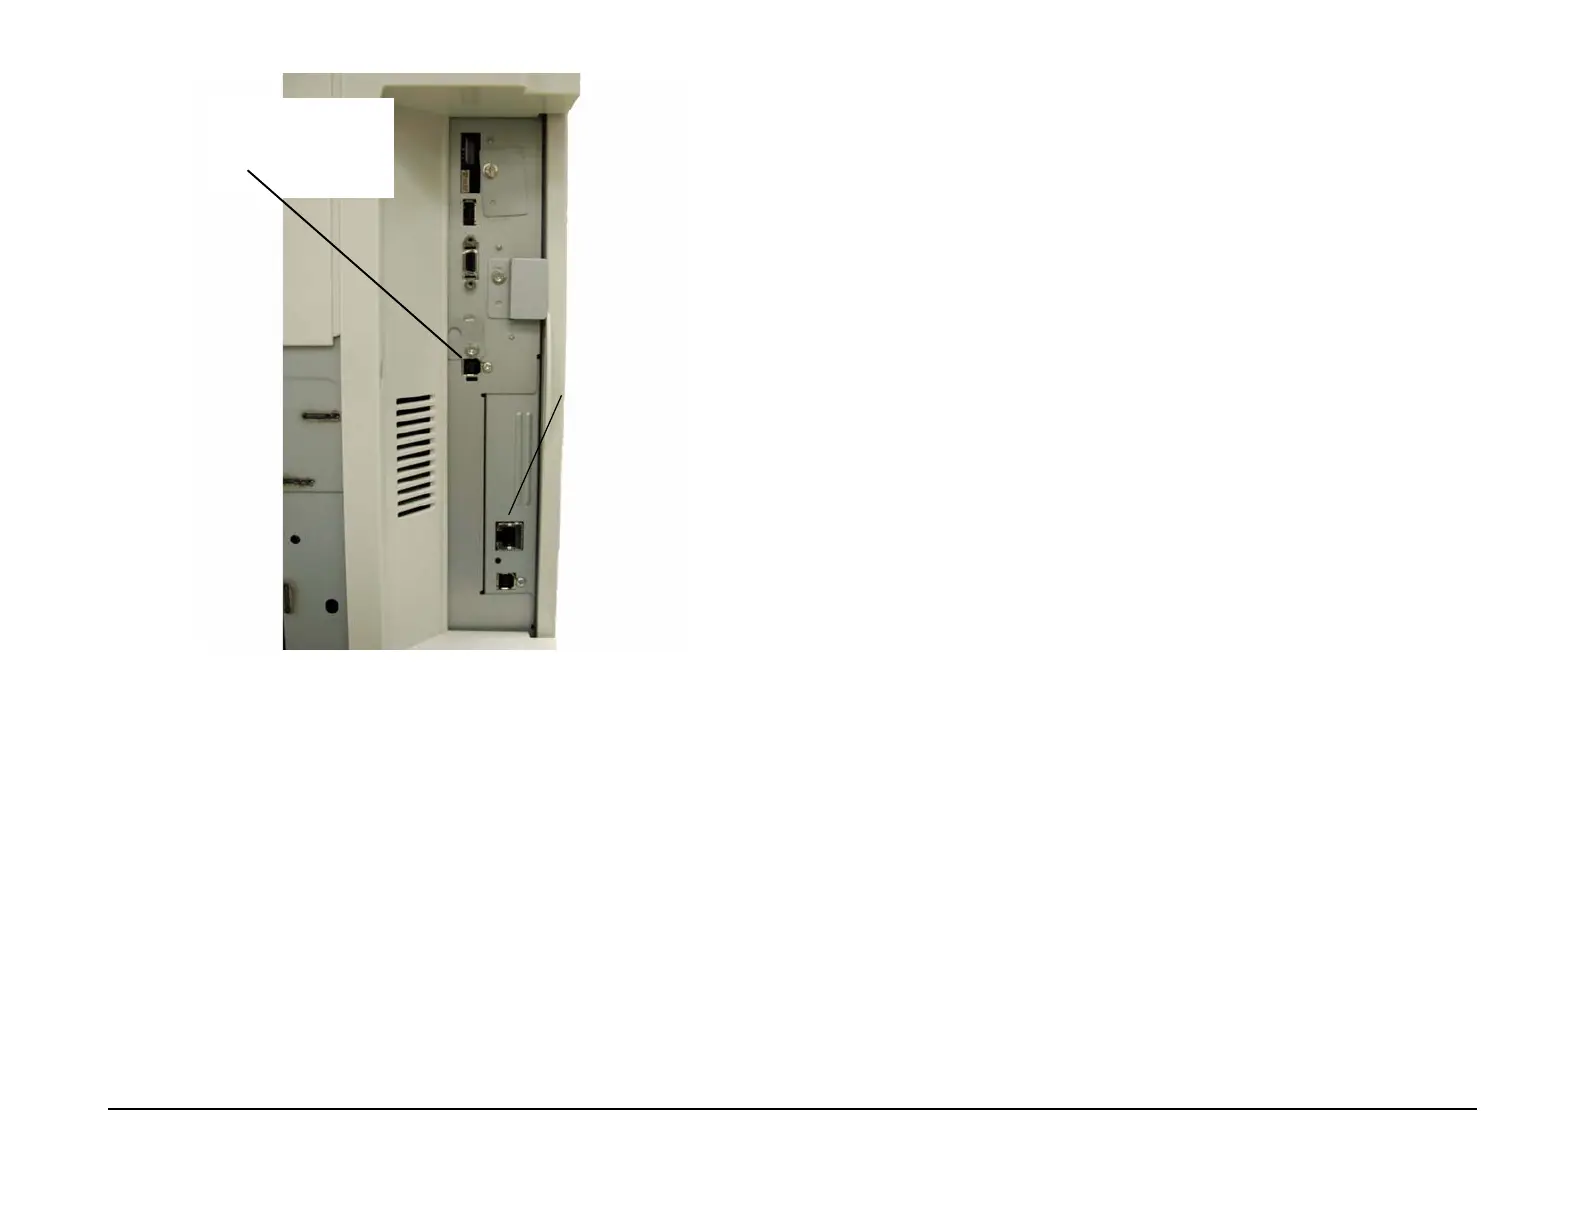
Figure 1 Where to connect the PWS and Network cables
7. Switch on the WC 7132.
NOTE: The first time the WC 7132 download tool is used on the PWS, the prompt to
install the Fuji Gen 2 driver might appear. Select “Install the Software Automatically” radio
button and select “Next”. Follow the screen prompts to install the driver. If the message
“Found new hardware” appears, follow the prompts.
8. Go to Product Tools and start the WC 7132 PWS Diagnostic Tool.
NOTE: The actual instructions that accompany the software may have additional steps
here, such as a list of NVM values that need to be recorded. Record those values.
9. When the tool is connected, select Enter Diagnostics.
10. Select dC351, ensure that All is selected.
11. Select Save Machine Settings. When the upload is complete, select File and Exit the
Diagnostics Tool.
12. When prompted, save the Machine Data file.
13. Switch off the WC 7132.
14. Switch on the power while pressing the Power Saver switch. Download Mode will be dis-
played on the UI.
NOTE: A new hardware wizard may appear and you will be asked to install the “Fuji
Xerox Firmware Download Device” on you PWS. Select “Cancel”.
15. Start the WC 7132 PWS Diagnostic Tool. When connected select Enter Software Down-
load.
NOTE: The actual instructions will list the files that need to be selected.
• Generally the Add All 1 File selection is used when upgrading to a newer version of
the software. Use the Add All 1 File (Postscript) selection if a PostScript module is
installed.
NOTE: Verify the presence of the PostScript module from the System Settings List under
Software Version. If the Statement “Controller + PS ROM” appears, the PostScript module
is installed. Alternatively you can remove the ESS cover and verify if a PostScript module
is installed on the Printer PWB.
• If there is no PostScript module use the Add All 1 File (Standard).
• If installing software at the same version. you must use individual files as the Add All
1 File option will not overwrite a file of the same version.
16. Select the appropriate file(s) for download.
17. Select Start Download... the screen will display Processing.
(Lead time is approximately 15 minutes).
18. When the download is completed the machine will reboot. Exit the PWS tool.
19. Perform any additional steps or procedures per the actual instructions that accompany
the software.
20. Print a copy of the new Systems Settings List to see if the SW was upgraded.
21. Reconnect RJ45 Network connector to the customer’s network.
USB 1.1 Device Port For
connecting the PWS down
loader (shipped covered)
RJ45 Network
connector for
connecting the
customers net-
work cable

 Loading...


