January 2007
4-113
WorkCentre 7132
REP 13.3.1
Repairs/Adjustments
Reversion 4.0
REP 13.3.1 Front/Rear Tray Cable (TTM)
Parts List on PL 15.1
Removal
WARNING
To avoid personal injury or shock, do not perform repair or adjustment with electrical
power applied to the machine.
1. Remove the Tray 3 Assembly. (REP 13.1.2)
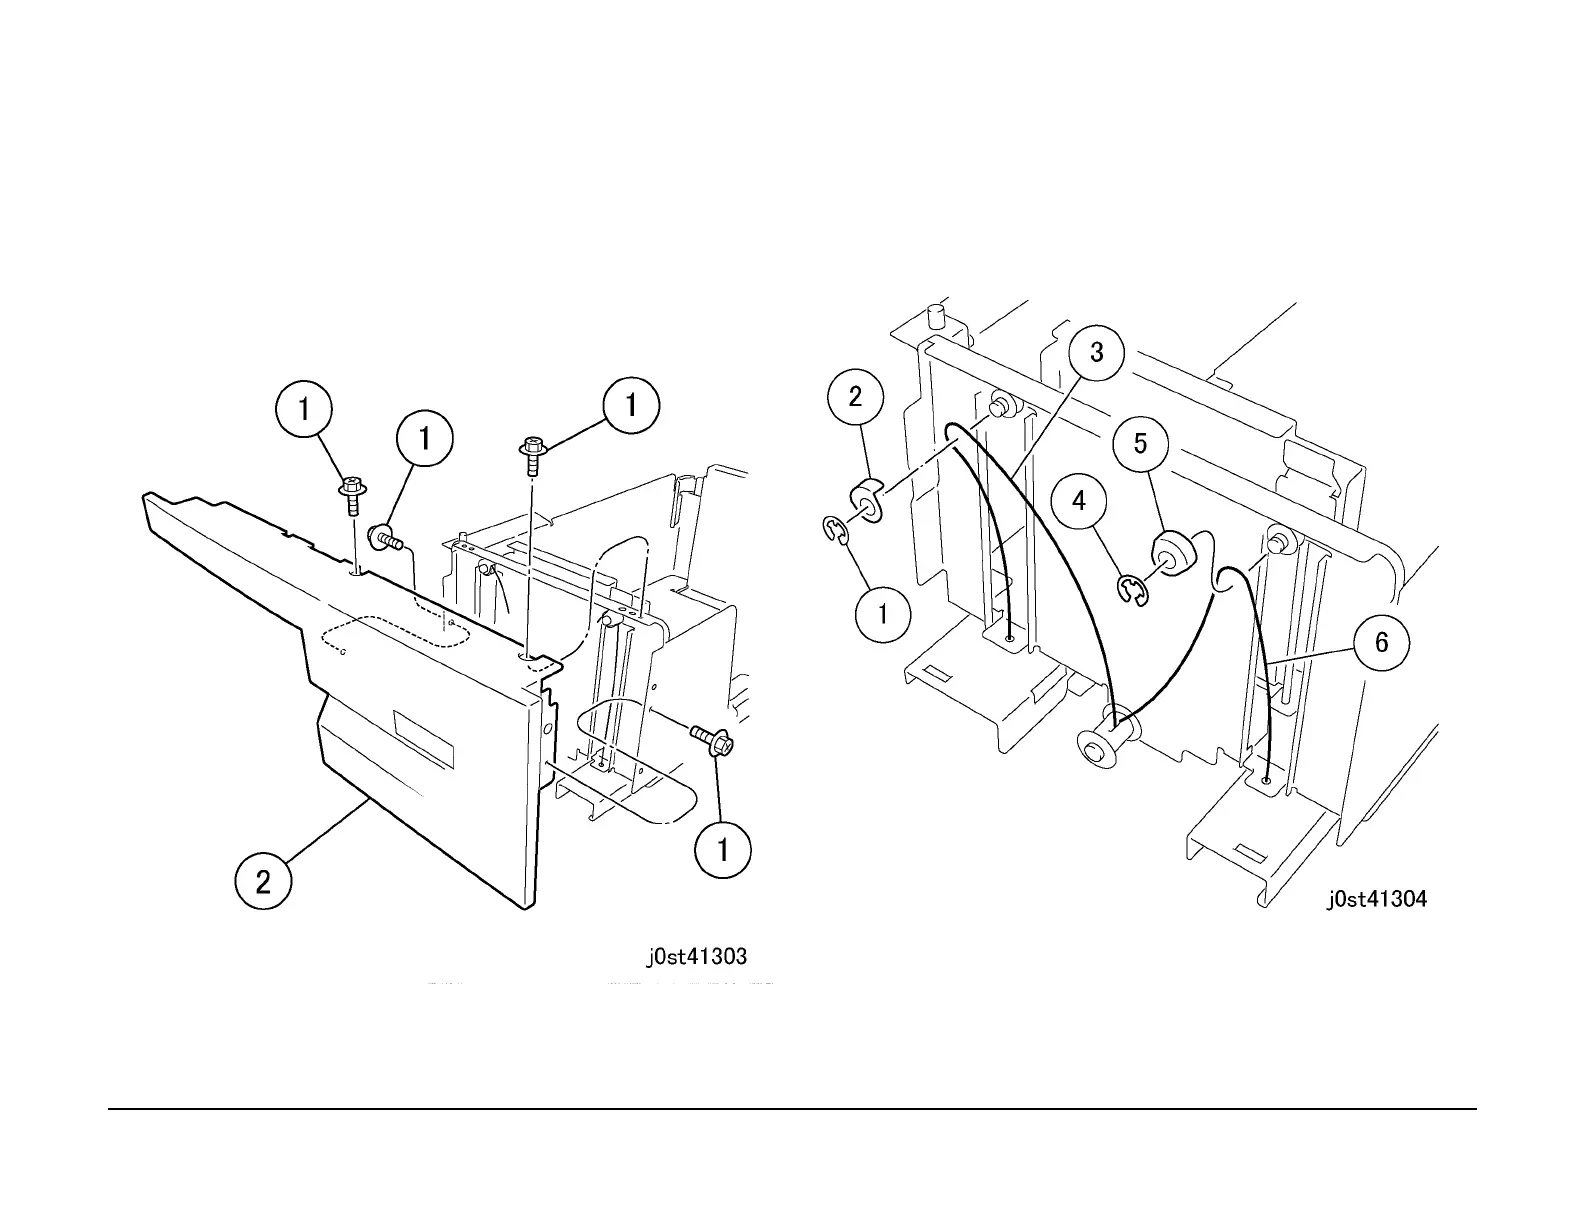
2. Remove the Tray 3 Cover together with the frame. (Figure 1)
1. Remove the screws (4).
2. Remove the Tray 3 Cover together with the frame.
Figure 1 Removing the Tray 3 Cover
3. Remove the Tray Cable. (Figure 2)
NOTE: Only the replacement procedure for the Front Tray Cable is described here. The
Rear Tray Cable is removed in the same way.
1. Remove the E-Clip.
2. Remove the Cable Guide.
3. Remove the Tray Cable.
4. Remove the E-Clip.
5. Remove the Cable Guide.
6. Remove the Tray Cable.
Figure 2 Removing the Tray Cable
4. Remove the Left Shaft Assembly to remove the Tray Cable. (Figure 3)
1. Remove the E-Clip.
2. Slide the bearings (2).
3. Remove the Lift Shaft Assembly.

 Loading...


