May 2006
4-68
WorkCentre 7132
REP 9.2.3, REP 9.2.4
Launch Version 3.0
Repairs/Adjustments
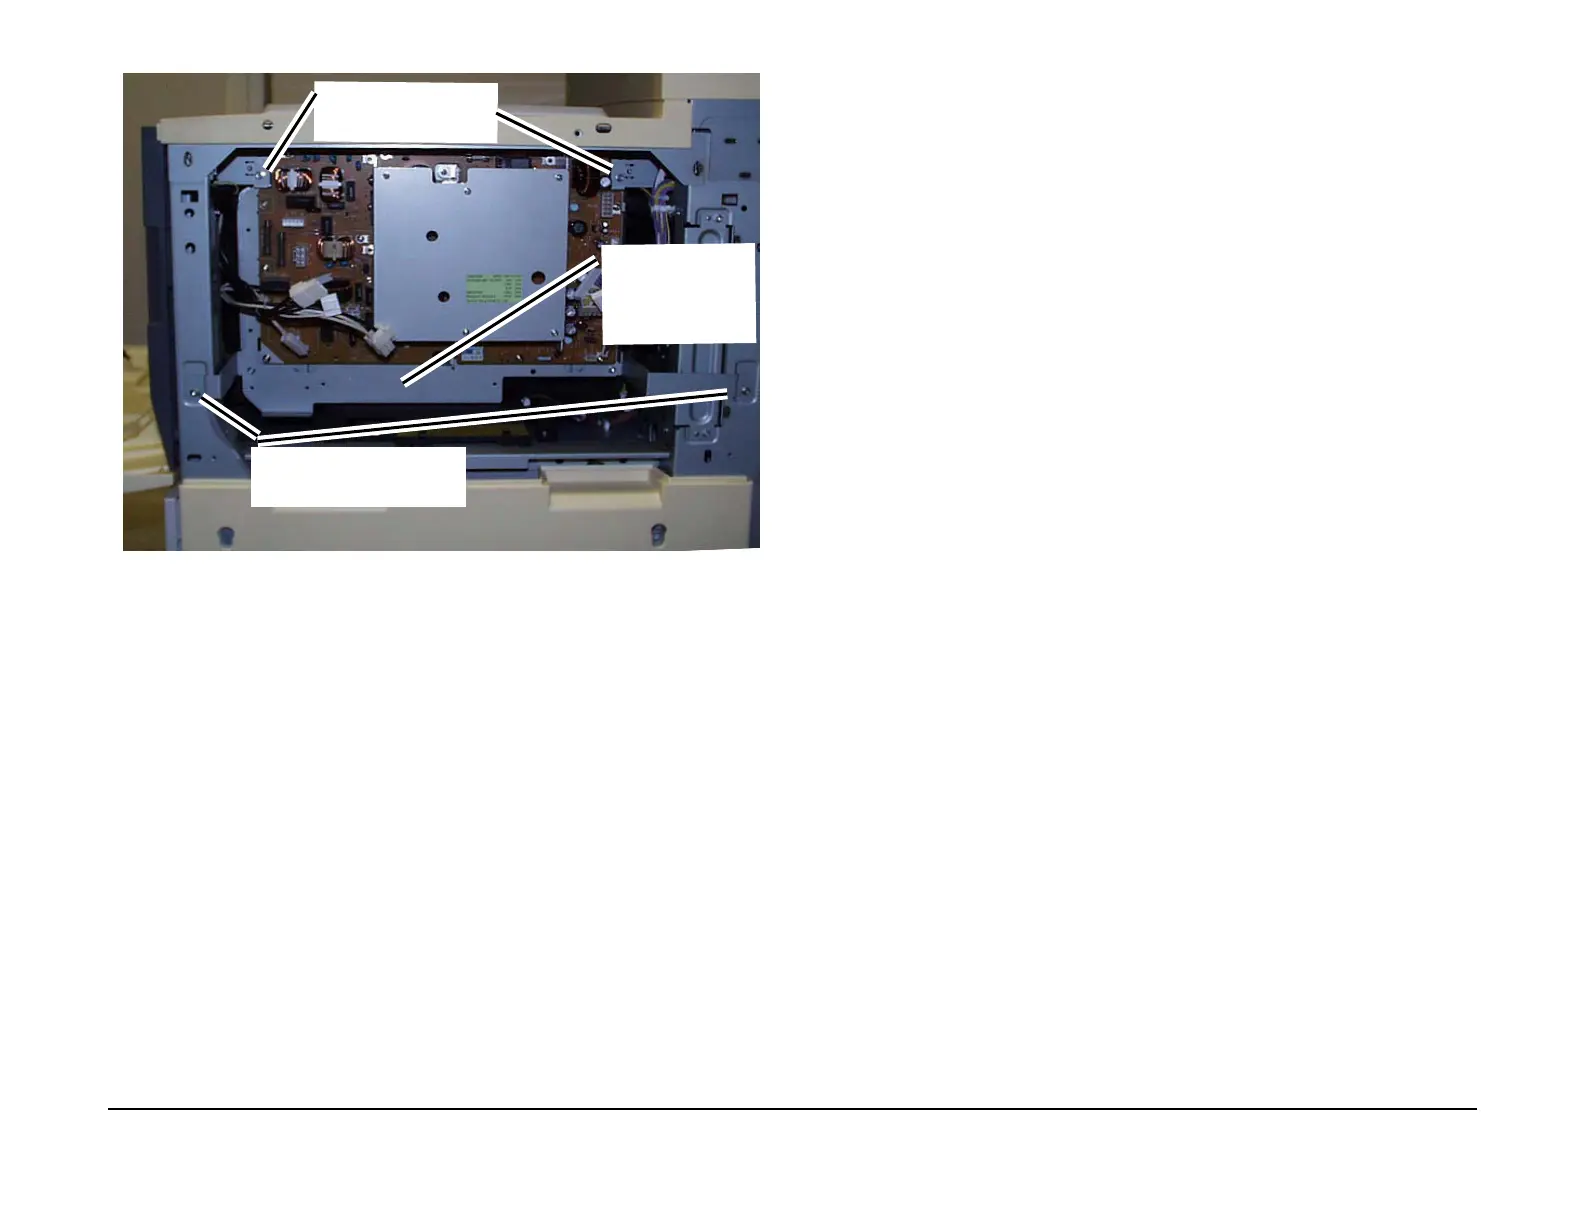
Figure 2 Removing the Power Supply PWB
REP 9.2.4 Print Chassis Assembly
Parts List on PL 11.2
Removal
1. Disconnect the Ethernet cable.
2. Switch off the power and disconnect the power cord.
3. Remove the ESS Cover. (REP 10.2.1)
4. Remove the Printer Chassis Assembly by loosening the thumb screws (3). (PL 11.2)
Replacement
1. Install the Printer Chassis Assembly in reverse order of removal.
2. Connect the power cord and switch on the power.
3. Verify that the machine has the correct level of ESS Controller software. If necessary,
upgrade the software to the correct version.
1
Remove the screws (2)
3
Lift up the Power
Supply Chassis and
remove from the
machine
2
Loosen the screws (2)

 Loading...


