January 2007
4-134
WorkCentre 7132
REP 15.3.3
Reversion 4.0
Repairs/Adjustments
REP 15.3.3 Right Counter Balance
Parts List on PL 16.3
Removal
WARNING
To avoid personal injury or shock, do not perform repair or adjustment with electrical
power applied to the machine.
NOTE: Left/Right Counter Balance is identified by Compression Spring pressure.
Left Counter Balance: Compression Spring pressure strong
Right Counter Balance: Compression Spring pressure weak
1. Remove the DADF. (REP 15.1.1)
2. Remove the DADF Rear Cover. (PL 15.2).
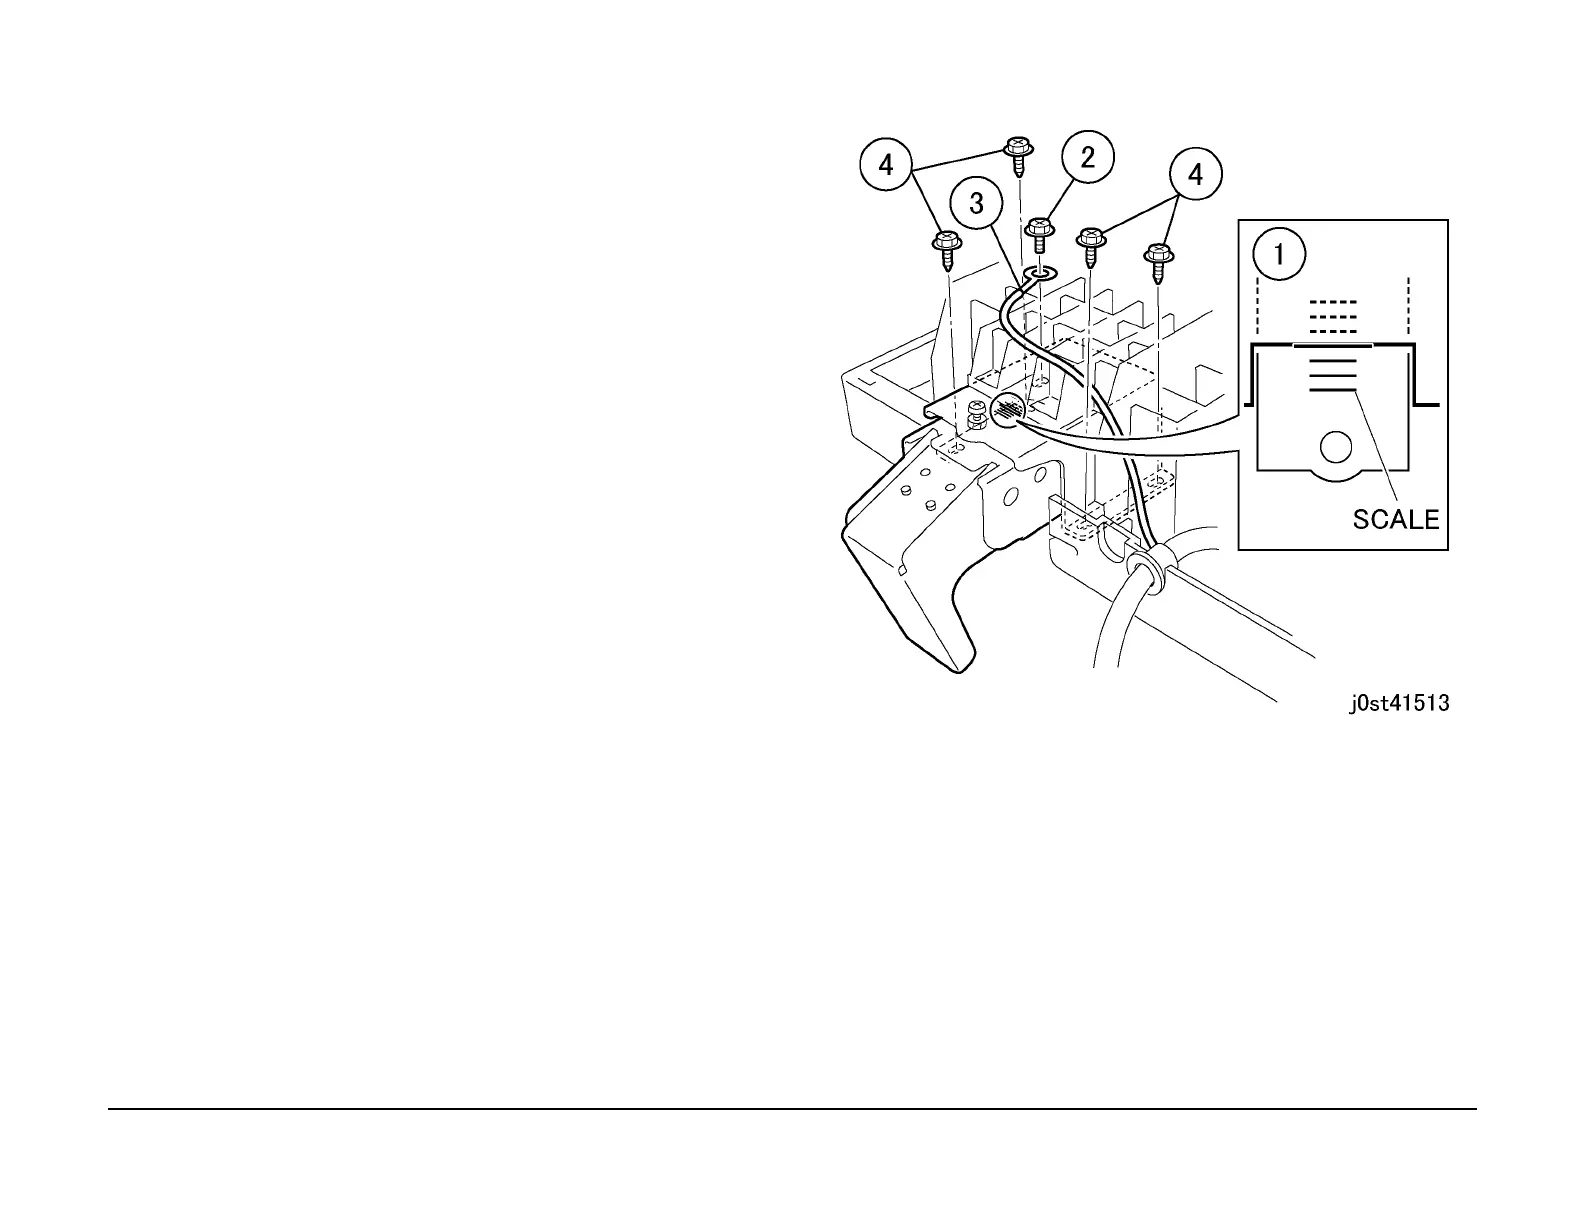
3. Remove the screw that secures the Right Counter Balance. (Figure 1)
1. Check the calibration.
2. Remove the screws (1).
3. Remove the Earth Wire.
4. Remove the Tapping Screws (4).
Figure 1 Unfastening the Right Counter Balance
4. Remove the Right Counter Balance. (Figure 2)
1. To remove, slide the Right Counter Balance in the direction of the arrow.
2. Precautions during installation:
A.Slot
B.Boss
C.Cutout

 Loading...


