May 2006
4-66
WorkCentre 7132
REP 9.2.1
Launch Version 3.0
Repairs/Adjustments
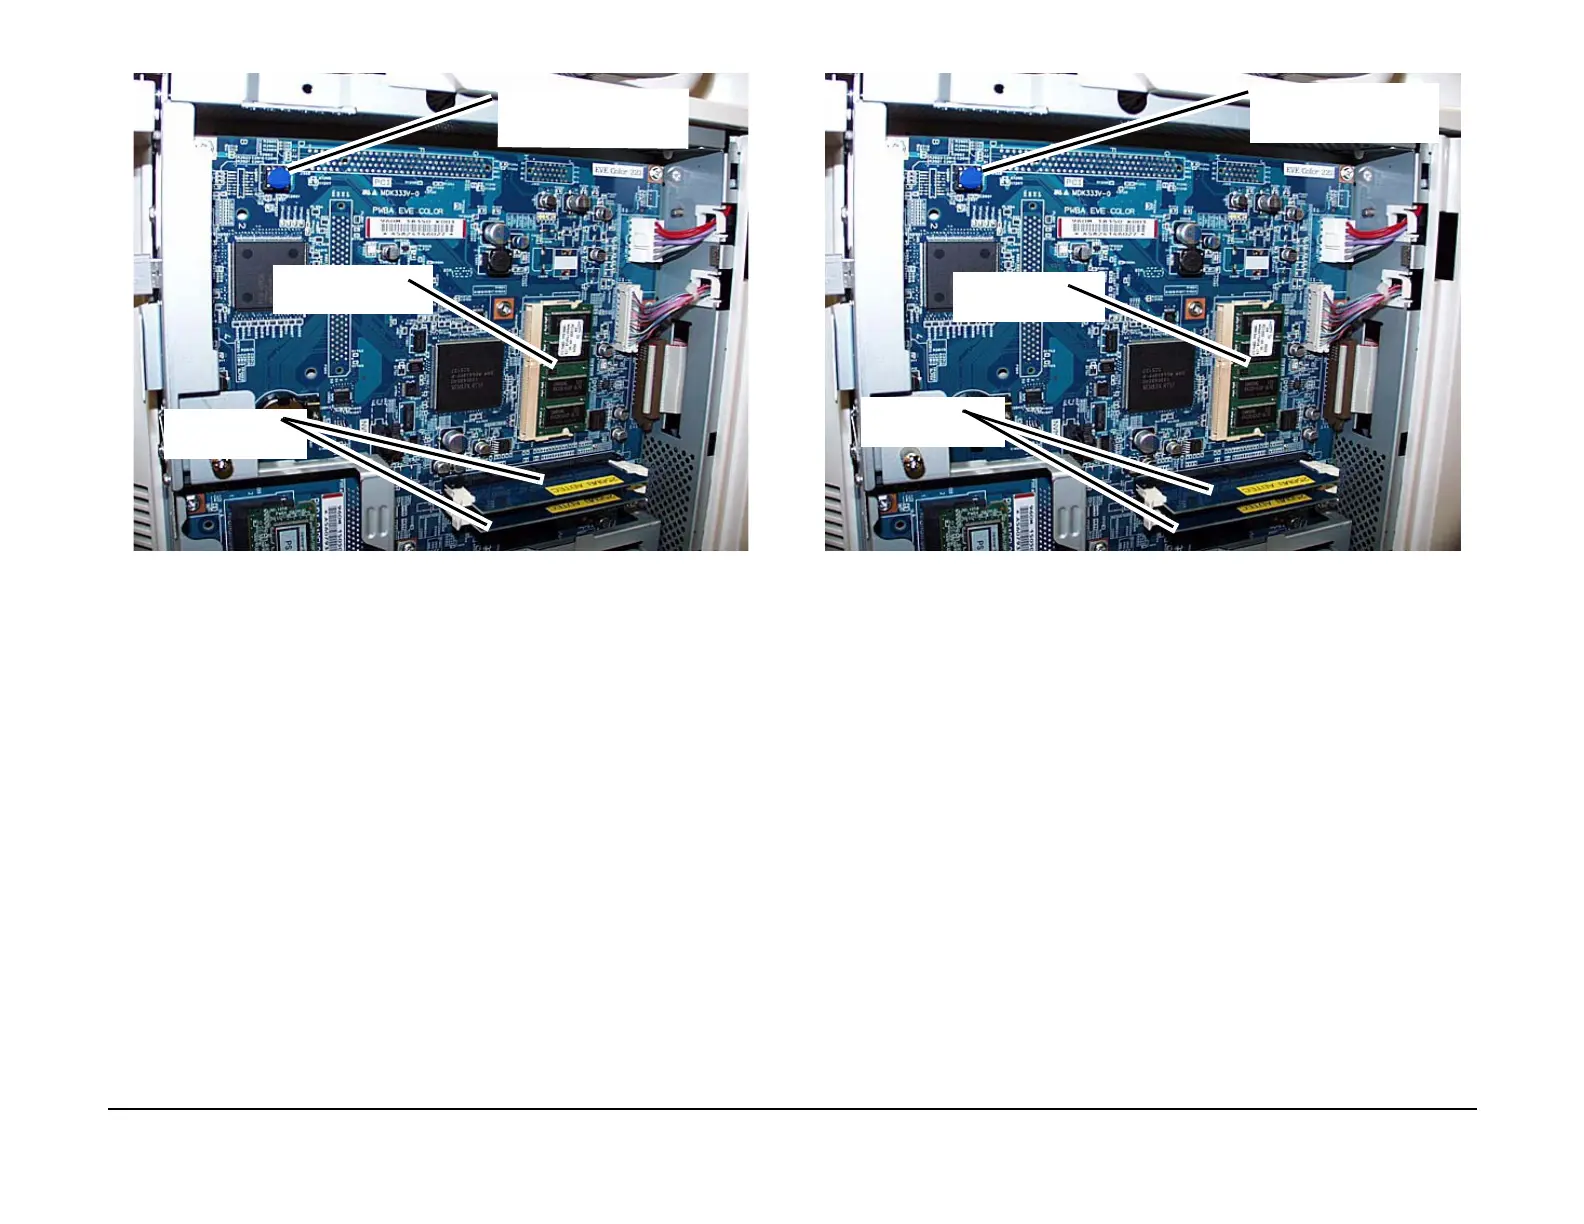
Figure 9 DDR DIMM, PC133 DIMM and ESS PWB EPROM Location
Replacement
1. If installing the same ESS PWB that was just removed, use the reverse of the removal
procedure to install.
2. If replacing the ESS PWB with a new ESS PWB, continue with the following steps.
CAUTION
Pin breakage occurs if the EPROM is carelessly replaced.
3. Install the DDR DIMM, PC133 DIMM and EPROM from the old ESS PWB on to the new
ESS PWB. (Figure 10)
Figure 10 ESS PWB EPROM Location
4. Install the ESS PWB and Panel into the Chassis.
5. Install the Base Chassis and then the HDD PWB and tighten the thumbscrews.
6. If present, install the Printer PWB.
a. Install Printer PWB while connecting it to ESS PWB and tighten thumbscrews.
7. Install the ESS PWB Chassis into the machine and connect all the connectors.
8. Slide the MCU PWB into position and tighten the screws.
9. Connect all the connectors to the MCU PWB.
10. Switch on the power.
11. If a fault occurs (116-334) switch off then switch on the power.
12. If a Serial Number, Billing Meter Mismatch fault (Speed Mismatch fault) occurs (124-315),
disregard and continue.
13. Perform PART 2 of GP 4 Replacing Billing PWBs.
14. Reinstall the Customer Settings. (Sys User settings will be affected).
ESS PWB EPROM loca-
tion
PC133 DIMM
DDR DIMM
ESS PWB EPROM loca-
tion
PC 133 DIMM
DDR DIMM

 Loading...


