January 2007
4-22
WorkCentre 7132
REP 3.1.1
Reversion 4.0
Repairs/Adjustments
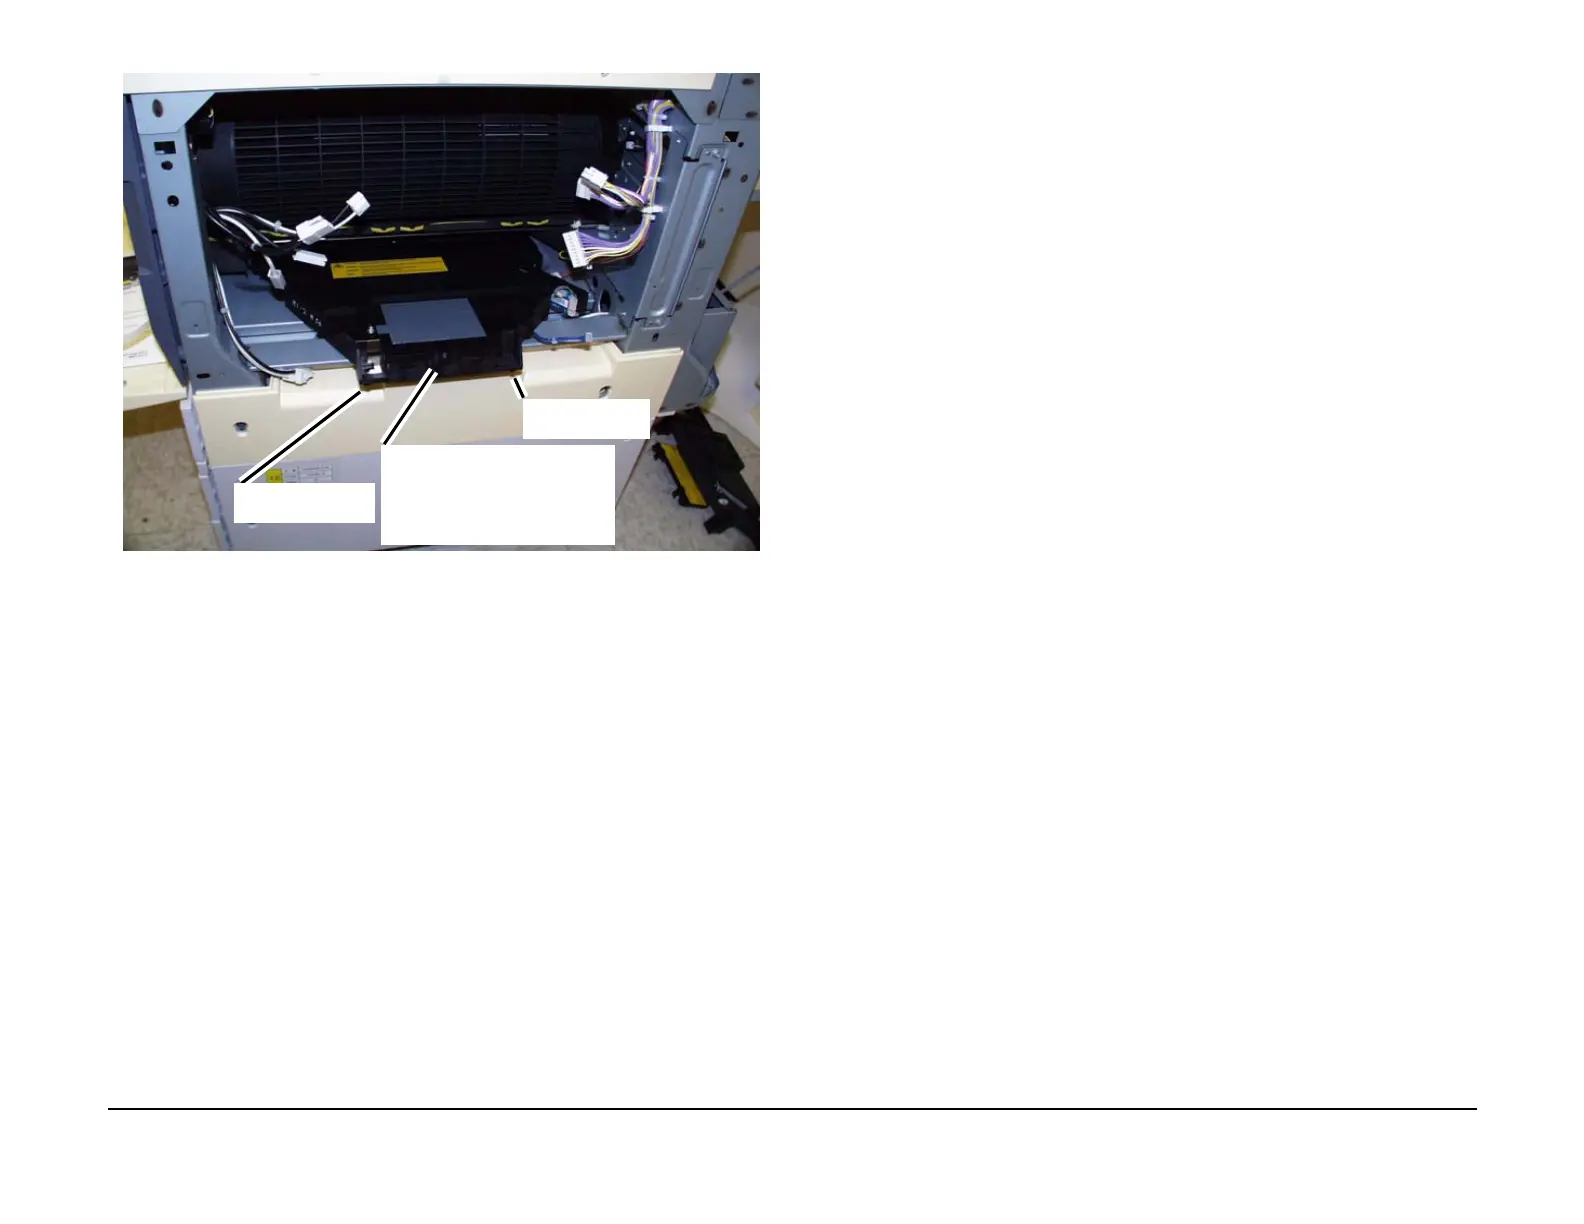
Figure 3 Removing the ROS Assembly
Replacement
NOTE: When the ROS Unit has been installed, read the warning label on top of the ROS unit
carefully before turning on the power and performing replacement.
1. Installing the ROS Assembly. (Figure 3)
a. To install, push the ROS Assembly into the machine.
b. Be sure that the locating pins (2) on the ROS is engaged into the machine frame.
c. Install the screws (2).
d. Connect the connectors (3).
2. Perform the remainder of the replacement procedure in the reverse order or the removal.
Locating pin
Lift up the ROS Assembly and
pull to remove from machine.
Locating pin

 Loading...


