EasyManuals Logo

Xerox WorkCentre 7132 Service Documentation

Xerox WorkCentre 7132
1726 pages
To Next Page IconTo Next Page
To Previous Page IconTo Previous Page
Page #983 background imageLoading...
Page #983 background image
January 2007
4-32
WorkCentre 7132
REP 4.2.2
Reversion 4.0
Repairs/Adjustments
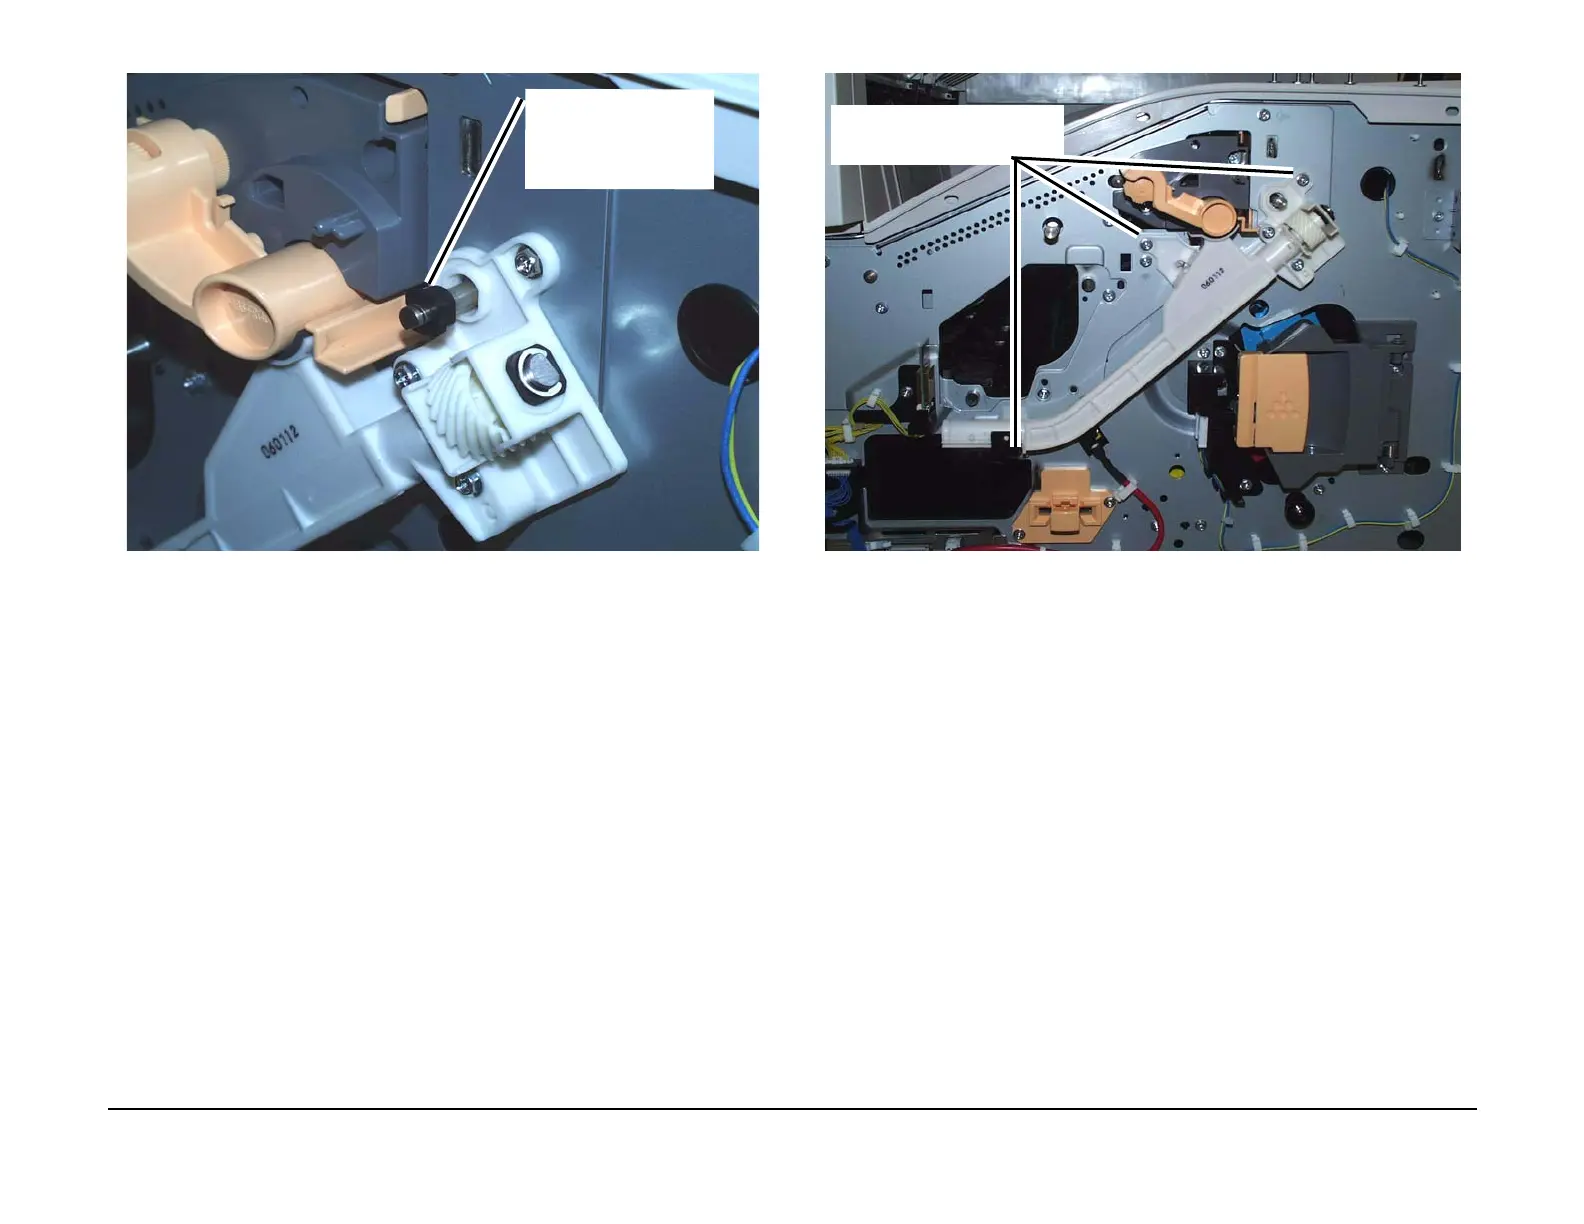
Figure 4 Removing the Waste Auger drive shaft bushing
NOTE: In the next step, place a sheet of paper under the opening in the Waste Auger when
removing it from the frame.
9. Remove the Waste Auger. (Figure 5)
Figure 5 Removing the Waste Auger
10. Open the left side door and position the levers (2) to the up or retract position. (Figure 6)
2
Remove the Waste Auger
drive shaft bushing
1
Remove the screws (3) and
remove the Waste Auger

Table of Contents

Other manuals for Xerox WorkCentre 7132

Questions and Answers:

Question and Answer IconNeed help?

Do you have a question about the Xerox WorkCentre 7132 and is the answer not in the manual?

Xerox WorkCentre 7132 Specifications

General IconGeneral
BrandXerox
ModelWorkCentre 7132
CategoryAll in One Printer
LanguageEnglish

Related product manuals