Edge Position
226
FH/FZ5 Processing Item Function Reference Manual
Region Setting (Edge Position)
This item is used to set up the measurement area.
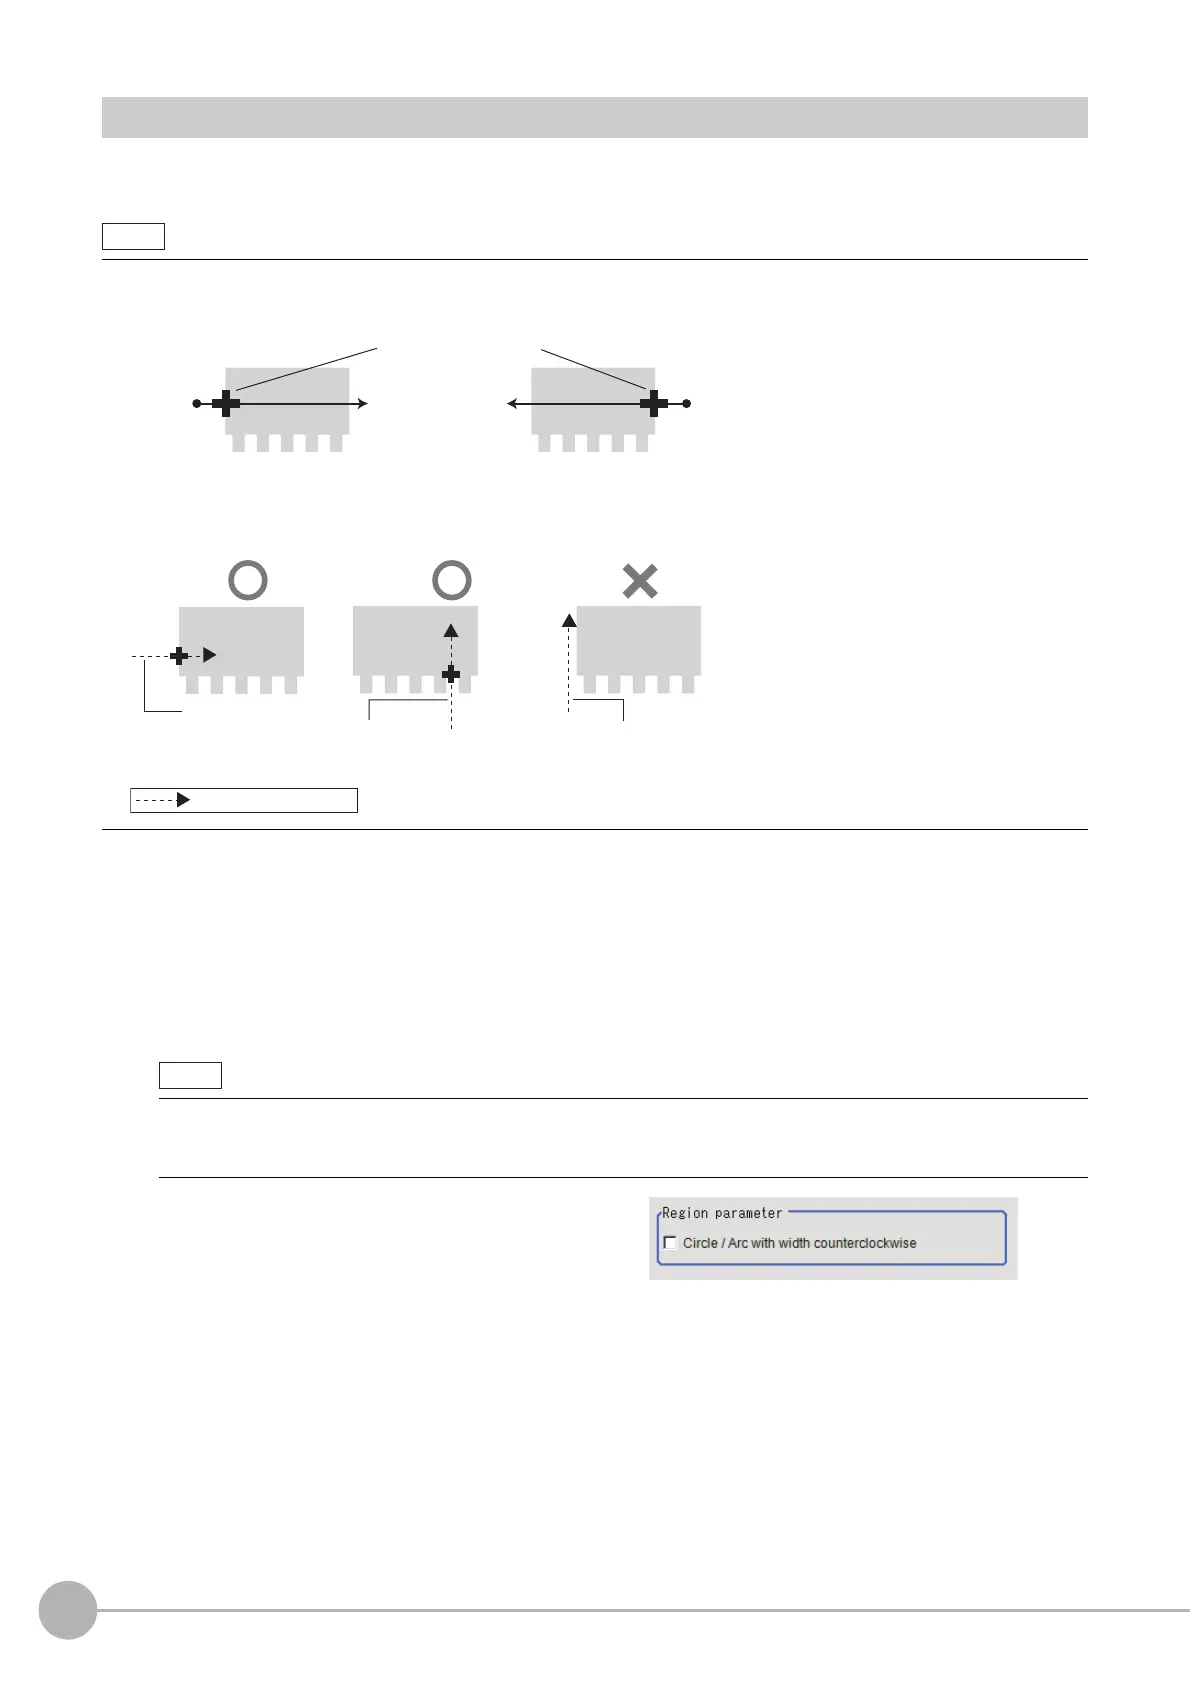
Use a straight line (arrow), circumference, or arc to
specify a measurement region for [Edge position].
1 In the Item Tab area, click [Region setting].
2 Use the Drawing tools to specify the measurement region.
3 Click [OK] in the Figure setting area.
• [OK]: Changes the settings and returns to the previous menu.
• [Cancel]: Changes are discarded. R
eturns to the previous menu.
• [Apply]: Updates the settings without leaving edit window.
4 When a circumference or arc is selected
as the registered figure, select the edge
search direction.
If a check is placed at the "Circle/Arc with
width counterclockwise" option, the edge is
searched counterclockwise. If this option is
unchecked, the edge is searched clockwise.
• The edge is scanned from the start point of the area toward the end point.
When setting up the measurement region, p
ay attention to the detection direction of the edge.
• Measurement cannot be performed if there is no edge within
the measurement region. When determining the size and
position of the measurement region, take into account the movement range of the measurement object.
• Use the zoom function if the measurement region is too small to iden
ti
fy the direction of the arrow.
Reference: "Appendixes Basic Knowledge about Operations Using th
e Zoom Function" in the "Vision System
FH/FZ5 Series User's Manual (Z365)"
Start
point
End
point
Start
point
End
point
Measured edges
Drawing the line from left to right and from right to left will lead to different measured edges.
For edge Measurement
in Y axis (↑/↓)
For edge
Measurement in
X axis (←/→)
: Measurement region
Edge out range of
Measurement area
 Loading...