1/05
8a-21
DocuColor 12/DCCS50
REP 2.8.26, REP 2.8.27
High Capacity Feeder
Reissue
REP 2.8.26 HCF Feed Motor
Parts List on PL 15.16
Removal
WARNING
To avoid electrical shock, switch-OFF the Main Power Switch and disconnect the Power
Cord.
1. Remove the HCF Paper Tray Assembly (REP 2.7.
5).
2. Remove the HCF Rear Cover (PL 15.3
)
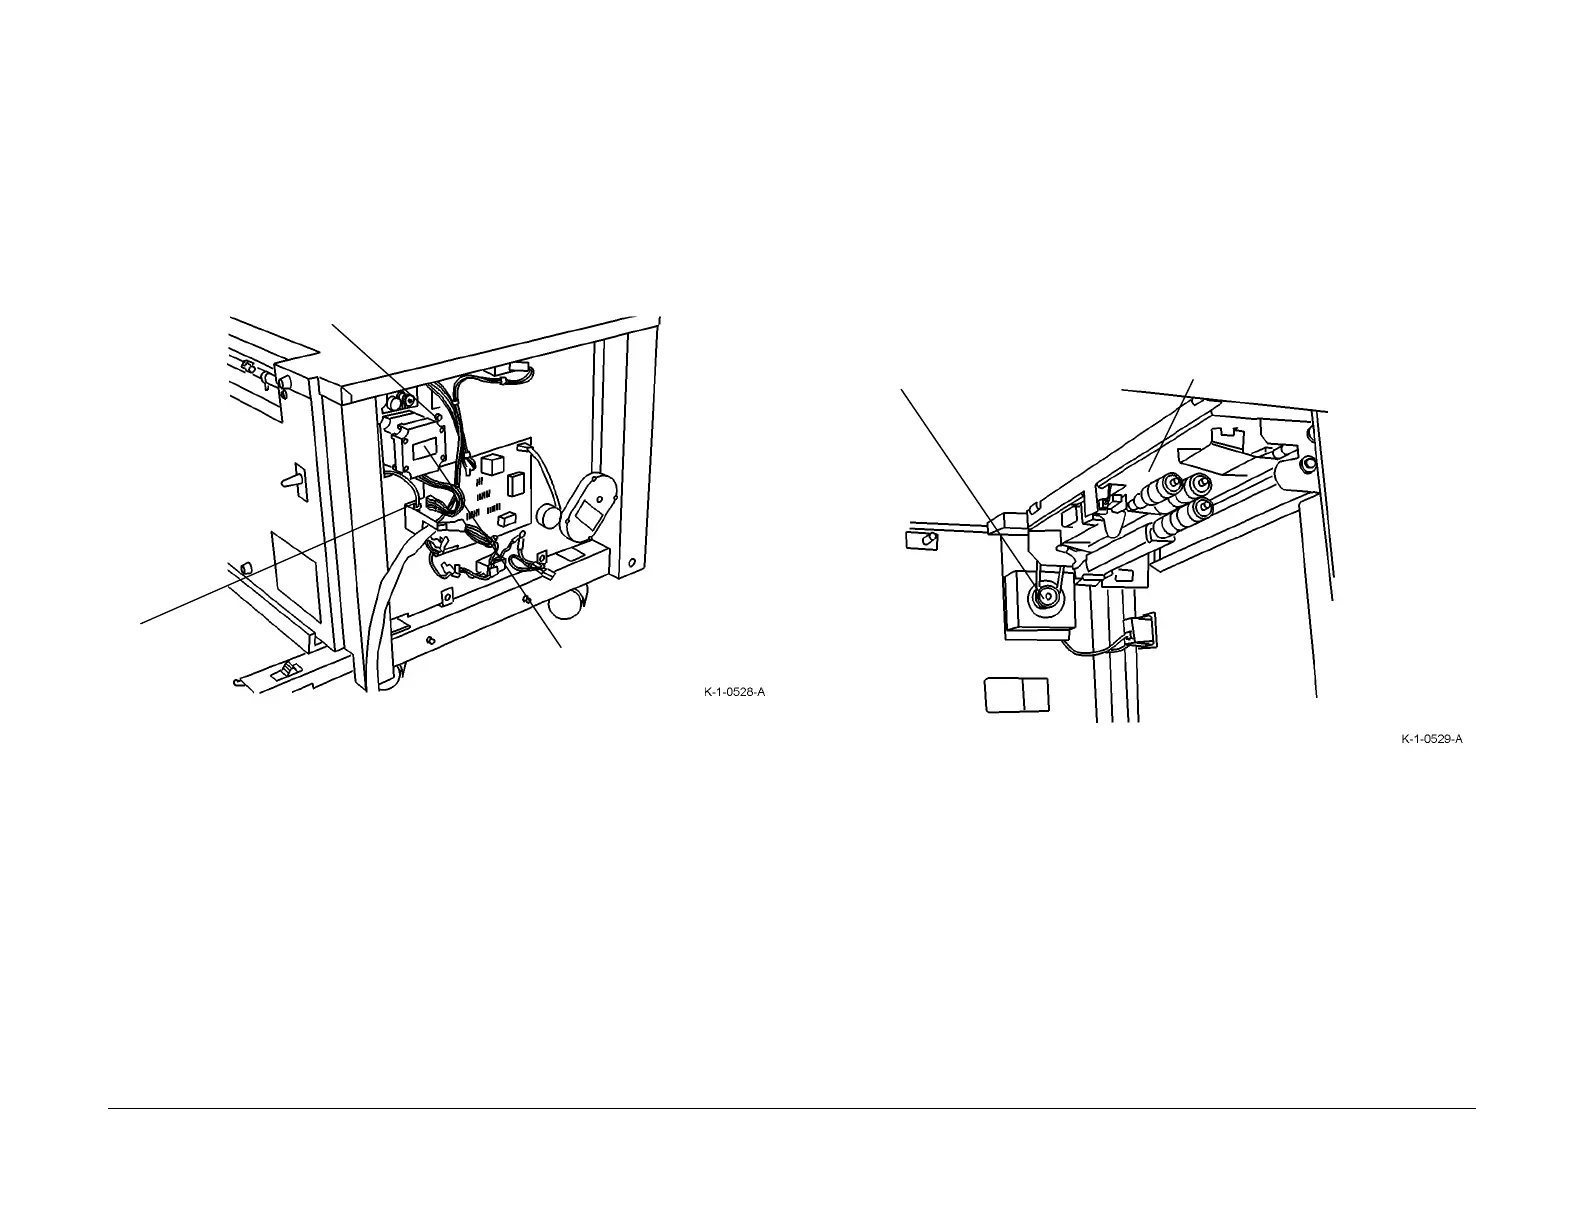
3. Remove the HCF Feed Motor (Figu
re 1).
Figure 1 Removing the HCF Feed Motor
Replacement
NOTE: Do not over tension the Feed Belt. The tension produced by the weight of the motor is
sufficient.
1. Reverse the above procedures to replace the HCF Feed Motor.
2. Set the belt tension by loosening the four screws securing the Feed Motor and bias the
motor
down to the bottom of the slots and tighten the four screws.
3. Loosen the screw securing the tensioning bracket and allow it to pivot into the drive belt.
Tight
en the screw
REP 2.8.27 HCF Feeder Assembly
Parts List on PL 15.10
Removal
WARNING
To avoid electrical shock, switch-OFF the Main Power Switch and disconnect the Power
Cord.
1. Remove the HCF Paper Tray Assembly (REP 2.7.
5).
2. Remove the HCF Rear Cover (PL 1
5.10).
3. Disconnect P/J 841 from the HCF Control PWB (PL 15.16).
4.
Remove the 2 screws on the right side and 1 from the front of the HCF.
5. Remove the HCF Feeder Assembly (Figure 1
).
Figure 1 Removing the HCF Feeder Assembly
Replacement
NOTE: Ensure that the Clutch and Locator Tab are engaged.
NOTE: Do not over tension the Feed Head Drive Belt. T
he tension produced by the spring is
sufficient.
1. Reverse the above procedures to replace the HCF
Feeder Assembly.
2. Set the belt tension by loosening the four screws securing the Feed Motor and bias the
motor down t
o the bottom of the slots and tighten the four screws.
3. Loosen the screw securing the tensioning bracket and allow it to pivot into the drive belt.
Tight
en the screw.
1. Disconnect
P/J-842
2. Remove the Screws (4)
3. Remove the Feed Motor
1. Remove the Feed Belt
2. Remove the Feeder Assembly

 Loading...


