EasyManuals Logo
Home>Xerox>All in One Printer>DocuColor 12/DCCS50

Xerox DocuColor 12/DCCS50 User Manual

Xerox DocuColor 12/DCCS50
1617 pages
To Next Page IconTo Next Page
To Previous Page IconTo Previous Page
Page #339 background imageLoading...
Page #339 background image
1/05
4-15
DocuColor 12/DCCS50
REP 1.6.3
Repairs and Adjustments
Reissue
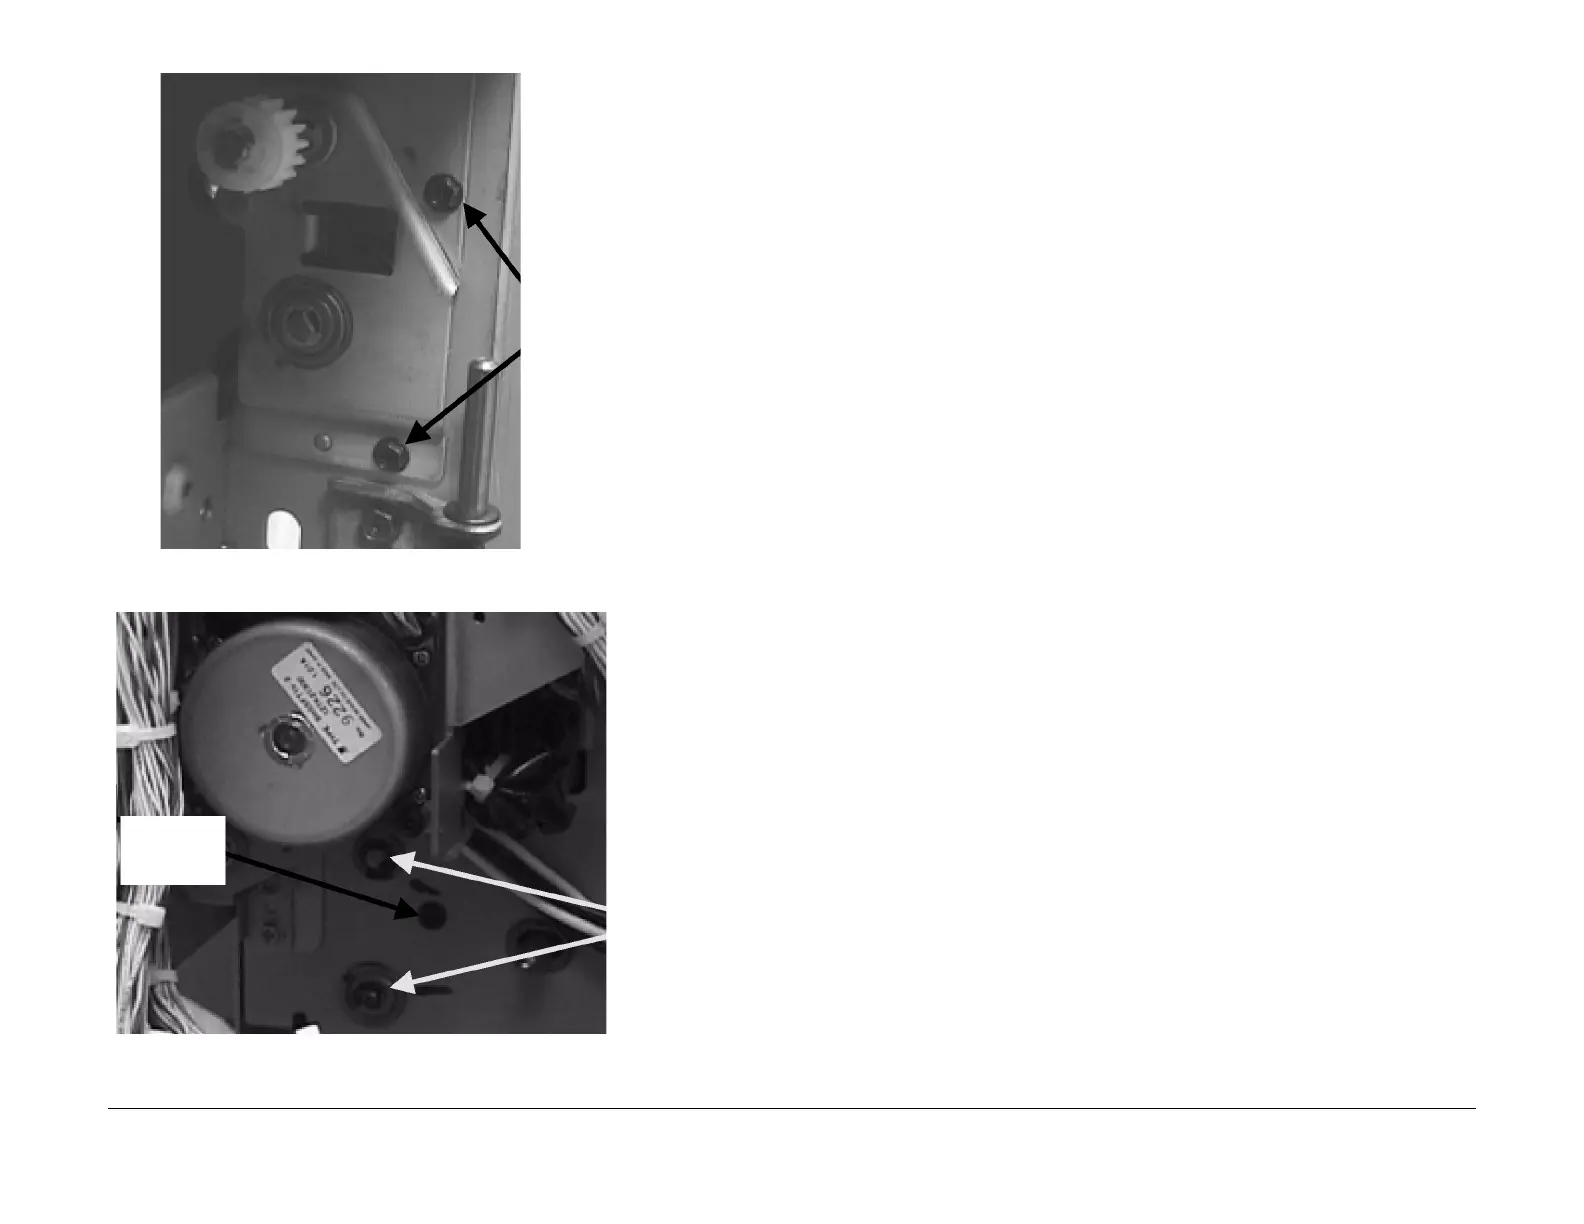
Figure 4 Removing the Exit/Fuser Nip Drive Assembly - Inside of Machine
Figure 5 Removing the Nip Clutch - Rear Frame of Machine
Installation
NOTE: Ensure that the Exit/Fuser Nip Drive Assembly is seated correctly. If assembly is not in
the correct position, the K-clips cannot be installed.
1. Reinstall the parts in the reverse order of disassembly.
1
Remove screws (2)
from bracket (inside of
machine)
1
Remove
Screw
2
Remove K-clips (2)
3
Unplug Clutch,
release harness
clamps (2)

Table of Contents

Questions and Answers:

Question and Answer IconNeed help?

Do you have a question about the Xerox DocuColor 12/DCCS50 and is the answer not in the manual?

Xerox DocuColor 12/DCCS50 Specifications

General IconGeneral
BrandXerox
ModelDocuColor 12/DCCS50
CategoryAll in One Printer
LanguageEnglish

Related product manuals